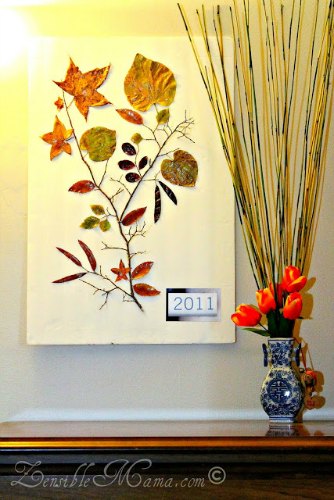
This time of year there are plenty of beautiful leaves around to inspire craft and art projects for you and/or for your kids. Maricris of Zensible Mama is sharing with us a fun fall leaf art project that could be fun for adults or kids and will look great on your wall to bring the season inside as home decor. Before that last leaf fall, try your hand at this attractive, 3D Leaf Wall Art project.
Fall Leaf Art Project Tutorial
DIY Fall Leaf Art Project Materials:
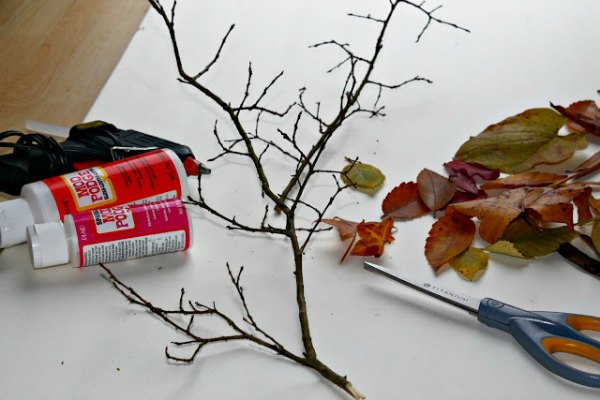
- semi-dry leaves
- tree twigs
- Mod Podge
- glitter glue
- glue gun
- glue stick
- scissors
- foam board of your color choice (or canvas or poster board)
How To Make A DIY Fall Decor Leaf Art Project For Your Wall:
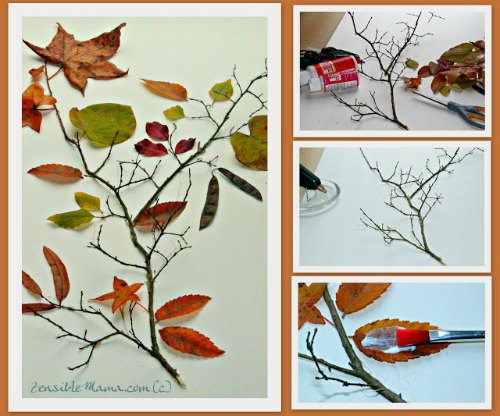
1- Arrange your materials according to your desired design. Re-arrange until you get your final look.
2- Cut twigs off that are in the way of you being able to glue your twig down flat onto your foam board.
3- Use the glue gun to glue down the tree branch and leaves. Cut off unwanted stems.
4- Seal each leaf with the regular mod podge glue. You can use a watercolor brush to apply the glue. The sealer will preserve the leaves and will make it lasts longer.
5- After you’re done with the leaves, continue to brush the mod podge on with the entire branch.
6- Add a little oomph to your leaves by applying mod podge glitter.
7- Let your project dry. Normally it takes 15- 20 mins but it depends on how thick you applied your sealer.
8- You can stencil the date on the side or a fun saying if you like.
9- Once dry, you can hang your homemade leaf wall art wherever you like!
I hope you enjoy this DIY fall decor. Do you think you will try this fun leaf art project? Do you have any other favorite fall leaf arts or crafts?
Related Posts: