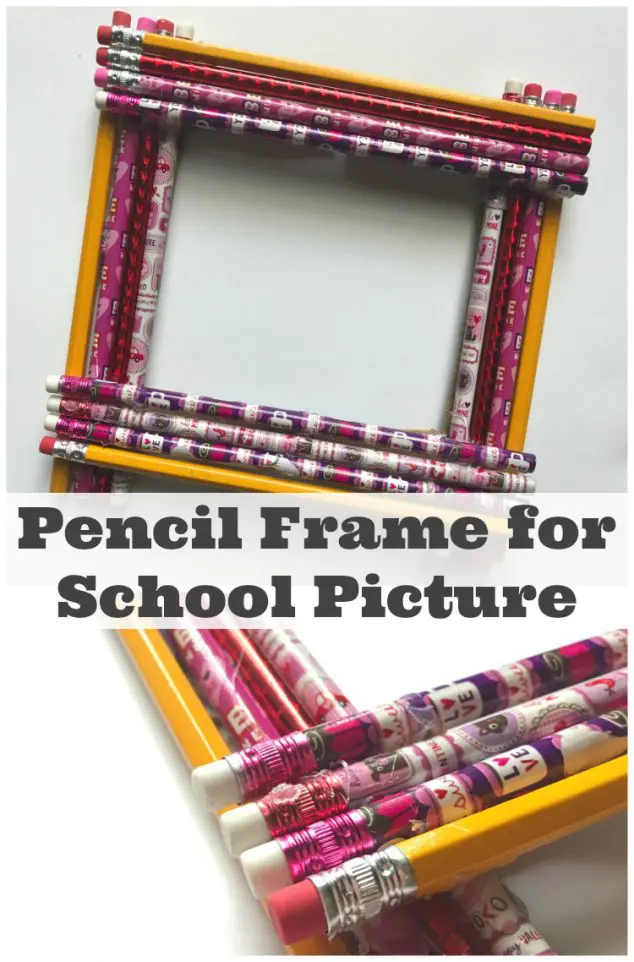
Can you believe that school is right around the corner? I’m excited and a little bummed at the same time! Summer is so much fun but with school comes more structured days which I am very ready for. We love taking school pictures on the first day! It’s fun to see kids so excited and wearing their new back to school clothes. Do you moms take first day of school pictures too? You may want to try first day of school printable signs as fun photo props for your kids to hold. This pencil DIY photo frame would be the perfect frame to display those first day of school and back to school pictures!
Homemade Photo Frame With Pencils For Back To School Pictures
Making your own photo frame allows you to create a personalized and unique piece that perfectly matches your style and home decor. It’s a fun, creative project that can also be budget-friendly compared to buying pre-made frames. Plus, it gives you the satisfaction of crafting something special with your own hands, and it’s a great way to repurpose materials you already have.
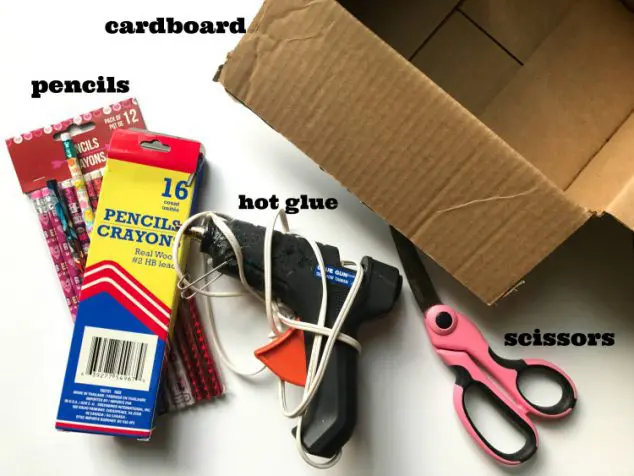
Pencil Photo Frame Craft Supplies:
- pencils
- scissors
- cardboard
- hot glue
You only need a few simple materials that you probably already have on hand. That’s my favorite kind of craft. Basic supplies and easy directions to follow.
How To Make Back To School Photo Frame:
Start by plugging in your glue gun so that it can be warming up. If you have a young child helping you make this, make sure to keep them away from the hot glue! Refresh older children on safety around the hot glue gun.
Grab your scissors and your cardboard. I just used a cardboard box. You could even use a shoe box top if you have one. I didn’t want to have to break my pencils so I cut a square out that was about the length and width of the pencils I was going to use.
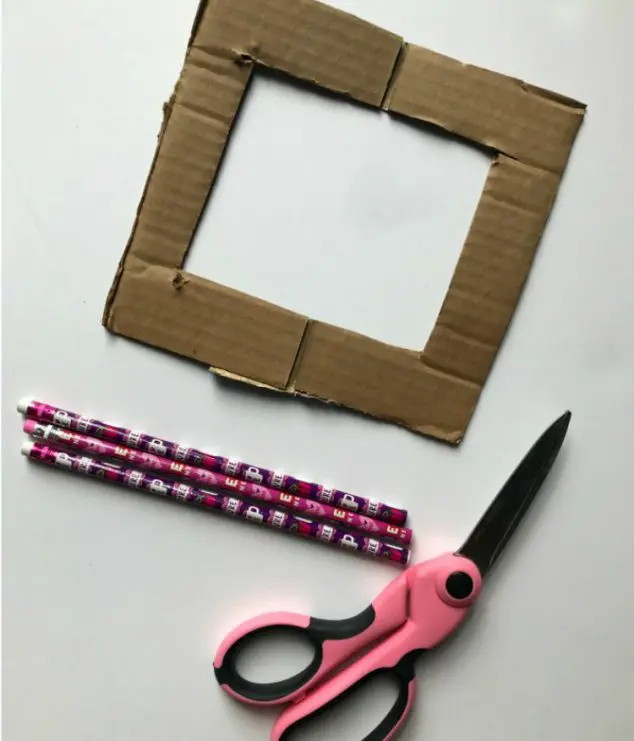
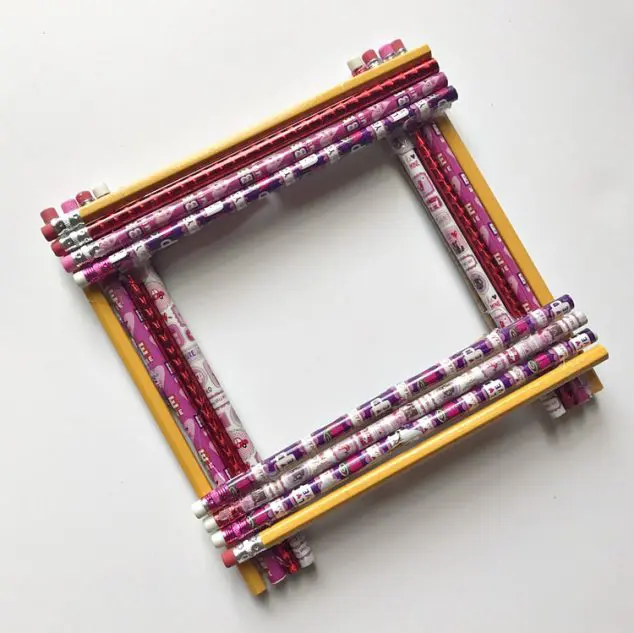
After cutting out the square, I used my photo to trace it’s size in the center. Then, you can cut out the middle where the picture will be placed. I left enough room around the edges for 4 pencils to be placed on each side. Time for the hot glue! Once you have your frame cut out, add a little glue to the cardboard and lay your 4 pencils down side by side. Do this to the opposite side of the frame. Now for the other 2 sides, your pencils will lay across/on top of the pencils that you have already glued on. Once you are done gluing your pencils down, you have a Pencil Frame!
This is a super easy way to make a back-to-school themed DIY photo frame. Very cute and a fun craft for the kids to make and give to grandparents.
Conclusion
Making a photo frame with pencils for back-to-school photos is a fun and creative way to celebrate the new school year. Not only does it add a personal touch to your child’s memories, but it also encourages creativity and hands-on crafting. The pencil frame can be customized with different colors or designs, making it a unique and meaningful keepsake. It’s an easy, budget-friendly project that brings both practical and sentimental value, making it the perfect addition to any back-to-school celebration.
Do you think your child would like this for their first day of school picture? I have made one of these DIY pencil frames for my daughter’s back to school pictures and now just need to make one for my son! Do you take first day of school photos? Don’t you think these made adorable decorations for your child’s room?
Related Posts:
Kelly Mahan says
What an adorable pencil frame! It’s simply the perfect craft to welcome back-to-school season. Thank you for sharing the tutorial with us!