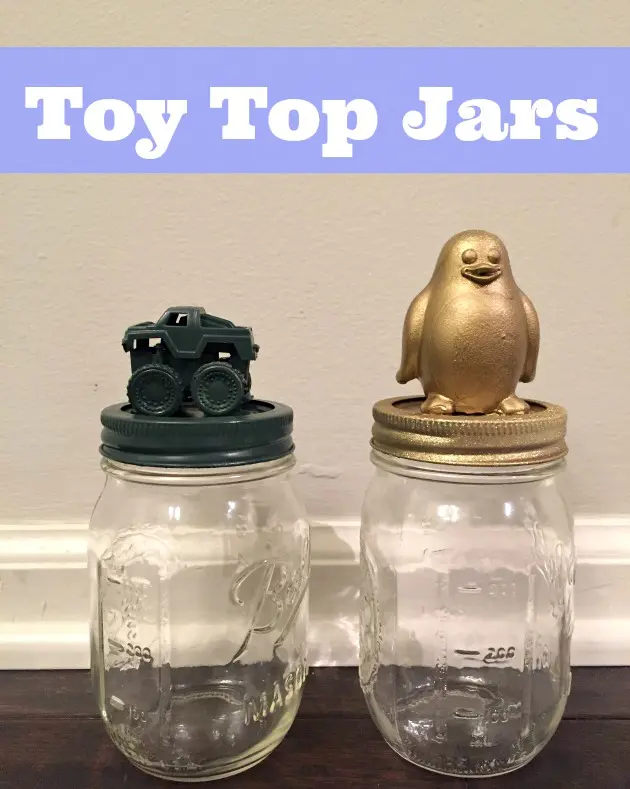
Mason jar décor is a charming and versatile way to add a rustic, vintage, or modern touch to any space. Looking for mason jar lids crafts? Toy Top Jars are a fun and easy way for your kids to jazz up storage containers for their small toys, rocks, legos, coins, hair bands, and more. The options for decorative mason jars are endless as well as the paint colors you can use. You probably already have most of the supplies required for this easy craft. If not, all of the items needed (except spray paint) can be found at the Dollar Store making this a very inexpensive activity! I hope you enjoy this easy mason jar decor tutorial for how to make cute toy lid mason jar decor toppers.
Toy Mason Jar Toppers Can Be Decorative And Improve Organization
You can actually use any type of glass jar for this upcycle project. However, mason jars are quite popular as they are timeless glass jars that many folks will already have on hand for canning and storage purposes. They can be transformed into stunning decorative pieces with a little creativity. With their affordability and endless customization options—such as painting and adding embellishments—Mason jars make for perfect DIY projects that blend functionality with style. Whether you’re decorating for a special occasion or simply enhancing your home’s aesthetic, Mason jar décor offers a beautiful and practical solution for any setting.
I decided to make Mason Jar Decor by embellishing my mason jar lids. In this way, glass jars can be made into cute decorative elements to match any decor. In addition, the mason jar lid embellishment, in this case the toy, can also be used to show what type of knick knacks or toys will be stored inside. For example, a toy dinosaur can indicate it is the perfect jar for housing a child’s small plastic dinosaur collection. This project is such a fun way to add to your home decor.
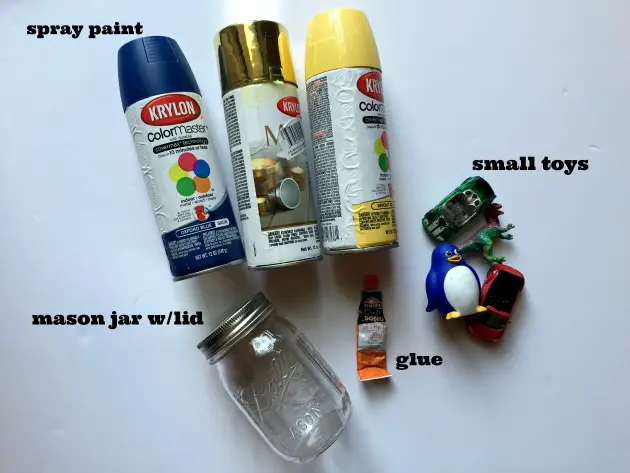
Craft Supplies Needed For Decorative Mason Jars With Toy Tops:
- Mason Jar with Lid and Ring
- Glue (we used hot glue but Super Glue would work as well)
- Small Toys
- Spray Paint
- newspaper (for protecting your working surface)
These toy jar toppers can be made all in one color for a monochromatic look. Or feel free to use colors you already have on hand. Or you may even want to go with rainbow colors which will look pretty lined up on a shelf. I used spray paint because I find it offers a nice smooth, easy coat.
For painting Mason jar lids, the best types of paint include:
- Acrylic Paint – Water-based and easy to apply, acrylic paint works well on Mason jar lids, especially when sealed with a clear topcoat for durability.
- Spray Paint – Ideal for a smooth and even finish, spray paint adheres well to metal lids and comes in a variety of colors and finishes, including matte, glossy, and metallic.
- Chalk Paint – Great for a rustic or distressed look, chalk paint provides excellent coverage and can be sealed with wax or a clear sealer for protection.
- Enamel Paint – More durable than acrylic, enamel paint is a good choice for lids that will be handled frequently or exposed to moisture.
To ensure the paint adheres well, lightly sand the lid before painting and use a primer if necessary. Sealing the paint with a clear spray or brush-on sealer (like Mod Podge) will help protect the finish.
Mason jars come in a variety of sizes, typically measured in ounces. Here are the most common sizes: 16 oz (Pint), 32 oz (Quart), and 64 oz (Half Gallon). The larger size can be harder to find but you can use my affiliate Amazon link. Mason jars are even available in wide mouth variety which are ideal for storing bulkier items.
How To Make Mason Jar Decoration Toy Jar Lids:
Gather your jar lids, glue, and toy toppers and head to the kitchen table (or other cleared work space). After the hot glue has warmed up, glue the lid of your mason jar to the mason jar ring. That just makes the mason jar lids and rings into a one-piece top which makes it easier for kids to handle and not lose the pieces.
After that has dried, glue your small toy to the center of the mason jar lid.
*We just found a few old small toys around the house to use for our toppers. If you don’t have extra small toys at home, a dollar store will have small characters on the toy aisle that would work great!
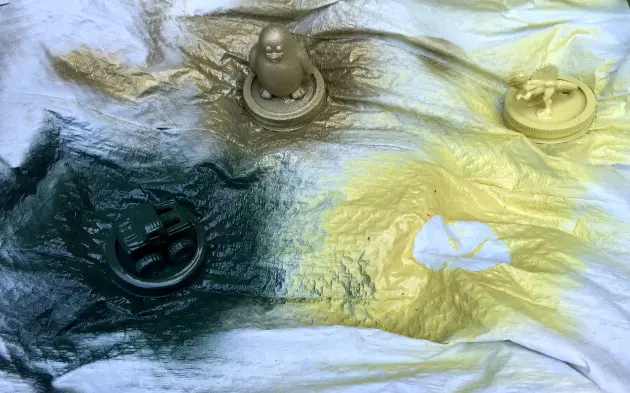
After all of the glue has dried, take your tops and paint outside. Prepare a protected work space by covering an area of your yard with old newspapers, trash bag or a tarp. Shake the spray paint can well. Hold the can about 8–12 inches away from the lids. Now, spray the lid, ring and toy with a nice even layer of paint. You might have to spray on 2 coats depending on the original color of your toy. Spray in light, even coats, moving side to side to prevent drips. Allow each coat to dry for about 15-30 minutes before applying the next one.
Once the final coat is dry, apply a clear spray sealer to protect the paint from chipping or scratching (optional). Let them dry completely. Allow the lids to cure for 24 hours before handling or screwing them onto jars. Now, your painted Mason jar lids are ready for use in décor and storage projects.
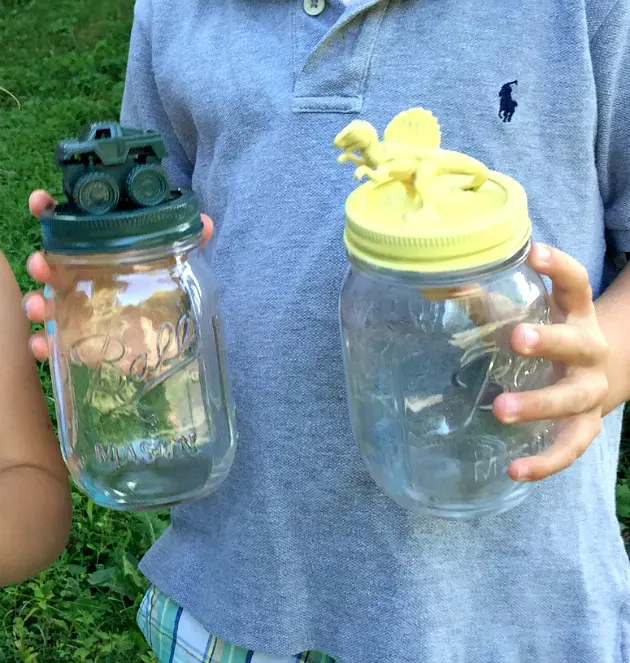
Once the top is cured, it is time for your children to find some treasure to store in their new Toy Top Jars!!
How To Use Mason Jars For Decorating
Mason jars are a versatile and budget-friendly way to add charm to any space. With a little creativity, they can be transformed into stunning and functional decorations for any occasion! Using this tutorial, you can customize mason jar lids and make them into adorable toy toppers that signify what should be stored in the mason jars- from army men to marbles. These look great lined up on wall shelves in your child’s bedroom or in toy room cubbies.
Safety Note:
Mason jars are relatively durable and hard to break compared to regular glass jars. They are made from tempered glass, which is thicker making them ideal for DIY projects. However, while they are tough, they are not shatterproof and can still break if dropped on a hard surface. Therefore, I recommend using these for older children and in rooms with carpets and not tiles.
Mason jars are an easy and stylish way to enhance any space with DIY décor. I hope you enjoyed this tutorial fro crafts with mason jar lids. Does your child love fun containers in which to store their small toys? Try out this toy mason jar topper activity soon! He/She will love getting to help make their own cool Toy Top Jars! These would also make excellent mason jar gifts. Share photos of your mason jar decor on social media @familyfocusblog and @roo615!
Related Posts:
Janet says
What creative ways to use a large mason jar! They came out so adorable!
Nettie says
I love how versatile Mason jars are for decorating! Whether it’s using them as centerpieces, lighting, or storage, they always add such a charming touch to any space. The spray-painting tip for lids is especially helpful—I never thought about sanding them first for better adhesion! Thanks for the inspiration and great ideas.
Sarah says
These cute mason jar decorations are such a perfect way plain jar into a focal point.
Vivian says
What a wonderful way to decorate jars and create customized storage in different colors. Fairy lights could be pretty around the base or cordless battery ones inside!
Pamela says
I love this cute craft for mason jar lids. These toy topped jars are so cute! Thanks for the DIY tutorial.