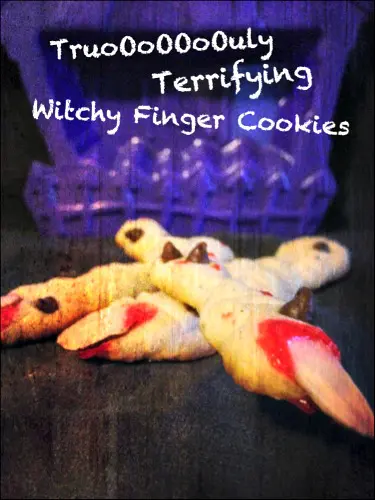
Jersey Farm Scribe here and I absolutely LOVE Halloween. There is something about a day we celebrate by trying to frighten ourselves that excites me and feeds into my playful mischievous side. So it’s fitting that less than a week before Halloween marks my début post for Family Focus Blog. I’m honored to be in the company of such creativity and professionalism and I hope you enjoy my Witch Finger Halloween Cookies recipe! Bring these Halloween cookies to any party and I guarantee you’ll get an eye-popping response from mini ghosts and grown-up goblins alike. But I warn you, depending on how they’re done, these can look truly terrifying. They can invoke quite the reaction from little ones and the blood may even be considered too “gory” for a school class party. What can I say? Proceed at your own risk! Printable recipe card at the bottom of the post.
Spooky Witch Finger Cookies Recipe
Making Witch Finger Cookies is a fun and festive way to celebrate Halloween! These spooky treats are shaped like creepy fingers with almond “nails” and red “blood” icing or jam, making them a hit at parties and with kids. They’re not only delicious—usually buttery shortbread or sugar cookies—but also spark creativity and laughter while baking. Plus, they’re a great hands-on activity for kids to help with, from shaping the dough to adding the eerie details. In short, Witch Finger Cookies combine Halloween fun, creativity, and tasty homemade goodness all in one spooky snack!
Halloween Cookies Ingredients:
- 1 1/2 cup sliced almonds (buy these in the baking section, not with the snacking nuts and you’ll save money!)
- 6 oz (3/4 of an 8oz package) cream cheese
- ½ cup butter (1 stick)
- ¾ cup powdered sugar
- ¼ cup regular white sugar
- 1 tsp almond extract (or vanilla is fine)
- 1 egg yolk
- ¼ tsp salt
- 2 cup flour
- Red cake decorating gel or icing
- Mini chocolate chips
Recipe Prep:
Preheat oven to 350 degrees F and line baking sheets with parchment paper. (Not 100 percent necessary, you can just spray with Pam or paint with oil, but I prefer parchment paper for cookies.)
How To Make Witch Finger Cookies:
Witch finger cookies are a fun and eerie Halloween treat that look like spooky witch fingers. Here’s a simple recipe to make these delicious and creepy cookies:
Step one: Almonds
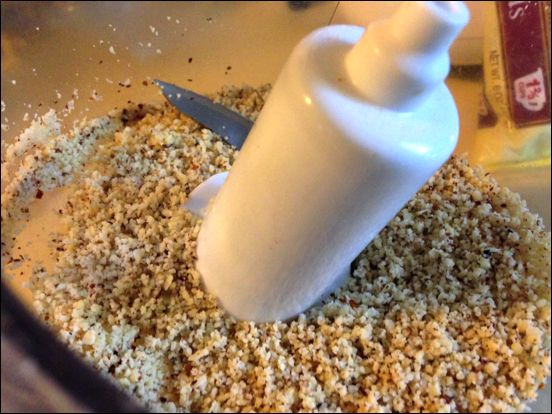
Pour the almonds out on counter and find 40 or so that would make good fingernails and put them aside. Put the rest in the food processor. Process. A lot. You can’t really over process here.
You’re looking for tiny, fine pieces.
Step two: Rest of ingredients
Take the cream cheese and butter and put in bowl, and break into pieces. IF IT’S A GLASS BOWL, but the whole thing in the microwave for about 40 seconds or so to soften. Mush up. Back in microwave for 15-20 seconds.
Toss in the rest of the ingredients (reserving about a half cup of flour). Don’t worry about the exact order. (Some folks GASP at my lack of order, or mixing in-between but as long as you hold off on a bit of flour, I think you’re covered.) Beat with a mixer.
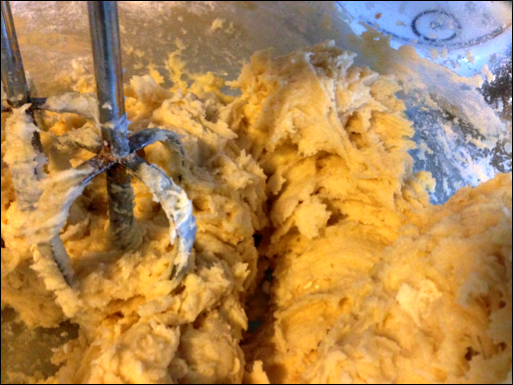
Then add the rest of the flour and mix it around with a fork. You’re looking for a dough you can roll between your hands and shape a bit, but is still be soft to the touch. If you need to, add up to another ¼ cup of flour or so.
Step three: Shaping
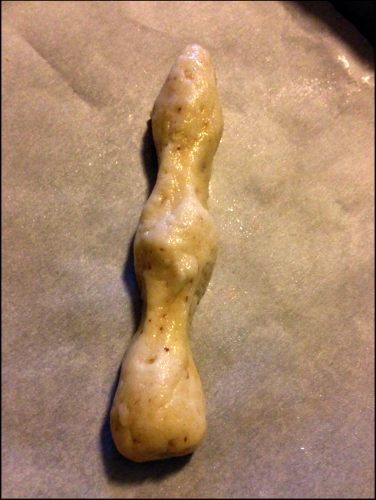
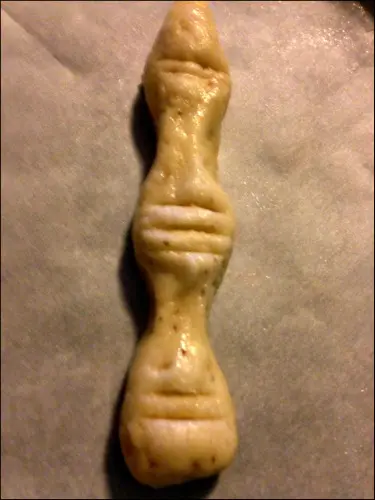
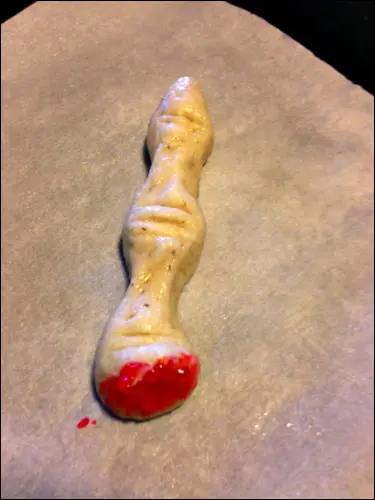
Roll the dough between your hands into little logs. It’ll be a soft dough, so be gentle. You can form them further on the parchment paper anyway. At first you just want a basic log. Use your fingers to make lumpy spots for knuckles and thin spots in-between. Use a sharp knife to make indents on the knuckles. Then put red decorating gel icing on the end. Don’t be neat! Blood is messy!
Step 4: Decorating
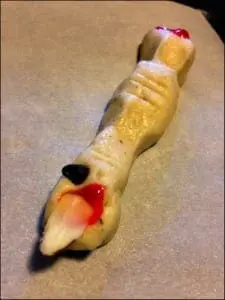
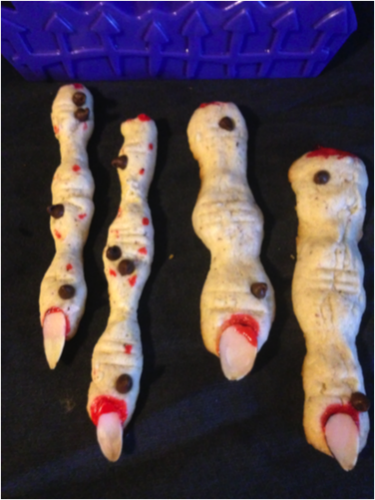
You can also drizzle a few spots of blood across the finger for more blood. Then put a big dollop on the very tip, and push an almond sliver fingernail into the dollop of icing. Don’t center it. Bloody fingers are rarely symmetrical. Just stick it on there and let the goo ooze out where it may! And you can stick a “wart” (mini chocolate chip) or two wherever you see fit.
Pop these in the 350 for 13-16 minutes or until you start to see them browning on the bottom. Time depends on size of the cookies. I think thinner fingers are scarier. My thin ones are only about the width of a pencil when they go in the oven. The dough is specially made so it won’t spread out TOO much, but they do get a bit bulkier as they cook.
This picture shows the difference between witch finger dough that was about the width of a finger when it went in the oven (right) versus dough the width of a pencil:
Both spooky and yummy, so don’t stress the size too much!
How To Make An Easy Halloween Sugar Cookies Version Of Witch Fingers
Looking for a CHEAT????!!!! Want to save time?
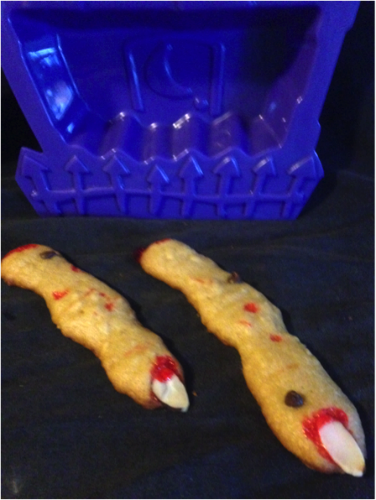
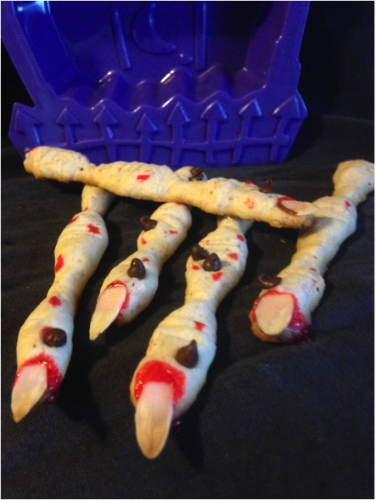
Just use sugar cookie dough. It will spread out more, will be a bit flat and won’t have quite the same coloring, but you can form ANY dough into scary fingers. And the kids will still think you’re a Halloween Hero!
I made the two above with regular cookie dough I had in the fridge. Not quite as realistic, but still a big hit with Halloween cookie eaters and Fright Fest go-ers alike!
No matter how you do them, these Halloween cookies are sure to shock your guests and showcase the ultimate Halloween experience to all your senses. They’ll bring fear to your eyes, shrieks of joy and terror to your ears all while delighting your taste buds.
Printable Halloween Cookies Recipe For Witch Fingers
Witch Finger Cookies- Truly Terrifying Treats For Halloween
Ingredients
- 1 1/2 cups sliced almonds
- 6 oz cream cheese, sliced into 6 pieces
- ½ cup butter, sliced into 8 pieces
- ¾ cup powdered sugar
- ¼ cup granulated sugar
- 1 tsp almond extract
- 1 egg yolk
- ¼ tsp salt
- 2 cups all purpose flour
- Red cake decorating gel
- 1/8 cup mini chocolate chips
Instructions
- Preheat oven to 350 degrees and line a cookie sheet with parchment paper.
- Pour the almonds out on counter and find 40 that will make good fingernails and put them aside. Put the rest in the food processor and grind until fine.
- In a large microwave safe bowl, add the cream cheese and butter. Put the whole thing in the microwave for about 40 seconds or so to soften. Mix gently and place back in microwave for another 15-20 seconds.
- Add the powered sugar, granulated sugar, extract, and egg yolk. Mix until blended. Add the flour and salt (reserving about a half cup of flour for later).
- Mix until blended.
- Add the rest of the flour and mix it until just blended. You’re looking for a dough you can roll between your hands and shape a bit, but is still be soft to the touch. If you need to, add up to another ¼ cup of flour to achieve this consistency.
- Roll the dough between your hands into little logs. Then, use your fingers to make lumpy spots for knuckles and thin spots in-between. Place on parchment paper.
- Use a sharp knife to make indents on the knuckles.
- Put red gel icing on the end of fingers where they would be attached to a hand.
- Then put a big dollop of red gel on the finger tip and push an almond sliver fingernail into the dollop of gel.
- Finally, you can stick a “wart” (mini chocolate chip) or two or three wherever you see fit.
- Pop the tray in the 350 preheated over for 13-16 minutes or until you start to see them browning.
- Remove from oven and allow to cool.
- Serve and enjoy!
Nutrition Facts
Witch Finger Cookies- Truly Terrifying Treats For Halloween
Serves: 20
|
Amount Per Serving: 2 cookies
|
||
|---|---|---|
| Calories | 192.21 kcal | |
| % Daily Value* | ||
| Total Fat 11.59 g | 16.9% | |
| Saturated Fat 5.1 g | 25% | |
| Trans Fat 0.19 g | ||
| Cholesterol 29.07 mg | 9.7% | |
| Sodium 62.46 mg | 2.6% | |
| Total Carbohydrate 19.37 g | 6.3% | |
| Dietary Fiber 1.24 g | 4% | |
| Sugars 8.41 g | ||
| Protein 3.48 g | ||
| Vitamin A 8.06 % | Vitamin C 0.01 % | |
| Calcium 3.27 % | Iron 5.05 % | |
* Percent Daily Values are based on a 2,000 calorie diet. Your daily values may be higher or lower depending on your calorie needs.
Family Focus Blog
Conclusion
These spooky and delicious Witch Finger Cookies are the perfect Halloween treat—fun to make, delightfully creepy to look at, and buttery good to eat. Whether you’re baking them for a party or just for some festive family fun, they’re sure to be a hit with both kids and adults. If you enjoy this recipe, please give us 5 stars and share it with your friends so everyone can enjoy a frightfully fun treat this Halloween!
Do you think you will make these Halloween cookies? Enjoy serving these witch finger cookies at your Halloween party or as a spooky treat for family and friends! Will be able to eat the witch fingers cookies? LOL. I’d love to hear your tips and tricks for the wonderful world of werewolves, monsters and other creatures of the night. Reach out on social media @familyfocusblog
Related Post:


Jen says
Love these halloween witch finger cookies! I actually made something very similar, but I think yours have turned out more realistic and frightening. I bet the kids could have some fun with them!
Carina says
Spooky and fun! Witch finger cookies are the perfect Halloween treat—creepy to look at but absolutely delicious to eat. A creative way to add frightful flair to any party!
Design Concepts says
These Witch Finger Cookies are scary… and delicious! Can’t wait to make them again this Halloween.
Maggie says
These Witch Finger Cookies look so spooky and fun—perfect for a Halloween party! I love how creative this recipe is, and the almond “nails” make them look extra realistic. I can’t wait to try making them with my kids. If we enjoy the recipe, we’ll definitely give it 5 stars!
shrea kuile says
It is an excellent article on the healthy food item, Witch Finger Cookies. Thanks for publishing the useful blog. You clearly mentioned the ingredients and instructions, which will help to prepare it at home easily. Children will like these delicious and fun cookies. I like your blog and also prefer organic products.
Sophia says
These Witch Finger Cookies are absolutely spooky and delicious! I love how detailed the recipe is — especially the idea of using almond slivers for nails and red gel for “blood.” Such a fun and creepy treat for Halloween parties!