Looking for unique and creative DIY autumn wreath ideas to spruce up your front porch? Look no further! Here is an easy step-by-step autumn wreath tutorial. A wreath for your front door can go a long way towards embracing the fall season in a cheerful welcoming way. A simple grapevine wreath is used as the basis for this DIY Autumn wreath. We just add some fun fall foliage, flowers, and berries and then it is ready to hang for September. In October you can give your classic autumn wreath the spirit of a Halloween wreath by adding spooky detachable letters! Unleash your creativity with our comprehensive guide to making the perfect DIY fall wreath.
This post was originally published September 28, 2014. I have updated it republished it here to make this DIY fall wreaths tutorial easier to my new readers to find.
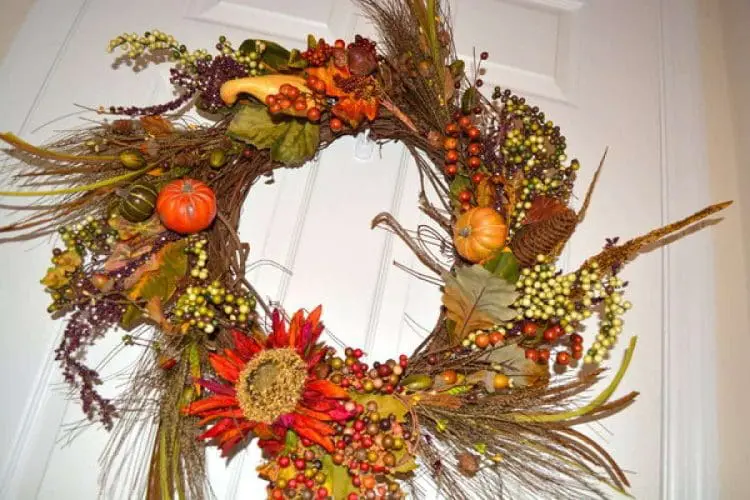
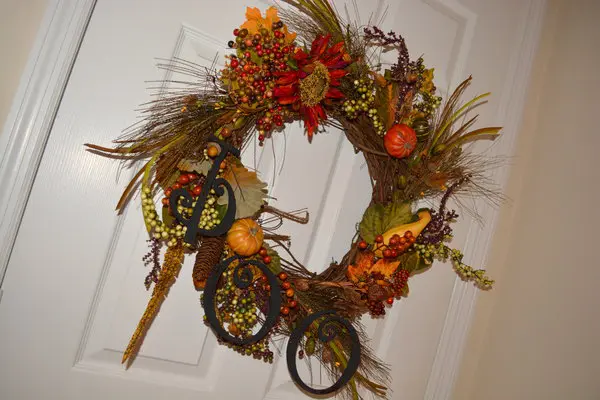
Seasonal wreaths are a great way to level up your home decor. Discover an easy hack that will have you crafting a stunning autumn wreath in no time. You can use a grapevine wreath from the Dollar Tree and embellish it with mini pumpkins and other fall decorations to make it a beautiful wreath. This step-by-step guide will show you how to use simple materials to create a unique and eye-catching wreath for the fall season. Grapevines make a great natural materials base because they are extremely long lasting. This means you can use this wreath over and over again just like artificial wreaths. I also chose faux embellishments that capture the autumn season to ensure the longevity of this pretty autumn wreath.
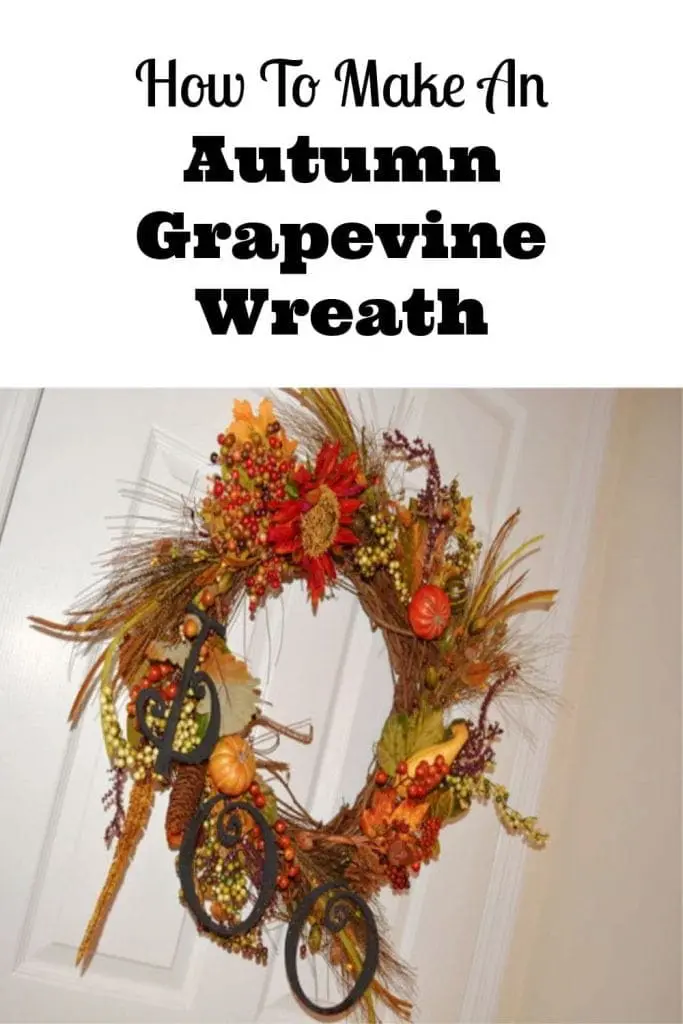
DIY Fall Wreath Tutorial
Did you know that a wreath is actually Fall’s Most Popular Decoration? It is so much fun to create a beautiful wreath that will impress your guests and add warmth to your home. Whether you’re a beginner or a seasoned crafter, this wreath tutorial will help you master the art of DIY wreath-making and create a masterpiece for your front door.
DIY Autumn Wreath Craft Supplies:
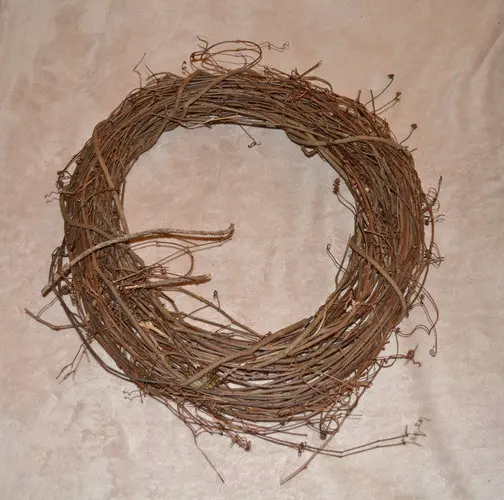
- Grape vine wreath
- Different faux autumn themed flowers, pine cones, berries, and fall leaves (such as maple leaves and oak leaves)
- Glue gun optional
- Wood letters (or other Halloween decorations) optional
- Paint optional
- Glitter optional
- Hooks optional
The grapevine wreath form provides the base for the wreath decorations. Some popular fall wreath decorations include: Artificial Leaves – Maple, oak, or other fall foliage; Mini Pumpkins or Gourds – Faux or dried; Acorns – Real or artificial; Berries – Faux cranberries or orange berries; Dried Flowers – Sunflowers, mums, or wheat stalks. Autumn garland can also be repurposed be wrapping the autumnal foliage around the grapevine base.
Fall Wreath Instructions: How To Make An Autumn Wreath Using A Grapevine Base
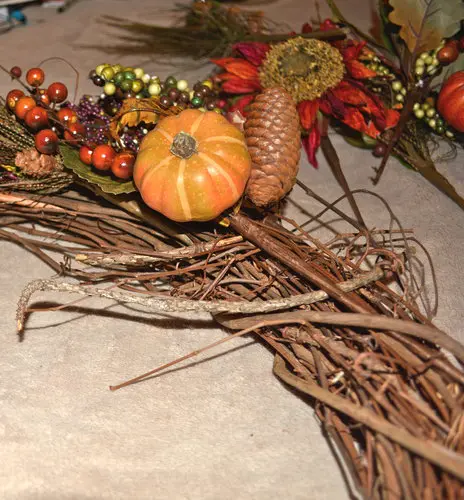
- First, lay out the autumnal foliage on top of the grapevine wreath to get a good idea of what your wreath will look like. Chose different sized and different looking fall leaves, flowers, and berries. This will add more dimension and make the wreath look more interesting. Feel free to use artificial flowers and props as you don’t have to worry about them wilting. The foliage should be laid out symmetrically but gather to a fuller point at the bottom of the wreath.
- The stems of faux flowers and artificial berries will need to be tucked into the wreath or wrapped around it. If you want to make it permanently attached, coat the points in glue using a hot glue gun. This step is optional but it is a better way to secure them.
3. Continue around the entire wreath until you are satisfied with the coverage and it is all secured. See how easy this grapevine wreath hack makes this process? At this point you could and hang your harvest wreath door decoration using a wreath hanger or proceed to add a touch of less permanent Halloween fun.

Autumn wreaths are typical decor between September and November. If you want to add some detachable Halloween decorations to your wreath for the month of October then continue on!
4. Take your wooden letters and paint them black. I used B-O-O as my wooden letters. (Acrylic paint works well and is easy to use. Do this over some scrap paper.)
5. Before the paint dries, sprinkle some orange/gold glitter light on top so the black still shows through.
6. Once everything is dry, glue your hooks on the back of the letters and hook them onto your wreath! Tip: paper clips make great hooks!
7. Display your classic fall wreath with touch of elegance and enjoy the sense of warmth it add to your home this fall.
Autumn Wreaths For Front Door Conclusion
An artificial fall wreath is a beautiful way to celebrate the season and add a touch of elegance to your home. With rich oak leaves, vibrant artificial berries, and soft eucalyptus leaves, this charming door decoration creates a warm and inviting atmosphere that captures the essence of autumn. Whether you prefer a rustic look or something more refined, a thoughtfully crafted wreath will welcome guests with seasonal beauty all season long.
Say goodbye to store-bought wreaths and unleash your inner artist this fall. I hope this front door wreath design has inspired you to create your own masterpiece. Have you ever made and decorated your own wreath? Would you make this DIY autumn wreath? Do you think you will add the detachable letters for Halloween? If you do, please share your creations with us @familyfocusblog!
Related Posts:
Rope Wreath Tutorial- Easy To Customize For Holidays
How To Make Essential Oil Room Spray: Delightful Autumn Air DIY Home Fragrance
Nicole B says
I love making wreaths! Your fall one is so pretty and will transition right into the Thanksgiving season perfectly.
Beauty says
Your door craft project is absolutely amazing! The attention to detail and creativity you’ve put into this fall wreath are truly impressive. Thank you for sharing your talent with us. Your autumn wreath is a true inspiration.
Suara says
Nice grape vine wreath hack and very detailed instructions. Perfect fall front door decor!
Hampton says
This door wreath looks like such a nice decoration for autumn. Thanks for sharing how to make a simple wreat. I personally I love the idea of a white pumpkin wreath with fresh eucalyptus as my greenery.
Alan says
I love how a seasonal wreath can instantly make a home feel warm and welcoming. The mix of natural elements and rich autumn colors creates such a cozy and festive touch. Such a great way to celebrate the beauty of fall!
fahad says
What a delightful Autumn Wreath Craft Project Tutorial! Fall is my favorite season, and I’ve been looking for creative ways to spruce up my home decor. Your step-by-step instructions and the beautiful images make it seem so achievable. Can’t wait to give this a try and add a touch of autumn charm to my doorstep.