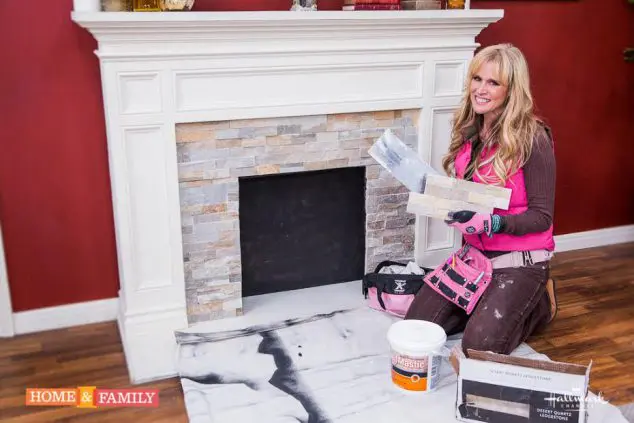
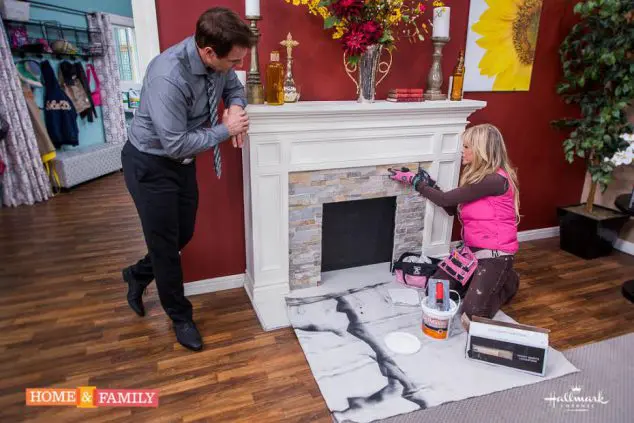
Do you love home makeovers? I do! I love seeing how something can be given a new, fresh look with minimum time and money. That is why this DIY fireplace makeover that was featured on Home & Family on the Hallmark Channel, caught my eye. The Home & Family show has all kinds of interesting stuff and airs weekdays at 10 am on the Hallmark Channel. I was given permission to share this DIY project from Paige Hemmis here with you. Do you want a faux rock fireplace? She explains how you can easily give your fireplace a new look by covering the old surface with a stone tile for a rock facing appearance.
Fireplace Makeover Tutorial on How To Install Stone Tile On Your Fireplace
Fireplace Makeover On A Budget
You just need a small area (but can cover a large area) to make a big difference to your old, worn-out fireplace. This is a great way to update your fireplace for just a little bit of money, but a lot bang for your buck. Home improvement stores and rock quarries now sell rock facing that is relatively easy to assemble on any surface (tile, drywall, wood, and even rock).
Fireplace Makeover Materials List:
- Rock Facing (a stacked stone tile works well)
- Mastic (Adhesive)
- Trowel
- Sponge
- Bucket
- Rubber gloves
- Tile cutter
- Drop cloth (old sheet will do!)
- Angle iron (I used drywall corners)Details on materials below.
Rock Fireplace Makeover Materials Shopping Tips:
For this DIY fireplace makeover, you will need to begin by measuring the area you would like to cover.
Purchase rock facing based on measurements. (The material used in these photos is called Desert Quartz Ledgestone Natural Stone Indoor/Outdoor Wall Tile (Common: 6-in x 12-in; Actual: 6-in x 11.87-in). When using tile or rock re-facing, it is recommended to purchase at least 10% overage due to the uneven nature and cuts that are needed to make to blend the pieces together.
Purchase mastic that is recommended for the rock facing product. The product you purchase will usually recommend the proper mastic (or adhesive) that will work best with the material. I used a product called TEC 1-gallon trowel tile adhesive. It will tell you how much square footage that it will cover, so based on your measurements, you will be able to know how much you need to buy.
Purchase a trowel that will be recommended on the mastic. The mastic we used recommended a 3/16” trowel for the application.
Purchase a small angle-iron of some sort. I used a drywall corner. It’s not as strong as steel, but in smaller applications, it will work. This is to hold the pieces in place over the middle section of the fireplace.
How do you install stone tile around a fireplace? Faux Rock Fireplace step by step instructions:
Since this is not an actual rock installation, you do not need to prep the area at all. If you were using real rock with a very heavy weight (that requires a heavy cement, a lot of drying time, and guards to hold the rock in place while it dries), you would need to take different precautions. A rock re-facing is lightweight and will hold over any surface. I’ve used rock facing over ceramic tile, painted drywall, unpainted drywall, cement backer board, etc. So far, it’s held up. If you currently have brick, it will take some extra prep, before you get started.
Cut Rock Facing To Size
To begin your DIY fireplace makeover, measure the area and cut your pieces of stone to size. Because you will want the rock to look un-uniform, you want to change up the pattern as much as possible to make it look more like real rock.
Apply Mastic
Use the mastic by scooping it out of the container with a trowel onto the back of each piece. At first you sort of glob it on, then use your trowel to bring it to a nice, workable amount on the back. The teeth of the trowel will create lines on the back of the tile. This allows the adhesive to stick properly.
Start at the bottom of one side of the fireplace. Place the tile onto the surface and sort of squish it on by wiggling it until you feel it really grab on. Apply the bottom piece to the other side of the fireplace.
Clean up any mastic with the sponge that may have squeezed out or fallen on the floor.
Repeat these steps as you move up the wall.
Attach Angle Iron
When you reach the point that suspends over the opening of the fireplace, it’s best to take an angle-iron and attach it to the wall to hold the suspended rock tiles in place. Cut the iron to size and attach it to the wall with screws. You will then cover it up with rock so it disappears.
Keep repeating the steps, now going all the way across the length (or width) of your fireplace. Keep cutting pieces to size with the tile cutter. Even though you get dirtier, I suggest a wet/dry tile cutter. When you use a wet tile cutter, you have a stream of water which cools the blade and washes away the dust. According to the experts, water is distributed on the saw blade to lessen the effects of heat and friction.
Because this effect is to mimic a real rock fireplace, no grout is needed. If you feel there are missing gaps, you can add some of the mastic, but you shouldn’t need to do that.
Note: if you do need to use grout (a tile installation for example), you would need to let the stone/tile rest 24 hours to set up before you apply the grout. This method does not use grout, so once you are done placing the pieces, you are done! It’s still advisable to let the adhesive work it’s magic for 24 hours to make sure it’s set in stone, so to speak.
Conclusion
Rock facing is a decorative technique that involves applying thin slices of natural or manufactured stone to a surface, giving the appearance of a full stone wall without the weight or cost. Adding rock facing to your fireplace is a simple and rewarding DIY project that can transform your living space with rustic charm or modern elegance. With the right tools, a bit of planning, and adhesive or mortar, you can easily attach stone veneer panels directly to your existing fireplace surround. You are sure to enjoy a beautiful, custom upgrade that adds warmth and character to your home.
If you like her work, follow lifestyle design expert Paige Hemmis on Twitter @paigehemmis and check out her site www.paigehemmis.com. I hope you enjoyed this DIY fireplace makeover. Do you plan to add faux rock facing to your fireplace?
You may also like to read my DIY project for updating old bonze fireplace doors.
Related Posts:


Uplifting Families says
This diy rock fireplace is a cool idea. We have a brick fireplace in our house. 🙂
Lauryn says
I seriously love this fireplace makeover diy! The living room is one room that we are planning on redoing in the next year. I am definitely keeping fireplace refacing in mind!!