This past weekend I joined my sister and a few of our old girlfriends for a fun girls night! The one thing we said we must do together was some fun DIY crafts. It is such a great way to do something memorable and fun and even have some cool decor to show for it. We chose this fun DIY painted mason jars as our girls day craft project. I will share a tutorial for how to paint mason jars with you here.
Painted Mason Jar Craft Tutorial
Before we got started, we had to prepare the house for “all things crafts”! My sister had her husband go golfing for the day with his buddies. Our friend Gina brought some disposable table cloths to cover our work area. Then we were ready to dive in. We began with these DIY painted mason jars. My plan was to make these mason jars for my daughter’s bedroom and display them with faux flowers. These painted mason jars should only be used for decorative purposes only. You obviously do NOT want any food or drink to come into contact with the paint or glitter.
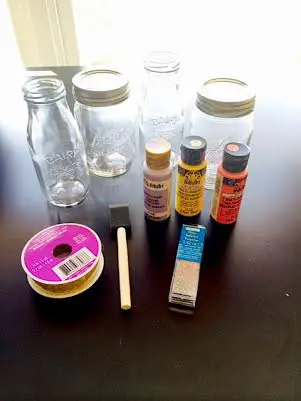
To begin this craft for how to paint a mason jar, here are the basic supplies you will need.
Craft Supplies For Painting Mason Jars:
- Mason Jars (or other fun glass jars you wish to reuse)
- Glass Acrylic Paint in variety of colors (here is my affiliate link to a cool glass paint set on Amazon or you can get them at your local craft store)
- Paint brushes and or a foam paint brush
- Small grain glitter
- Decorative ribbon (optional)
- Painters tape (thin)
- Mod Podge
If you are reusing old jars such as pickle jars, you may need to soak them first in hot soapy water to remove the labels. Rubbing alcohol is also useful to getting off any sticky patches of glue.
A note on the type of paint:
You may select from many kinds of paint such as acrylic craft paint, chalk paint, or glass paint. Acrylic paint is more budget-friendly and comes in a wide range of colors, but glass paint is specially formulated for glass surfaces and may offer better durability.
How To Paint Mason Jars:
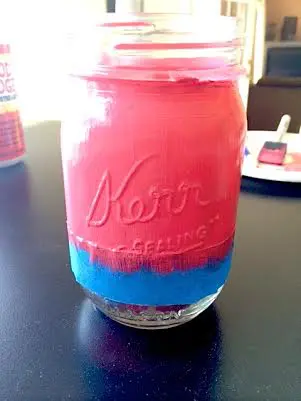
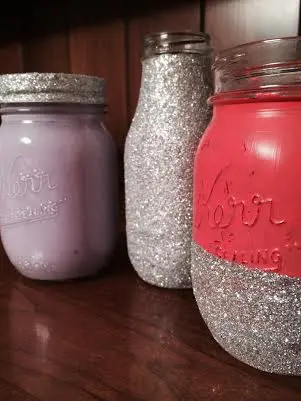
To start, I taped off where I wanted the paint and where I wanted the glitter. Feel free to place the tape wherever you like. I chose to have about ⅓ of the jar in glitter. Once you are done tapping, begin to paint the top section! Have an extra regular hair paintbrush handy to smooth out some of the lines the sponge brush may create. After the first coat on the outside of the jar, I painted part of the inside of the jar as well. This helped make the color coat look more opaque. By part of the jar I mean paint as far down to the tapeline you can see. This does not have to be perfect. After the glitter is applied you will have a more defined line to go off of.
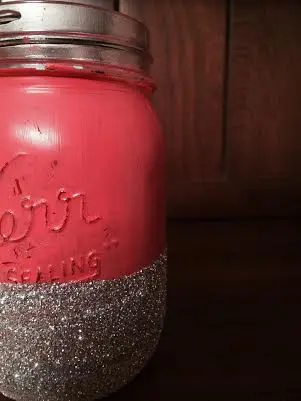
After painting 2 coats of paint on the outside I grabbed the Mod Podge! With the tape still in place I painted a hefty coat of Mod Podge all around the bottom and base of the jar. The fun part began! Put the glitter in a small bowl or Tupperware container. I grabbed a spoon and spooned some glitter and poured it over the Mod Podge. Be careful to not get it on the painted area because it may still be wet!!
Once you are done with the glitter take a peek at how it looks in direct light. You may want to touch up a few spots. You will notice the glitter line will come in handy here!
Then carefully rip the tape off. You will have a colorless section of the jar on the outside but a semi painted jar from the inside. I chose to continue the glitter up to the paint line on the outside. Alternatively, you could choose to Mod Podge a ribbon over that area or continue to bring the paint down.
Next, let everything dry for a few hours. It is best to allow the jars to cure for at least 24 hours before using them. This will help ensure that the paint fully adheres to the glass surface.
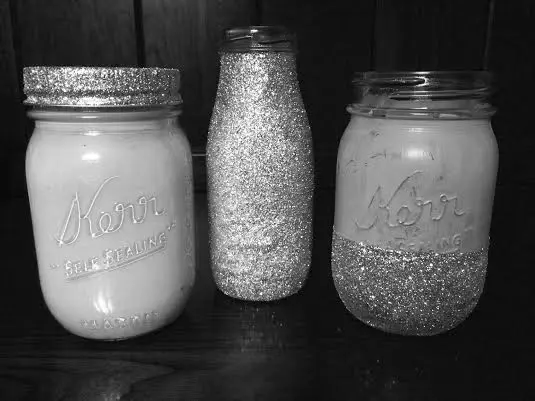
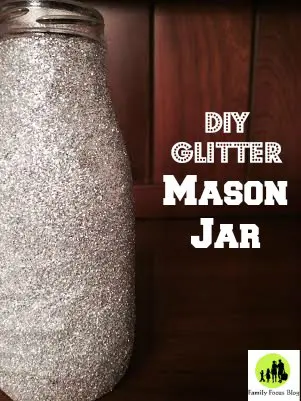
While that was drying, I painted 2 more of my glass jars. For this one I chose to 100% glitter it! This one is probably my favorite! I was inspired by jars that I originally found on Etsy.
More Mason Jar Painting Ideas:
Painting mason jars can be a fun and creative way to add a personal touch to your home decor or create unique gifts. Here are some ideas:
- Floral Designs: Paint mason jars with flowers or vines for a rustic, garden-inspired look.
- Ombré Effect: Use different shades of the same color to create a beautiful ombré effect on the jars.
- Holiday Themes: Paint jars to match different holidays, such as snowflakes for winter, flowers for spring, or pumpkins for fall.
- Animal Silhouettes: Paint simple animal silhouettes, such as birds or deer, for a charming design.
- Chalkboard Paint: Use chalkboard paint on the jars so you can write and erase messages or labels as needed.
- Stripes or Polka Dots: Paint jars with stripes or polka dots for a playful and colorful look.
- Beach or Nautical Themes: Paint jars with seashells, anchors, or fish for a coastal-inspired design.
- Mason Jar Lanterns: Paint the outside of the jars with a translucent paint to create beautiful lanterns when lit from within.
- Abstract Art: Get creative with abstract designs, splatter paint, or geometric patterns for a modern look.
- Personalized Messages: Paint jars with initials, names, or meaningful quotes for a personalized touch.
You could also try a clear coat for tinted mason jars. Remember to use glass paint or acrylic paint suitable for glass surfaces, and consider adding a protective coat of varnish or sealer once the paint is dry to ensure durability.
Conclusion
Here are the all the final products from our craft day with mason jars.
Painting mason jars is a fun and easy way to add a personal touch to your home decor. I hope you enjoyed my simple guide to painting mason jars and that you have fun making your own DIY painted mason jars. It is really a good time and they make great decorations. You can display your painted mason jars as-is or use them for storing items, holding candles, or as vases for flowers. Do you enjoy DIY projects? Will you make a painted glass jar? Do you think you will try glitter mason jars too?
Guest post by Arianna who is a full-time mom and a fashion-lover, world traveler, animal lover, and family woman extraordinaire. She loves to cook and bake, travel to new places, share great fashion finds, and spend time doing crafts and projects at home with her kids. She’s got a crazy busy life, but she wouldn’t have it any other way! Follow her blog at http://ariannaknowsbest.blogspot.com/
Related Posts:

