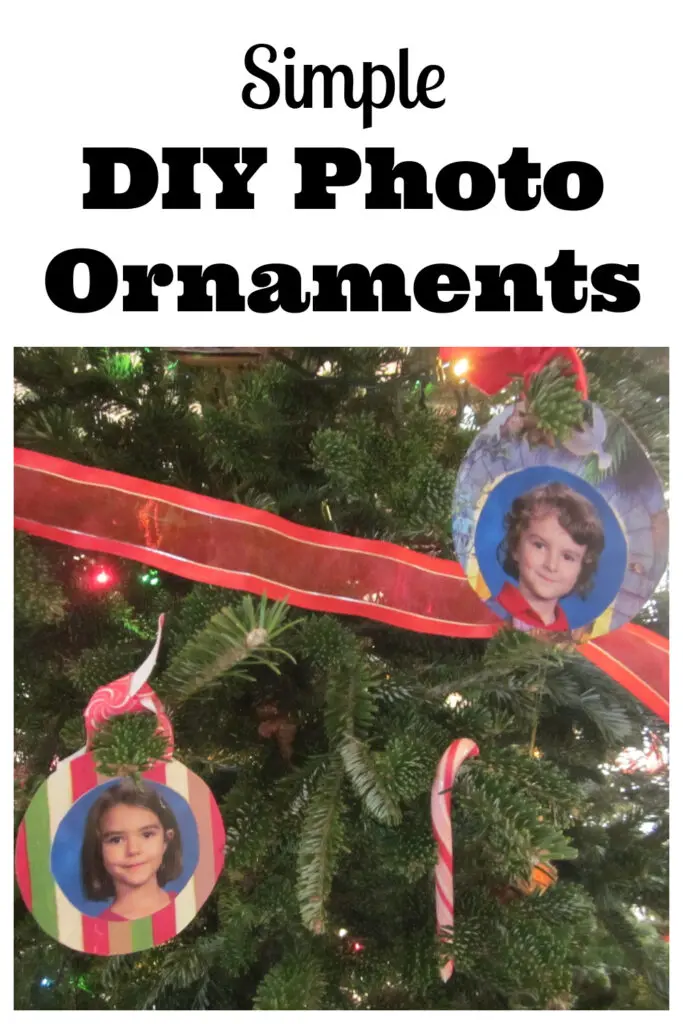
This is a fun, easy Christmas craft to do with your kids. They will love getting to make their own ornaments and it will be a fun keepsake to remember doing together each year when you hang them. These DIY photo ornaments are eco-friendly too because you can use wrapping paper and cardboard you have laying around the house. Call it upcycling or a recycle craft or just a cheap craft- it is all of the above! Have fun making these easy DIY photo ornaments with your kids.
Do It Yourself Photo Ornaments
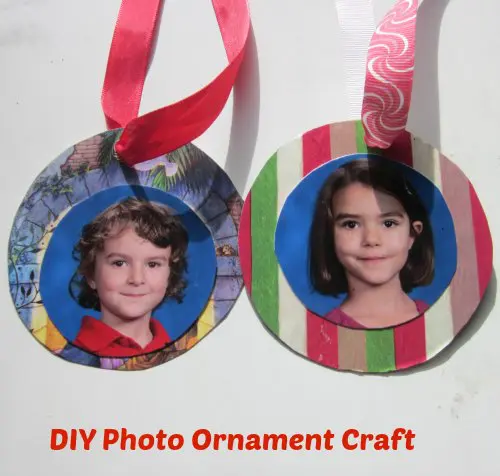
Photo ornaments hold a special charm as they beautifully combine sentimental value with festive decor. These personalized keepsakes transform cherished memories into tangible, decorative art that adds a personal touch to holiday celebrations. Whether displaying a snapshot of a special moment, a beloved pet, or a family portrait, photo ornaments evoke joy and nostalgia every time they are seen. They not only enhance the holiday spirit but also make thoughtful gifts, capturing memories that can be revisited year after year.
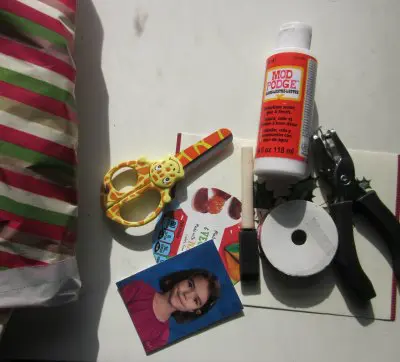
Photo Ornament DIY Craft Supplies & Materials:
- photo prints
- mod podge (works as a water-based sealer, glue & finish)
- foam paint brush
- old Christmas cards or cereal box cardboard and used Christmas wrapping paper
- hole punch
- ribbon
- round objects of concentric sizes so you can trace your circles or a drafting compass
I wanted to keep this do it yourself photo ornament very simple and easy to make with supplies you already have on hand. However, if you want to make these Christmas tree decorations even fancier, you could use wood slices for the base of your DIY ornaments. In that case, you would trace your wood slices onto the old Christmas cards or wrapping paper instead of using a circle so that they would be a perfect fit. They make great gifts for family members. Don’t forget to put the year on the back of the ornament.
How To Make A Photo Ornament:
Making DIY photo ornaments with kids can be a fun and meaningful activity, especially during the holiday season. Here are the steps to make this easy photo ornament for kids.
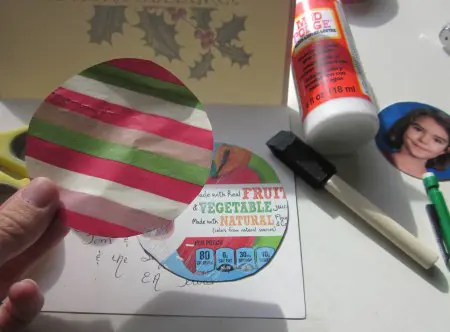
First cut out your circles.
Trace a small circle onto your photo where you want it and cut it out. Trace a large circle onto a Christmas card just where you like the design and imagine your photo going well in the center of that area. Then cut it out. If you are reusing a cereal box as your background, then trace a large circle on it as well as on the wrapping paper you will use to cover that.
Cover your cardboard circle with your wrapping paper circle.
If you are using Christmas cards that don’t need to be covered with wrapping paper, skip this step.
Use your foam paint brush to paint a thin, even layer of mod podge over your cardboard and then place the wrapping paper on top carefully lining up the circles. Allow to dry completely-about 15 minutes.
Add the photo.
Apply a few drops of mod podge to the back of the photo and smooth evenly with the foam brush. Then stick it down onto the Christmas card circle or wrapping paper circle you have prepared. Most likely, you will want to center the photo on the larger circle but depending on the designs you may place it a little lower but not higher since you need to leave room for hanging it at the top.
Seal the DIY photo ornament.
Paint a thin layer of mod podge evenly over the photo and ornament. It will appear opaque at first and you may worry about your photo but don’t! It will dry clear. Let dry around 15 minutes. You can do an extra coat for sealing the ornament more behind a glossy, protective finish. You can also embellish a little with some glitter sprinkles or felt cutouts if you like with this final layer.

Add ribbon to hang photo ornament.
Just hole punch at the top of the ornament and run some ribbon through the hole to hang on the tree and tie.
Conclusion
Here are five reasons to make these photo ornament crafts with your kids:
- Creativity: This activity fosters creativity and allows kids to express themselves artistically.
- Bonding: Making ornaments together is a great way to spend quality time with your children.
- Memories: These ornaments can become cherished keepsakes, reminding you of the fun times you had making them together.
- Personalization: Photo ornaments add a personal touch to your holiday decorations.
- Motor Skills: The activity helps improve fine motor skills through cutting, gluing, and decorating.
Merry Christmas! I hope you enjoy this fun, easy DIY photo ornament Christmas craft. What are some of your favorite Christmas gift giving traditions? Do you cherish your homemade ornaments from the kiddos?
Related Posts:
Knochu says
These are seriously the best photo ornaments I’ve seen. I love the glamor and the specialness of the moments captured. Thanks for sharing! I can’t wait to make our own photo ornaments with my children.