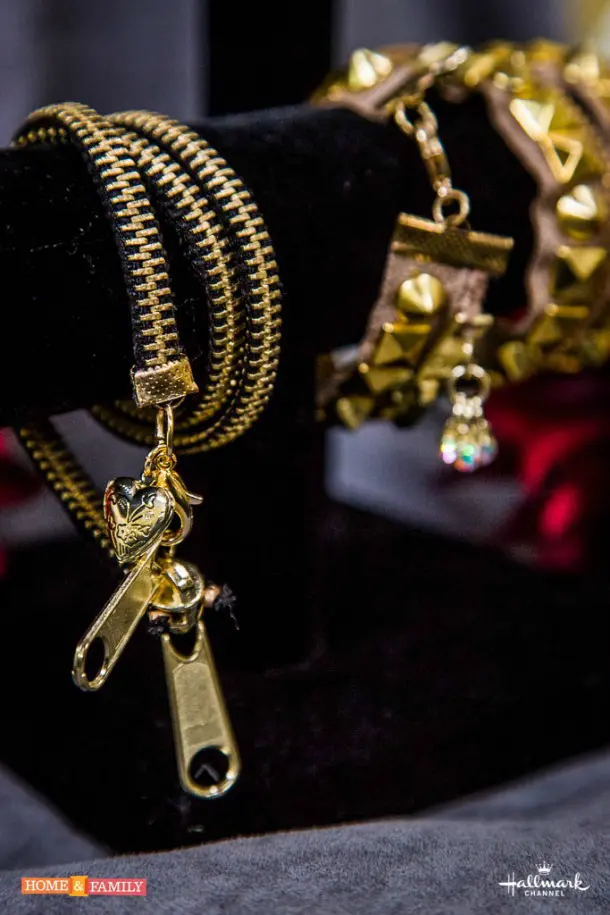
Zippers are big in fashion right now and these fun, DIY zipper bracelets are a great way to jazz up an outfit as well as a fun diy jewelry item to make. I saw this clip on the Home & Family show which airs weekdays at 10 am ET/PT on the Hallmark Channel. DIY expert Tanya Memme demonstrates how to make a zipper bracelet and makes it look super easy. I just love her zipper pull bracelet design. I have been given permission to share this zipper pull bracelet design with you here.
Easy DIY Zipper Bracelet Tutorial
DIY Bracelet Materials:
- 7″ zipper for a single bracelet or a 20″ zipper for a double wrap bracelet (these come in a variety of colors)
- Studs
- Lobster Clasp
- Rings
- Ribbon Clamps
- Charms (optional)
- Fabric glue
- Scissors
- Needle nose pliers
How To Make A Zipper Bracelet:
You can make these zipper bracelets in several different colors and give them as gifts to your group of friends- a sort of zipper friendship bracelet! You can also vary the length of the zipper for variety. Here is my affiliate link to an antique brass metal zipper on Amazon.
Step By Step Instructions For The Wider Zipper Bracelets
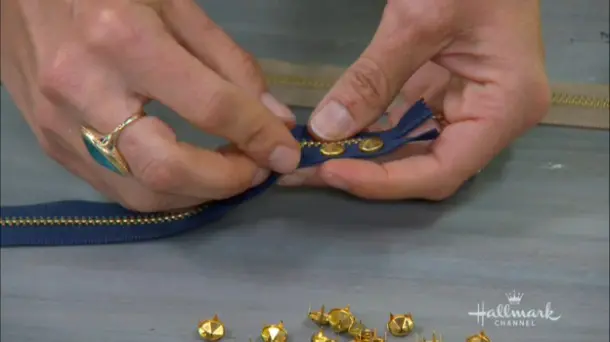
1. Take the Studs and press them through the fabric on the sides of the zipper. Bend down the stud progs in the back with needle nose pliers making sure they don’t stick up or out.
Note: you can cut the fabric on one side of the zipper and have a one side with buttons down the length of the zipper. This will give you a different look and a thinner bracelet. (Like the bracelet in the middle above.)
2. Cut the extra fabric along the top side of the zipper off leaving about a 1/4 inch. Add a dab of fabric glue to the inside of the ribbon clamp and with pliers fasten the clamp to the top of the zipper. Do this again to the bottom of the zipper. This is how you finish the end of the bracelet so you can add the lobster clasp for closure.
3. Add a ring to one clamp and a clasp to the other camp for closure and you have your diy bracelet! When adding the clasp you can also add a charm to the ring for an extra stylish effect.
Directions For Skinnier Zipper Bracelet Variation
- Cut the two sides of the fabric off the zipper.
- Add a ribbon clamp to the top and bottom of the zipper.
- Add a ring and clasp to your clamps and your diy bracelet is done! You can add a bead dangle to the clasp if you like.
If you want to watch the Home & Family Clip, you can see her make the bracelets as well. You can watch the video tutorial here hallmarkchannel.com/home-and-family/
Conclusion
Zipper bracelets are popular for several reasons. They have a distinctive, edgy appearance that stands out from more traditional bracelets. The zipper design adds a modern, industrial touch, which appeals to fashion-forward individuals. In addition, the functional zipper aspect can serve as a fidget tool, offering a tactile and engaging experience, which can be satisfying to zip and unzip.
A DIY zipper bracelet is a fun DIY fashion projects. It offers the opportunity to customize your bracelets, adding a personal and creative touch. There you have it! You can make these zipper bracelets yourself for just about $10 so they make a great DIY gift as well. They are fun friendship bracelets to give to your besties. They could even be a great project for a girl’s night in!
Related Posts:
Homemade Fabric Freshener and Linen Spray Recipe


