Today y’all are in for a special treat! Learn how to make a trendy and practical DIY apron that will not only protect your clothes (or your child’s clothes) but also showcase your unique style. This step-by-step guide will reveal the secrets to creating an apron that fits perfectly around your waist and requires minimal sewing skills. There is even a no-sew version. Get ready to impress your friends and family with your stylish and functional homemade apron!
I have permission to reprint a fun DIY project from Lazing on a Sunday Crafternoon: Little Projects for People with Just a Little Time and a Little Skill (Allen & Unwin, affiliate Amazon link) by Eliza Muldoon. This book of 52 ideas for a whole year’s worth of Sunday crafting requires only basic skills and utilizes simple household items. It is full of great projects that are can be done by yourself or with your kids. I love useful things so I asked permission to reprint the craft on how to make a child’s apron. I think you will love Eliza Muldoon’s DIY kids apron- it is so cute and would make an adorable DIY gift as well as a really useful item for children to have while crafting or helping in the kitchen.
Easy DIY Apron
Calling all art and craft enthusiasts and home cooks! This article is your go-to guide for creating a simple yet stylish half apron. Don’t worry if you don’t possess advanced sewing skills or don’t own a sewing machine. This article will walk you through the process of creating a fabulous DIY apron using simple materials and techniques. Whether you’re a beginner or an experienced DIYer, you’ll be amazed at how easily you can unleash your creativity and make a unique apron for yourself or as a thoughtful gift for someone special.
A DIY waist apron is both functional and fashionable. With just a few simple steps, you can transform ordinary fabric into a stylish apron that will keep your clothes clean as you work. An apron is especially great for kids, who are always wiping their hands on the shirt or pants otherwise! This apron tutorial can be used to make an adult apron or a kid’s apron. You just adjust the width of the apron to fit the person. There is a lot of leeway since it has ribbons that tie so it can be gathered up tighter or let out looser.
This easy DIY tutorial will guide you through the process of creating a waist apron that not only protects your clothes from stains but also adds a touch of flair to your craft and culinary adventures. The first section requires basic sewing skills or you can skip to the no sew version below it.
reprint below (craft #12 from the book)
How To Make Apron
I have been lucky enough to find a few cute vintage aprons lately. I only need them once a year when I teach art as therapy, but when I see a hand-embroidered and trimmed apron in an a second hand shop, how can I just leave it there? However, I haven’t found any kids’ ones, so I thought I would make an apron for my daughter. There do seem to be a lot of little aspiring chefs around at the moment.
Idea and inspiration
I love dress-ups and how easily kids can put on an apron and spend the next half hour preparing food, or how they put on ‘Janey socks’ and break into dance moves. I try putting on tracksuit pants in the hope that it will inspire me to exercise—maybe one day.
Time taken 45 minutes
What we used
- Fabric for the apron—this was a 1-m square piece left over from Christmas gift-wrapping
- Small piece of fabric for a pocket
- An iron
- Sewing machine
- Needle and thread
- Measuring tape
- Ribbon—enough to go around the recipient and tie a bow at the back
Waist Apron With Pockets- Step By Step Tutorial
What I did
First the child’s apron preparation
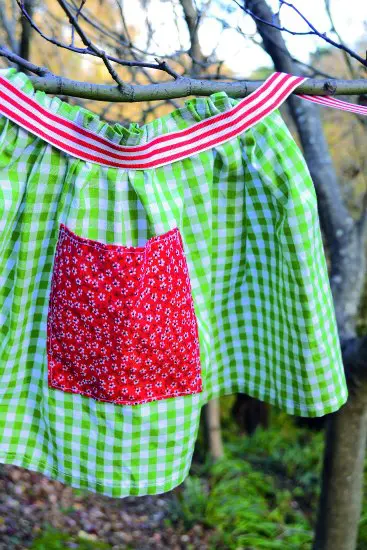
- To work out the size of the apron, I measured loosely around Lotte’s hips to decide the width. For the length, I wanted it to go a bit past her knees. I settled on 85 cm wide ∞ 35 cm long, and cut the fabric to size.
- I chose a 10-cm square piece from my patchwork square stash for the pocket.
Now for the child’s apron construction
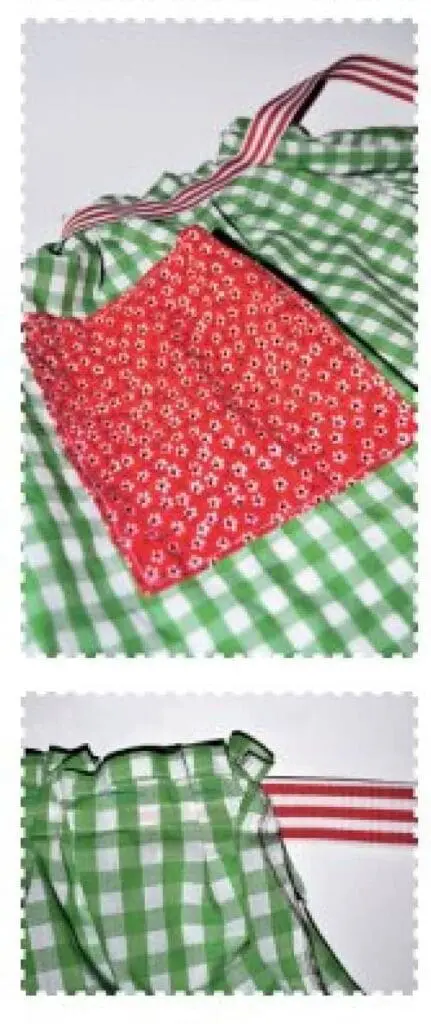
- First, I ironed a hem on all four sides of the apron, and sewed the hem using a basic straight stitch.
- Then I ironed a hem on the four sides of the patchwork square, but only stitched one side of the square. This became the top of the pocket.
- I stitched the pocket to the apron on the remaining three sides. I just guessed where to put it. (No surprises that it was off-centre!)
- Across the top of the apron, just below the seam, I sewed a very loose straight stitch by hand and gathered as I went. I wanted the gathered width to go just around Lotte’s hips, but by this stage she’d run off so I just guessed. It worked though.
- Finally, I sewed the ribbon across the gathering, hiding the white stitch on the white stripe. I left a bit of the gathering visible at the top because I thought it looked sweet.
Child’s Apron Variations
- You can make it less flouncy by just folding three pleats at the top instead of gathering it. To do this just fold about 5 cm or so at the centre of the fabric and then add two more folds halfway along either side.
- You could add vertical seams from the bottom to the top of the pocket to make smaller sections that could happily hold little utensils.
- You could make an apron in this way for grown-ups too—simply adjust the fabric measurements to suit.
AND THE LITTLE ONE
Lotte was involved in the fabric selection—I thought her choices were mighty cute! She didn’t stick around for the sewing, though; she was already playing with her toy stove and bringing me ‘baked goods’. When I gave this to her, she said, ‘It’s so pretty. Everyone watch me run around the kitchen table in my apron.’ (Because that is what one does when one puts on an apron.)
If you enjoyed this tutorial for how to make a child’s apron and you’d like to check out more DIY craft projects, you can get the Lazing on a Sunday Crafternoon book at IPGBook.com and they even have eBook editions available. Thanks so much to the author Eliza Muldoon and IPG for allowing me to reprint this craft here.

No-Sew Version
First, gather all the necessary materials for your project and bring them to your cleared work space. You’ll need a piece of fabric that is at least 1 yard long and 45 inches wide. Choose a fabric that speaks to your personal taste for your own apron. Whether it’s a vibrant floral pattern or a bold geometric design, the choice is yours. Additionally, you’ll need ribbon 1 inch wide and 69″ long, fabric scissors, fabric glue, an iron, and any decorative elements you might want to include, such as buttons or bows.
Once you have your materials ready, lay the yard of fabric out on a flat surface. Measure and mark the desired dimensions for your new apron, typically around 18 inches wide and 24 inches long. Use fabric scissors to carefully cut along the marked lines, creating the base of your apron.
Next, it’s time to add some personality to your apron by incorporating pockets or compartments. Adding an apron pocket to the front of the apron not only adds functionality to your apron but also provides an opportunity for embellishment. Consider using a contrasting fabric or decorative stitching to make your pockets really stand out. You can even attach small accessories like buttons or bows for an extra touch of whimsy.
After you’ve added your desired embellishments to the skirt piece, fold over the top edge of the apron fabric over about 1 inch in a straight line. Secure the folded edge with fabric glue. This will create a clean, finished edge for the waistband of your apron. Similarly, fold over the side edges of the fabric and secure them with fabric glue, creating a neat hem.
Once you’ve completed these steps, it’s time to attach the ribbon to the waist of your half apron. Center the top edge of your apron in the middle of the ribbon and secure in place with fabric glue. This will create the waist straps that will keep your apron in place.
Conclusion
By following the steps outlined in this article, you now have the tools and knowledge to unleash your creativity and make an apron that truly stands out. With the perfect fabric combinations and personalized embellishments, you can create a one-of-a-kind half apron that reflects your unique style. Do you think you will use these instructions for how to make a child’s apron? Or will you make a waist apron for yourself? I’d love to see the fabrics you chose and how it turns out. Tag me @familyfocusblog!
Related Posts:
Teaching Kids To Sew Can Be Easy!
Berita says
Such a cute apron. Thank you so much for the easy and adorable apron pattern for my little grandchild. I love the front pocket idea and the accent fabrics. Also the ribbon waist ties for this back wrap apron are perfect.
Maxi says
If using a sewing machine, sew the straps securely to the apron body using a straight stitch. Backstitch at the beginning and end to reinforce.
If hand-sewing, use a strong needle and thread and close stitches for a secure hold.
Minnie says
Wonderful, informative post on how to make an apron. I never knew it could be so easy. I am going to do this project with my daughter tomorrow. Thanks for the idea.
Kandari says
This tutorial is really very helpful. I like how you cover the raw edges by providing a seam allowance. I also like the mix of different pattern pieces. So cute! I have gathered some great inspiration from this blog to make my own apron.