My mother moved to New Mexico when I went to college and she sent me a dream catcher. Right away, I loved the dream catcher meaning (to catch bad dreams) and I also loved the aesthetic. When Giuroiu Anton, Founder of Homesthetics Magazine, an online architecture art and design resource offered to share a tutorial for how to make a dream catcher with my readers I was totally excited. He writes as a guest for several architecture websites like Freshome and Architecture`n Design. I think you will enjoy his easy instructions for making Native American dream catchers. While both “dreamcatcher” (one word) and “dream catcher” (two words) are both used, “dreamcatcher” is the more common and generally preferred spelling.
This post was first published on May 29, 2016. I made a few updates and I have republished this dreamcatcher tutorial to share with my new readers.
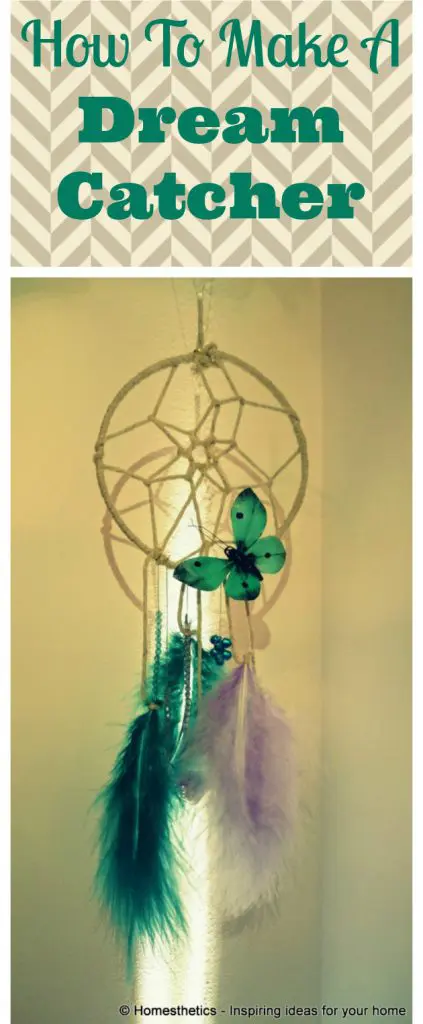
What is A Dream Catcher? Dreamcatcher Meaning
What does a dream catcher do? The Native American dream catcher is known to have a powerful history that originated in the heart of Ojibwe people. There, the Asibikaashi, also known as the spider woman used the enchanted objects to protect infants.
The Native American dream catchers are constructed as a filter for dreams. In Native American culture, it is supposed to allow only good dreams to pass through the web. Bad dreams are thought to get stuck in the web. The first sun ray of each morning erased all the bad dreams captured through the night on the web. Thus offering a clean filter for the night to come.
In recent times, the dream catcher has lost its meaning along the way and is often overlooked despite its powerful heritage. The intricate items are mostly mass produced today for decorative purposes and often the natural materials are lost in the process. If you are seeking the dream catcher benefits, I would suggest actual Native American dream catchers made by hand. However, these DIY dreamcatchers can be personalized to a great extent and then are ready to be hung over the bed to protect with their beautiful uniqueness. The short tutorial that follows will help you make a dream catcher; the process is simple and inexpensive.
3 Easy Steps For How To Make A Dreamcatcher
Dreamcatchers have long been cherished as symbols of protection, believed to filter out bad dreams and let only positive thoughts flow through. Originating from Native American cultures, these beautiful, intricate designs are more than just decorations—they carry deep meaning and personal significance. Whether you want to craft a dreamcatcher for yourself, as a gift, or as a creative home accent, this step-by-step tutorial will guide you through the process. With just a few materials and a little patience, you can weave your own unique dreamcatcher, infused with intention and creativity. Let’s get started!
Craft Supplies Required To Make Dream Catchers:
- A hoop about 6 inches ~ 15 centimeters
- Thread, yarn or twine
- Craft Feathers
- Wooden Beads
- Glue
- Suede lacing
Ok, here is how to make a dreamcatcher step by step.
Step 1 – Purchase or Shape the Loop of the Dream Catcher
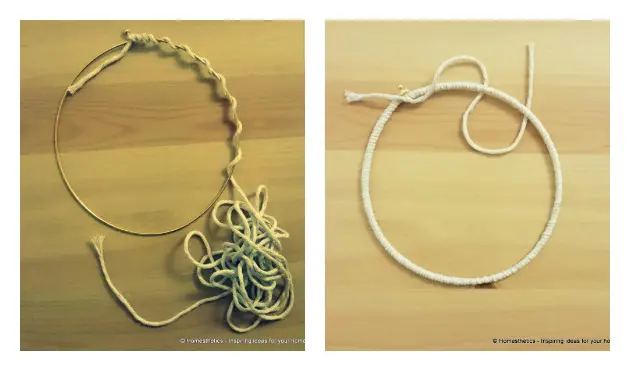
- If you are to use a willow or grapevine for a natural hoop, it is recommended to soak it in warm water for approximately 30 minutes.
- Bend the hoop next, secure the circle with a twist tie and land some heavy weights on it to make sure it remains all in a single plane.
- Dip the entire hoop in tacky glue and proceed by wrapping suede lacing (or twine) tightly.
This first step is most easily accomplished by using pre-made metal ring, wire hoop, or an embroidery hoop. After wrapping the entire metal hoop, add a hanging loop to the top of the hoop of your own dreamcatcher.
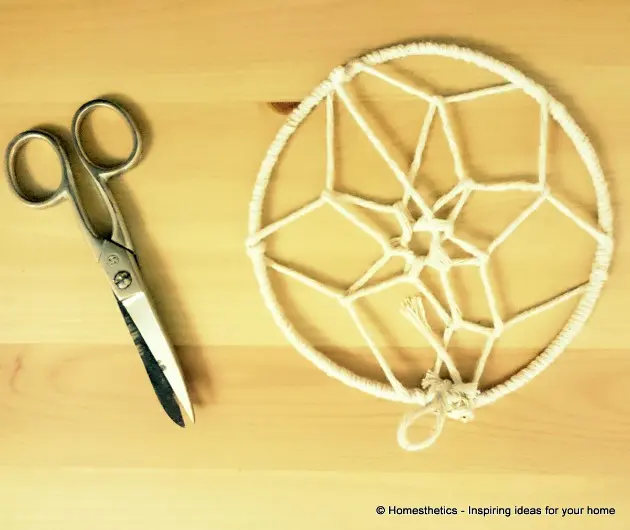
Weave The Dream Catcher’s Web- Step 2

- To make a dreamcatcher web, one should start from the top, with a knot and place the connections about one inch apart
- A conventional hoop can contain 8 to 10 jumps along the hoop on the first level
- The last stop will mark the moment when you jump on tier two, on the midpoint of the first tier one hoop
So for this second step, you are creating each level of the web by tying a knot and skipping two inches and tying a knot again. When the first level is complete, you tie a knot to the center of the span of twine and then reach over to the next center of the span of twine on level one and tie a knot again. As you do this, it will be pulling towards the center and creating the interior walls of the spider web.
Step 3 – Finish The Dream Catcher With Custom Accessories
- Tie the end of your thread when you are to unable to continue with the jumps, the center of the dreamcatcher should remain balanced
- Add colorful feathers to your dream-catcher to highlight verticality; beads could also bring it a more natural, rustic vibe
- Using heaver decorative elements like pieces of wool in your composition will grant the dream catcher a beautiful, vertical position

The third step is all about adding different things to the end of the hoop of the dream catcher. These various materials are how you make your own dream catchers personalized to the individual. You may want to use symbols that were important to Native Americans. For example, crossed arrows are a symbol of friendship while a wolf symbolizes strength and protection. A hanging feather is believed to help guide good dreams down to the sleeper.
That is how you make a simple dream catcher. Congratulations! Hopefully this is the first of many. One could consider creating dream catchers as beautiful DIY gifts.
Dream Catcher Tutorial Tips
- The composition can become more complicated when the string used is thinner, allowing the web to be far more intricate, far denser and more graphic. Embroidery floss can work well for this. I suggest saving this for your 2nd or 3rd dreamcatcher as you become more comfortable with the crafting process.
- One could also use a bigger hoop to obtain the same effect with the thicker string. Large wooden hoops may serve for this purpose.
- Personalize these dream catcher craft instructions by adding your own personal elements such as pom poms and favorite colors.
- A DIY dreamcatcher can also be made in layers with successively smaller hoops.
- Get creative with simple elements and create truly unique, beautiful dreamcatchers!
Conclusion
Creating your own dreamcatcher is a great way to explore creativity while making something meaningful. Whether you choose a larger hoop for a statement piece or a smaller one for your rear view mirror, each design is unique. As you complete the final step, tying the nylon string and securing the feathers, your magical web comes to life. You can experiment with different colors of beads and thread or wrap the inside of the hoop with buckskin suede lace for a traditional touch.
This fun activity is perfect for birthday parties, crafting sessions, or simply decorating bedroom walls and other spaces. You can even use a pom-pom maker to add soft embellishments or a piece of wire to shape custom charms. Most supplies can be found at your local craft store, making it easy to get started. Whether you’re weaving the first row or finishing the center circle, your dreamcatcher will be a beautiful addition to your home decor and a symbol of positivity. Enjoy your handmade creation!
I hope this DIY dream catcher inspires you dream big and keeps you safe from anxiety about missing. It all starts with the dream! What do you think? We would love to hear your opinion on the subject in the comment section below. If you use these step by step instructions for how to make a dreamcatcher, please share your pics with us on social media @familyfocusblog! I wish you positive energy and sweet dreams!
Related Post:
How To Make A Dream Board And Why You Will Be Glad You Did
Ann says
I love how you explained the meaning behind the dreamcatcher while also making the process easy to follow. The idea of using different colors and materials to personalize it is so creative! This was definitely a fun craft activity.
Alberta says
This dreamcatcher tutorial is amazing! I love how you broke down each final step so clearly, making it easy for beginners to follow. What a great idea for birthday parties or adding a unique touch to bedroom walls.
Nop Valley says
Ever wondered if a simple craft could actually bring positive vibes into your space? This dreamcatcher tutorial isn’t just about weaving string—it’s about weaving intention, creativity, and a touch of personal magic. Love how you made the process so easy to follow while keeping the meaning alive.
Barbara says
I absolutely loved how you made the process of creating a dreamcatcher so simple and approachable. The way you explained the meaning behind it really added depth to the craft. Your tips for adding colorful feathers and beads word great!
Accent Future says
I love how you encourage creativity and personalization in dreamcatcher making—your tips make the process feel accessible and inspiring. Thanks so much!