Every little girl wants to play dress up at some point and being a fairy is always a fun choice. After all, fairies can fly and have magic. That is why even my son likes to wear the fairy wings at times! Here is a tutorial on how to make fairy wings and fairy wand from stuff you have around the house. Your kids can put their imagination to use and play a pretend game with their very own fairy wings. With Halloween approaching, these instructions for how to make fairy wings may come in handy. This DIY fairy wings tutorial is perfect for making your own Halloween costume or pretend play any time of the year.
Why make fairy wings?
Making fairy wings and a wand can be a fun, creative activity for several reasons:
- Creative Expression: Designing fairy wings and a wand allows you to use imagination, experimenting with colors, shapes, and decorations. It’s an opportunity to explore personal style, whether that’s going for a delicate, ethereal look or something bolder and more magical.
- Costumes and Play: Fairy wings and wands are perfect for costumes, whether for Halloween, themed parties, or dress-up at home. Kids especially love pretending to be fairies or magical characters, which can encourage creative storytelling and imaginative play.
- Low-cost DIY Fun: It’s often inexpensive to make fairy wings and wands using craft materials or items you have at home, making it a budget-friendly activity.
Craft Supplies Needed For Homemade Fairy Wings:
- large cardboard box
- scissors or craft blade
- ribbon
- acrylic paint or puff paint
- glue and glitter if you want iridescent fairy wings
How To Make Fairy Wings For Kids
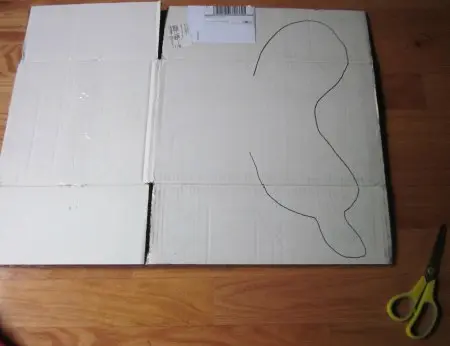
First, I found an old box and cut the tape so it laid flat on the floor. The box I used had a white exterior but if yours is brown- no worries. Your child will probably want to paint it anyway!
I free handed one fairy wing shape. I suggest you do the outline in pencil so you can change it till you get it just right.
Next, I cut around the one fairy wing. Try to maintain the extra cut off cardboard in as large of pieces as possible. We use these cut off pieces in just a few minutes, so keep them handy.
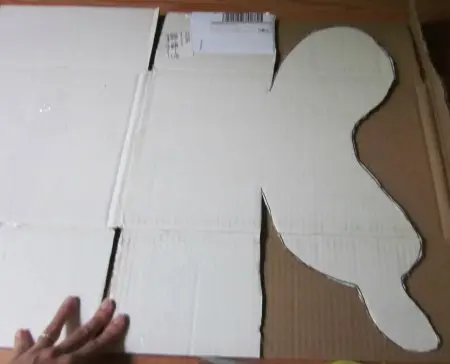
I then used her dress to measure out the size space I wanted to leave for her torso between the wings. Once that was done I laid my cut pieces of cardboard down in the shape of the wing. Then I drew the outline for the second wing so that it would match the first perfectly.
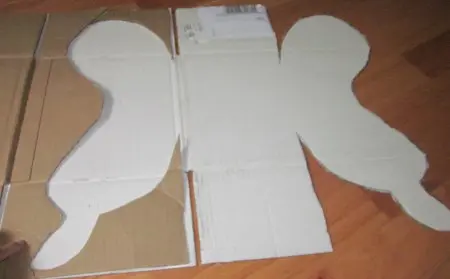
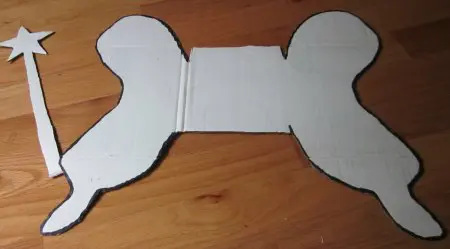
Then cut out the second fairy wing and cut off the extra portion of cardboard above and below where the wings meet. So now you have your basic pair of wings and in the center of the wings you have a cardboard section that will be used to attach the wings to your child.
Now, I used the leftover cardboard to draw a star and staff and cut out my fairy wand. You can use all kinds of wing shapes for your cardboard wings, I wanted mine to look like a butterfly.
The next step is the fun part! It is time to decorate your fairy wings. When it comes to wing design, you can let your child’s imagination run free.
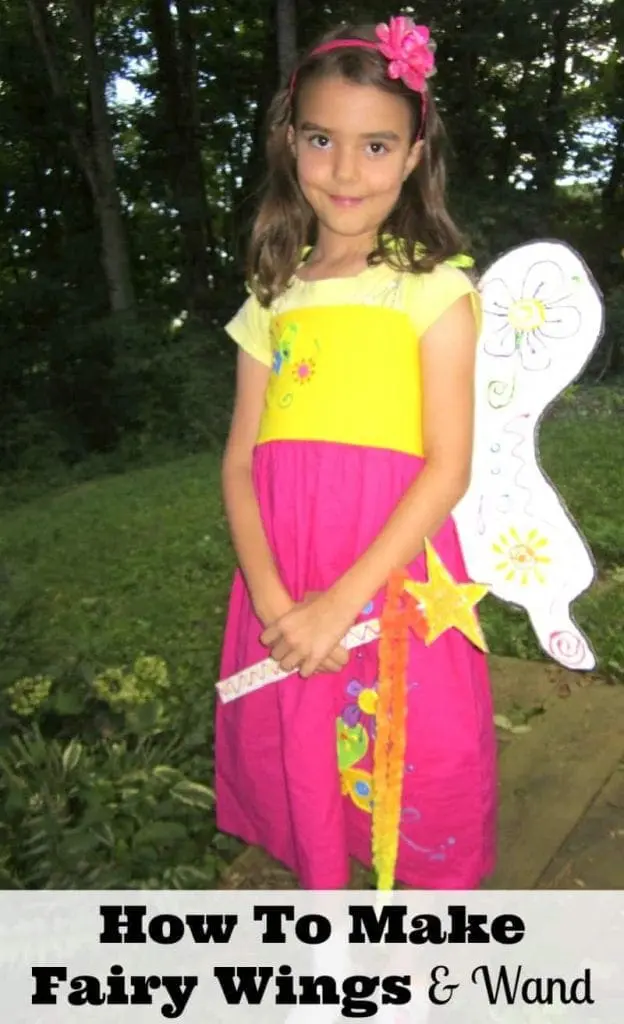
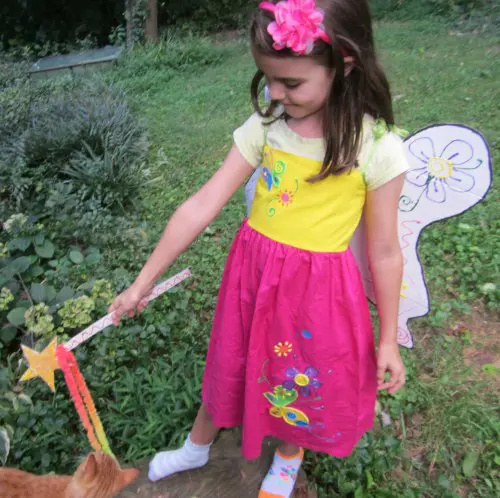
We chose to outline the fairy wings in black marker just for contrast. Next, we used puffy fabric paints that we had on had so that I could match designs on the dress that I had picked out for her to wear with the fair wings. Finally, we decorated with flower petals, suns and random shapes while keeping the design symmetrical between the lovely fairy wings.
From paint to crayons to markers to glue and glitter, the craft materials options are endless for decorating the DIY fairy wings. That could be a craft project in and of itself for your child.

The last step in how to make fairy wings, is to hole punch the cardboard in the section that you left for the torso about an inch down and an inch away from the edge so that the cardboard doesn’t tear easily. Then you can use yarn loops tied through these holes to create arm straps for your child to be able to slip the wings on and off. Of you can use ribbon and tie them in bows over their shoulders.
How To Make A Fairy Wand
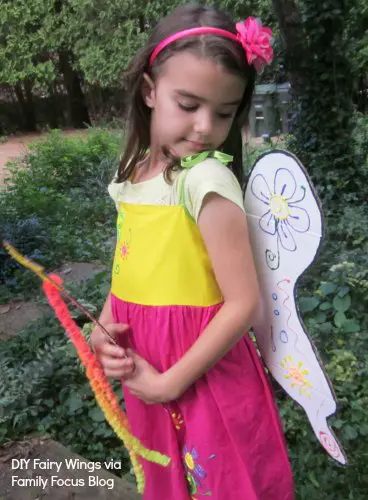
The fairy wand is as simple as drawing a star with a staff centered below it onto your extra cardboard and cutting it out. Of course, you can choose other designs such as a heart instead. Then decorate the DIY fairy wand. We used glue for the star and then coated it with yellow glitter . Next we used puffy paint to make a pattern on the staff and we tied on some yarn we had on hand that matched our color scheme. Little jewels that you can glue onto the star would also look lovely. For the finishing touch tie a ribbon or a tulle ribbon around the top of the fairy wand for a bit of flourish!
Conclusion
My daughter loves her flower fairy wings. Making fairy wings and wands can be an enjoyable art project, whether done alone or with others. If you’re working with kids, it can also be a great activity for fine motor skill development as they glue, cut, and assemble the different parts. Homemade fairy wings and wands can be lovely keepsakes or room decor. They can add a magical touch when hung on walls or placed as part of a whimsical bedroom setup.
I hope you’ve enjoyed learning how to make fairy wings. I am sure your child will love this easy upcycle project and enjoy decorating the DIY fairy wings. Put these wings on with a pretty dress and you have got an adorable fairy costume! Let your child’s imagination soar and share your beautiful fairy wings on social media @familyfocusblog!
Related Posts:
Edna says
Very cute, I tried making some for my girls last year out of wire hangers and pantyhose then I used glitter glue to decorate them. Took me about 5 hours did half one day the rest the next day. This seems much simpler wish I done them this way too. Especially since my kids only played with them for about two days then they forgot all about them. I made some glittery tutus to match- ugh, glitter everywhere. I will be trying this easier way to make beautiful wings and I’ll be letting my girls decorate their wings themselves this time around. This will make a great summer craft project.