Summer has arrived and it is fun to get outdoors for summer family activities but the heat is here! One of the things that my kids love to do in the summer to cool off is play with water! Whether it’s swimming at the pool, squirting each other with water squirters or tossing around water […]
Family Activities & Crafts
Family Activities such as fun family game ideas, fun things to do with kids and family fun crafts. Art crafts for kids and craft ideas adults will love too.
Water Gun Painting [Summer Art Project]
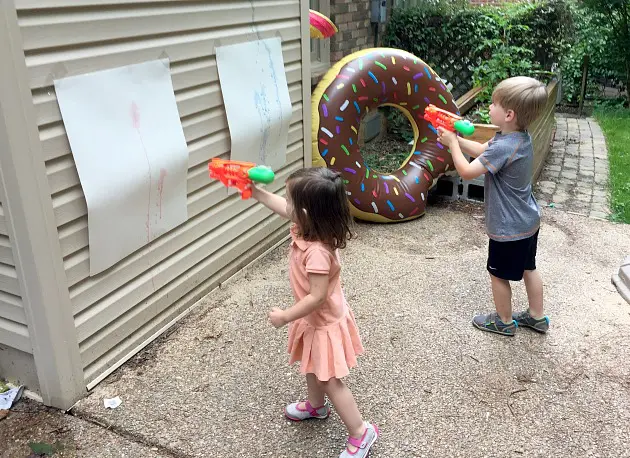
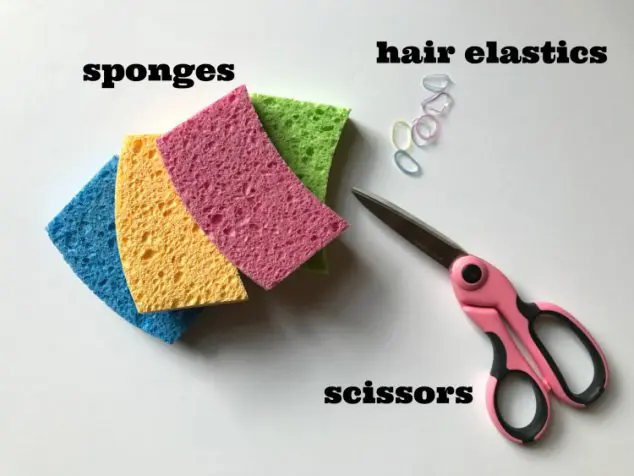
My kids love the outdoors and just playing outside in general. I have thought up of some fun and cheap outdoor crafts for this summer. Today, I’ll be sharing one of our favorite summer art projects that is perfect for preschool age young children as well as the older kids too. You will only need […]
List of Fun Summer Games For Kids
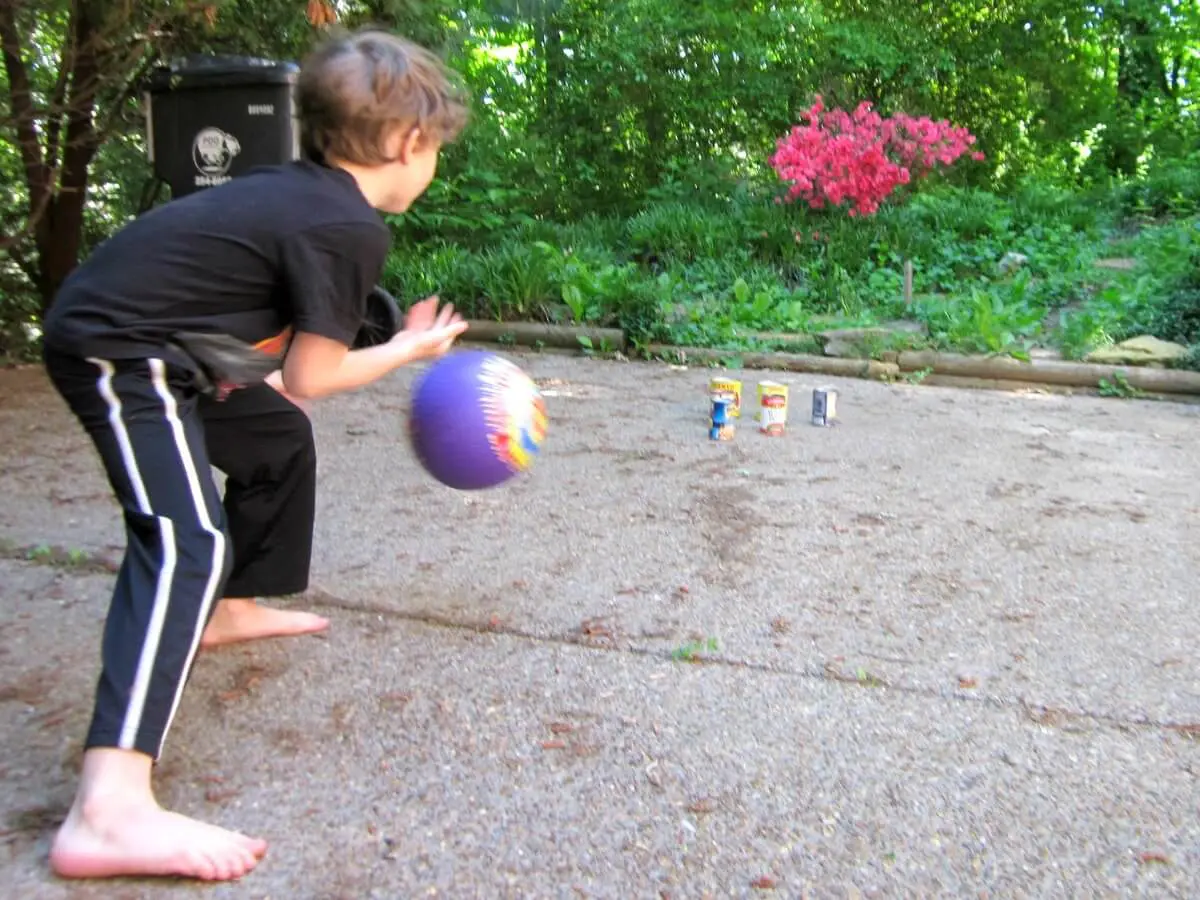
Kids are out of school for the summer and looking for things to do. While there always seem to be a plethora of fun activities to do with kids and camps to sign them up for, they can often be quite expensive. Summer camp, art, music, and dance classes, soccer camp and horseback riding, are […]
20 Family Activities For Summer Fun

As 21st century parents, we are constantly competing with technology for our children’s attention and getting off devices to enjoy outdoor family activities can be a struggle. Between iPads, Facebook, Xbox and YouTube, you can almost go an entire summer without interacting with your child–except to nag them to do their chores. Although this makes […]
10 Great Summer Crafts Kids Will Love
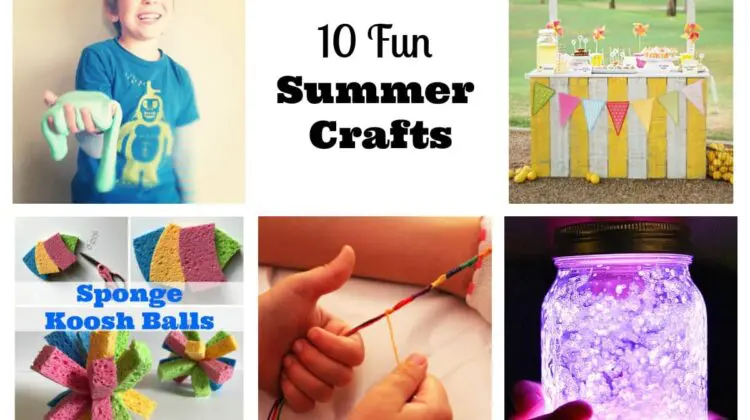
I decided to compile an inspirational list of ideas that you and your family can do this Summer in your very own backyard! Choosing only ten fun summer crafts kids will love turned out to be harder than I expected. I narrowed it down going with affordable DIY-projects and crafts that any family could take […]
10 Boredom Buster Sidewalk Chalk Ideas Kids Will Love
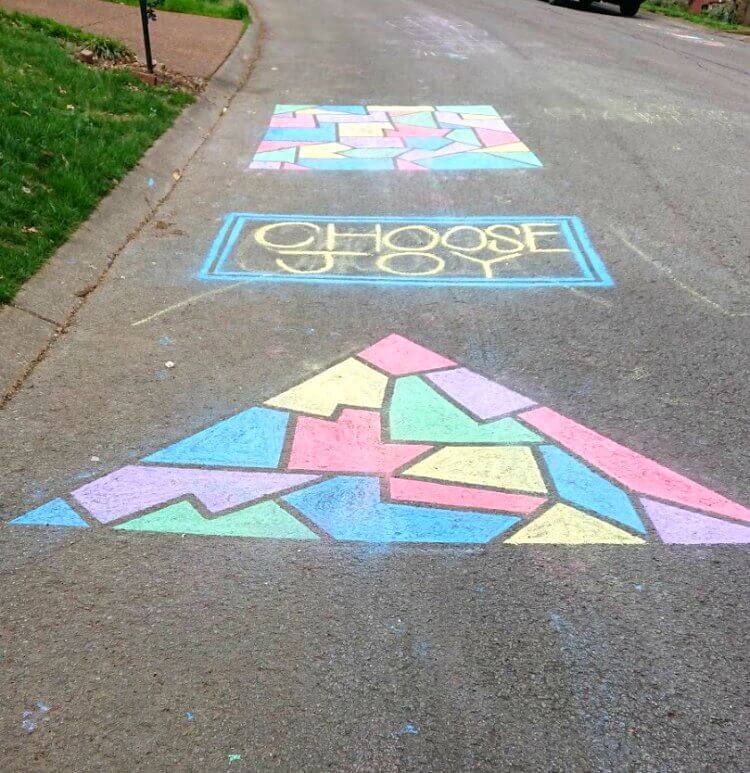
The summer months are such a fun time of the year! It’s my most favorite season. I love how the kids are off of school and we get to spend time together doing all sorts of things. There are days though when we just want to spend most of the day at home instead of […]
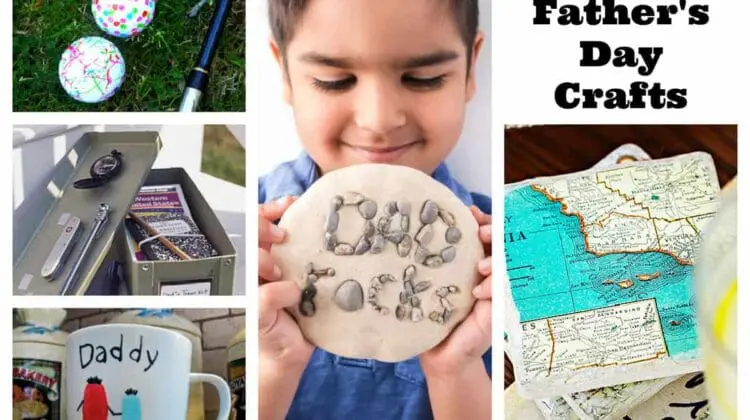
Easy Fathers Day Crafts For Kids To Make And Give As DIY Gifts
I was really kind of shocked to see the lack of Father’s Day gift ideas for kids to do compared to the over following amount of ideas I came across for Mother’s Day. It really made me sad that Father’s Day was being eclipsed by Mother’s Day but then I thought that might be going […]