Looking for cool Halloween Village ideas? Here is an in-depth, step-by-step tutorial for a DIY Halloween Graveyard! Fall and winter are probably the most exciting times of the year for interior and exterior decorating. Putting out model towns always seem to be so popular with village collectors. For the last 20 years there has even been a Lemax Spooky Town Collection. So why not grab the family and make your very own Halloween Village set? Scenes like this halloween graveyard scene are quite easy to make and come out looking so realistic! I hope you enjoy these DIY Halloween Village display ideas and they following this tutorial helps give you confidence to crate your own.
DIY Halloween Graveyard Scene Tutorial
Halloween graveyard scenes have become very popular. I think it because it makes a real fear more approachable and explorable and fun. Get ready for a spooktacular adventure as we create our own DIY Halloween Village scenes and dip our toes into the world of fear and fantasy. Delve into the creative process behind the spooky displays, unearth inspiration for eerie village scenes, and feel that satisfaction of bringing these haunting Halloween villages to life. Whether you’re a Halloween craft enthusiast or a first-time crafter, this comprehensive guide will ensure your Halloween Village is a display to remember. Enjoy these halloween graveyard ideas and feel free to add your own.
Craft Supplies:
- Foam board
- Moss (sheet)
- Moss (loose)
- Small flower pot
- LED branches
- Flower/plant tape
- Air dry molding foam
- Acrylic paints
- Fence
- Small plastic skulls
- Paper clips
- Glue
How To Make A Halloween Village Graveyard Scene For Your Spooky Model Town:
- First we will start off this halloween graveyard ideas diy tutorial by creating the tree. Take the flower pot and slightly widen the hole; I used a screw driver and tapped the sides.
- Make this hole wide enough so you can fit the LED branches through. I suggest doing this one branch at a time.
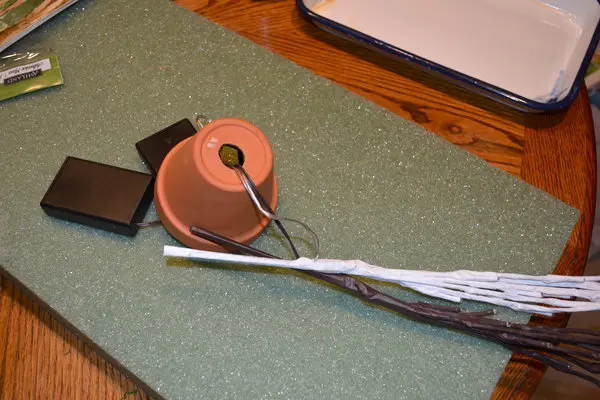
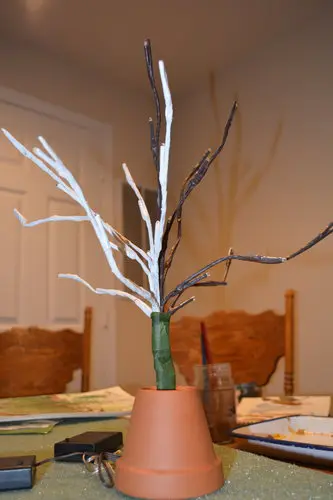
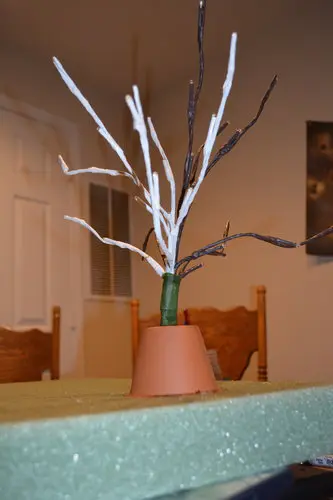
3. Once both branches are through wrap the ends to one another using the green flower/plant tape.
4. Figure out where on the foam board you want your tree. Once you know, place the flower pot and using a marking utensil trace the outside of the pot.
5. Cut this hole out of the foam board and wedge the flower pot into the hole. Make sure the pot fits snug into the foam board; do not make the hole too big.
6. Now we can start building and shaping the tree. Get out the molding foam and start building the trunk and roots of the tree. Do not worry if the surface is a little lumpy, we want this to look realistic.
7. Once you have the shape of your tree done and the molding foam is dry it is time to paint!
8. For this step I used four different colored paints. Start by painting the entire tree your lightest shade of brown. You may want to add two layers of this color. Then add your second darkest shade of brown. Remember to let the lightest brown be your highlight so leave those areas that would get THE most sun/light just the first color.
9. Start to show depth with the third color which will be your darkest brown. Your final color is black. Concentrate this at the bottom edges of the tree and it any areas that you want to sink in. Let this all dry.
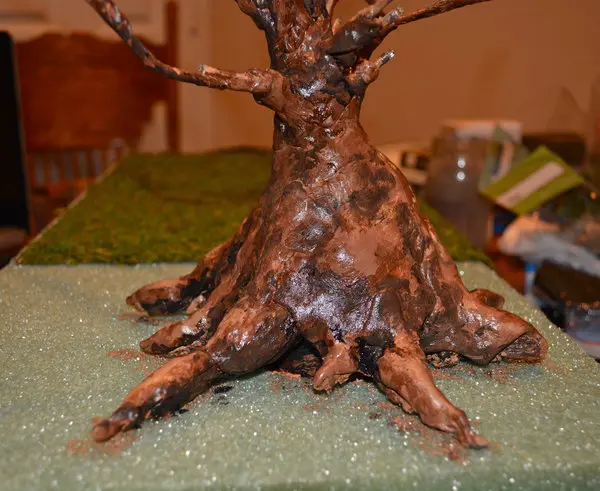
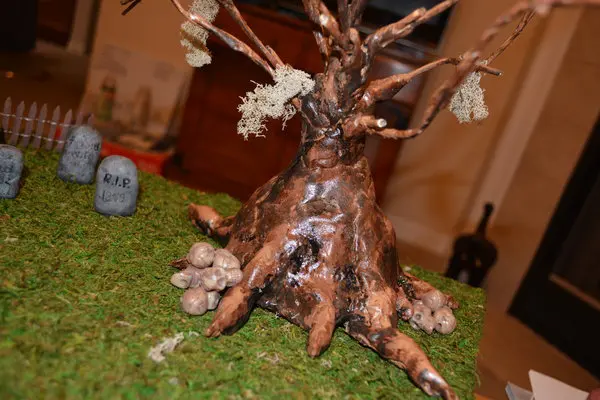
10. Get out the sheet of moss and cut it into the shape and size of the foam board. Now, you did put a hole in the foam board for the tree so carefully remove the tree and be sure to put a hole the same size and shape in the moss sheet.
11. Glue the moss sheet down and put your tree back into the hole. At this point your scene should start coming alive!
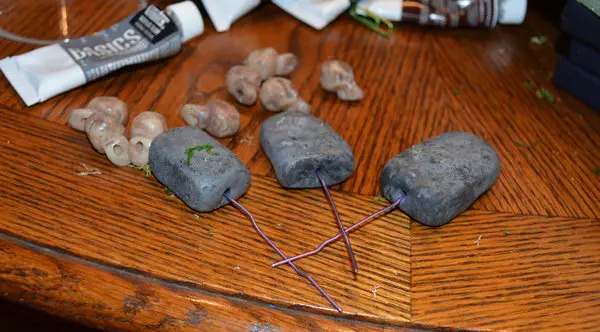
12. Now it is time to turn the spooky scene into a diy graveyard with some tombstones. Using the molding foam, create tombstone shapes, let dry and then paint using grey and black paint. Once they are dry you can use a sharpie and write RIP and other names and dates on them.
13.To get these guys to stick into the ground I suggest using a stretched out paper clip. Stick the paper clip where you want the tomb stone to be and then stick the tomb stone down on to the paper clip.
14. Add the fence, some loose moss and of course the small skulls to finish off the Halloween graveyard diy scene! Enjoy!

DIY Halloween Village Ideas Conclusion
A DIY Halloween Village Display with a graveyard is a fantastic spooky touch! With the simple plan above, you can create your own mini graveyard scene. It’s a hands-on project where you get to design something spooky and personal. It’s a great outlet for creativity, especially if you like crafts, painting, or miniatures. If you love setting a spooky mood for Halloween, a little graveyard with flickering lights and fog effect looks amazing as part of a larger Halloween setup.
I hope you experienced the captivating allure of DIY Halloween Village display ideas as we took you on a journey through its bewitching charm. Immerse yourself in the vibrant colors, intricate decorations, and enchanting atmosphere that transforms this village into a spellbinding wonderland. Now you have discovered the secrets behind the stunning displays and you can embrace the magical ambiance add your own ideas.
Have you ever created your own holiday model town or DIY Halloween village scene? Would you try this DIY Halloween Graveyard Scene? If you do make your own Halloween decorations, be sure to share your creation with us and tag @familyfocusblog!
Related Posts:
Michelle @ Dishes and Dust Bunnies says
I haven’t created a Halloween scene before but since I have a little boy of my own now it’s something I’ll definitely try. I love how you created the tree for the Halloween Village display scene!