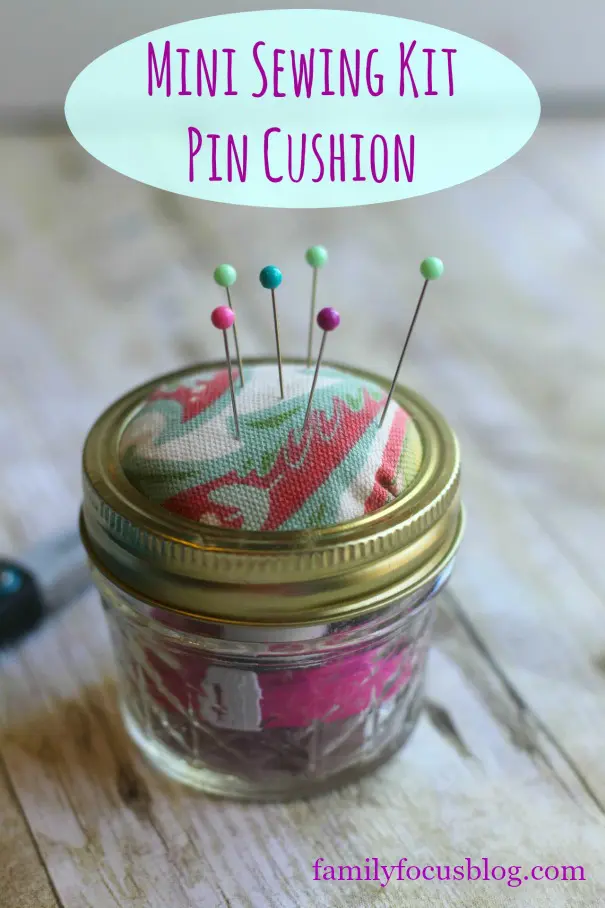
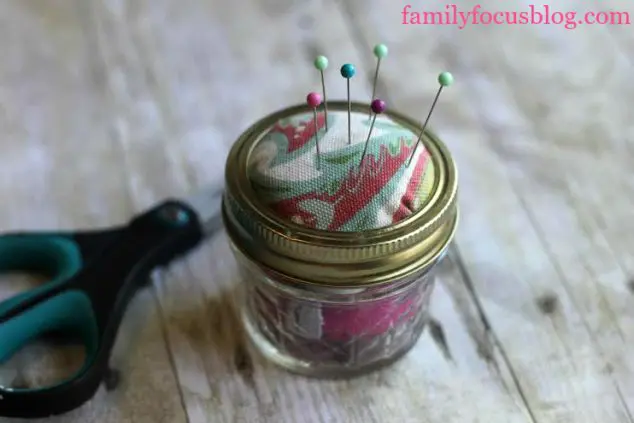
This DIY Pin Cushion Sewing Kit is so fun to make and so cute that you will have a hard time making just one. They make a lovely DIY gift for a beginning sewer, an experienced seamstress, or someone headed off to college. Pick a pretty scrap of fabric and a little mason jar and get ready to create this pretty and useful DIY gift for someone (or yourself). I picked up all the sewing items inexpensively at my Michael’s but you can find them at any craft stores. This mason jar pin cushion jar is so cute and useful!
Mini DIY Sewing Kit With Pin Cushion
Making your own pin cushion is a fun, creative project that comes with a few great benefits:
1. Personalization
- You can design a pin cushion that matches your style, sewing area, or project theme. Whether you prefer vintage, modern, or whimsical designs, a homemade pin cushion can reflect your personality.
2. Eco-Friendly and Budget-Friendly
- Homemade pin cushions can be a sustainable project, especially if you use leftover fabric, scraps, or other upcycled materials. It’s a budget-friendly way to use materials you already have, reducing waste.
3. Unique Gift Idea
- A handmade pin cushion makes a thoughtful gift for sewing or crafting friends. You can customize it with colors and designs that suit them, turning it into a practical and personal present.
Whenever I see a pin cushion full of colorful stick pins, I think of my grandmother. I loved watching her sew. I wish I could make one of these nifty sewing kits with a pin cushion for her because I just know she would tell me how clever I am. She was the sweetest! Anyway, I hope you enjoy this diy mason jar craft as much as I do!

Sewing Kit Pin Cushion Craft Supplies:
- Mason Jar or Ball Jar with lid and band
- a small piece of fabric with a cute pattern (your favorite fabric scraps work well)
- cotton batting
- small black and white thread spools
- 2-3 needles (and a bit of extra felt fabric)
- retractable measuring tape
- straight sewing pins
- hot glue gun and glue sticks
Here is my affiliate amazon link for the mini mason jar I used for your convenience.
How To Make A Pin Cushion From A Mason Jar:
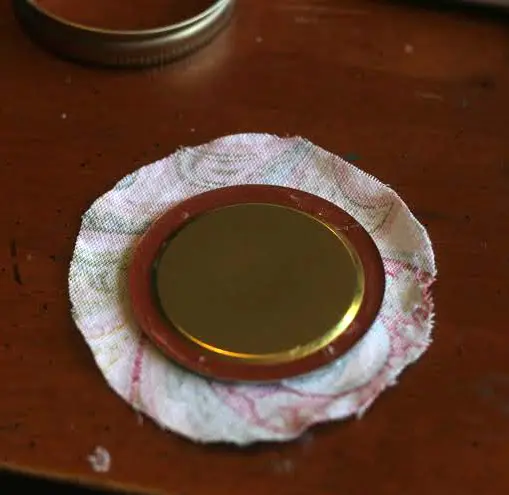
Remove the lid portion of your mason jar and lay it on the fabric so that the top is facing the “wrong” side of the fabric. Cut a fabric circle around it, leaving ½” of extra fabric all the way around.
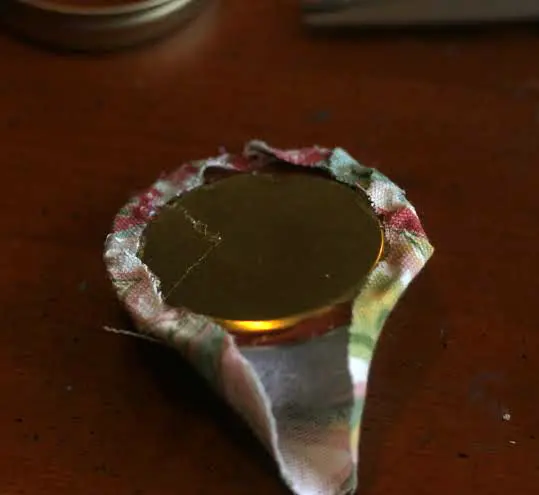
Apply an even line of hot glue on the underside 1” at a time, gathering and folding fabric over and pressing into glue, barely overlapping. Continue until you have a 2” opening then stuff with cotton batting until desired puffiness is reached. I think cotton batting makes the best filling but you could use cotton balls if you need a substitute for the pincushion stuffing.
Then continue hot gluing fabric until it is completely sealed. This creates the pin cushion part of the diy sewing kit. The best part of this diy pin cushion jar is that it also serves as a mini storage area for a small sewing kit.
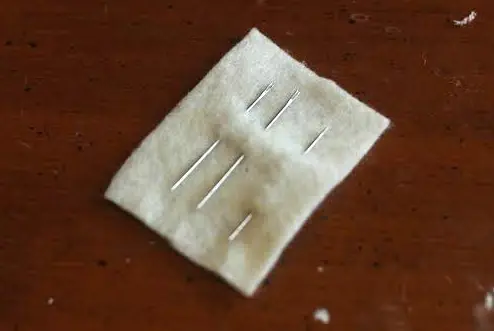
To keep the needles from rolling around in the jar, I cut a small square of felt cloth and pierced the needles through it.
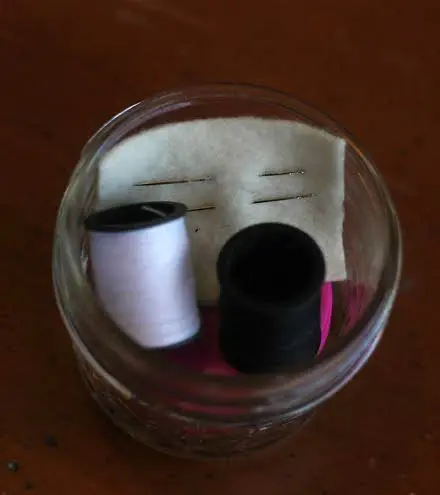
Fill your pin cushion sewing kit include a few basic necessities that will come in handy for popped buttons or loose hemlines- a small spool of both black and white thread, a small retracting measuring tape, straight pins, and a couple needles on fabric. Slip covered mason jar lid through ring and place on jar. Screw shut. Now you can tie a pretty bow and diy pin cushion sewing kit will be ready to gift!
Conclusion
A pin cushion is a handy sewing tool primarily used to hold and organize sewing pins and needles. Here are some specific ways to use a pin cushion:
1. Organizing Pins and Needles
- A pin cushion keeps pins and needles in one place, so they’re easy to access and safe from getting lost. It prevents pins from scattering on your work surface or floor.
2. Quick Access or Holding During Sewing
- A pin cushion is helpful when you’re sewing or quilting and need quick access to pins. When you’re cutting fabric and need to remove pins as you go, a pin cushion offers a safe spot to quickly stick them without losing track.
3. Separating Different Types of Pins or Needles
- If you have different types of pins (such as glass-head, silk, or quilting pins) or needles (like embroidery or hand-sewing needles), you can use different sections of a larger pin cushion or multiple pin cushions to keep them organized.
4. Preventing Injury
- By keeping your pins stored safely in a pin cushion, you’re less likely to accidentally prick yourself, especially compared to leaving them on your work surface.
5. Decorative Addition to Your Sewing Space
- Pin cushions can be made in endless styles and designs. A pretty pincushion can add a bit of fun and personality to your sewing room setup.
Pin cushions are simple yet essential tools, making sewing projects easier, safer, and more organized! These tiny pincushions make such a great project to make use of pretty scrap fabrics. You may want to get several mason jars because these make great gifts for sewing friends! Do you think you will make this easy pin cushion sewing kit in a mason jar?
If you enjoyed this craft tutorial, please follow me on Facebook and Pinterest so you don’t miss out on future crafts and diy projects!
Related Posts:
LeAnne says
Love this pretty pincushion. I will be making it as gifts! I’ll be writing “Sew Cute” on top in a cursive font with a fine tip Sharpie or embroidery thread if I get fancy. Thanks!
Scarlet says
What an adorable idea!
Jean says
What a great tutorial for an easy pincushion. I made several of these as gifts. I used larger mason jars and filled the jar with all the “odd” buttons I had laying around in my sewing box.
Scarlet says
Extra buttons are always useful. Great idea. Reminds me of the children’s book, “Buster loves Buttons”- a old favorite of ours.
Susen says
If you stuff it with new clean & dry (very important, no rusting) steel wool you will keep your pins & needles sharp. Cover jar lid with cloth or tape to keep 2 metals from reacting as well. Use a little larger jar & add small scissors & more to create a gift, for an emergency “sew job”, for a student. Use plastic jar for safer handling.
Scarlet says
Wow, that steel wool tip is so genius. I never would have thought of that!
Online indus says
What a delightful and creative tutorial! ✨ I love how easy-to-follow and detailed your steps are for making a DIY pin cushion. The use of photos and clear instructions makes it perfect for beginners and seasoned crafters alike. It’s such a charming project that not only helps keep sewing tools organized but also adds a personal touch to the sewing kit. I can’t wait to try this out and add some handmade flair to my craft space! Thanks for the inspiration! ✂️
Lucy says
This is such a cute and practical DIY project! I love how easy it is to make and how perfect it is for sewing beginners.