This is a step-by-step DIY origami crane decorations tutorial. This is an inexpensive way to add color and decoration to your walls. Try this tutorial whether you are looking to spice up your living room or add a delicate touch to a nursery! If you are looking for something to put on a wall or hang from the ceiling, there are two paper crane decor ideas below. Origami hanging decorations are a fun and easy project. These paper crafts are really fun for kids’ rooms and can be altered to color coordinate with the rest of the room decor. Have fun and enjoy!
2 Fun Origami Crane Decoration Ideas
Paper cranes are fun to make and probably the best know form of origami- the Japanese art of folding paper into a myriad of things. According to Alex + Ani, “The crane has always been a strong symbol of success and good fortune in Japanese culture, and when folded into origami, it is believed that your heart’s desire will come true.” Whether you enjoy the symbolism of paper cranes or you just enjoy the way they capture the imagination and fascination of children, origami crane decorations are fun ways to put the paper cranes to use.
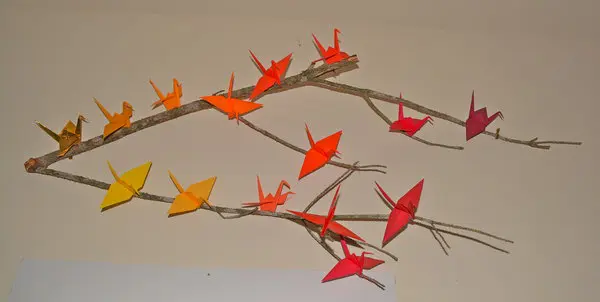
DIY Origami Paper Crane Decor for the Wall
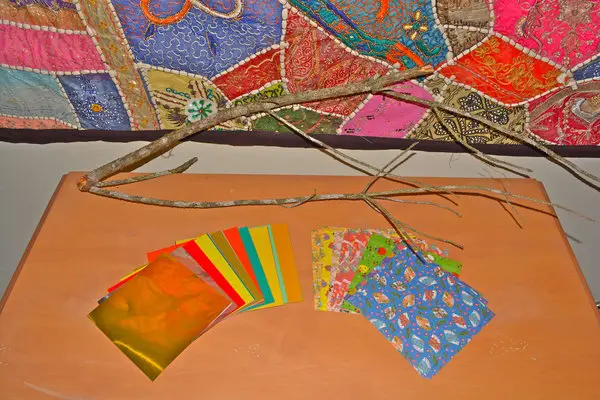
What you will need for these origami projects:
- Origami sheets of paper (5 7/8 in x 5 7/8 in)
- Branch from tree
- Glue gun
- String
- Spray paint (optional)
How To Make Origami Crane Decor for the Wall:
- First, find a branch. The more smaller branches it has the more cranes you can put on it.
- Optional, spray paint the branch a different color.
- Next, get your origami paper out and make some cranes! I chose to do a warm color ombre effect, but you can choose whatever colors you please.
- Get your glue gun ready and glue the cranes to the branch!
- Lastly, hang it on the wall and enjoy!
If you do not know how to fold origami cranes here is a great step-by-step tutorial with free origami instructions!
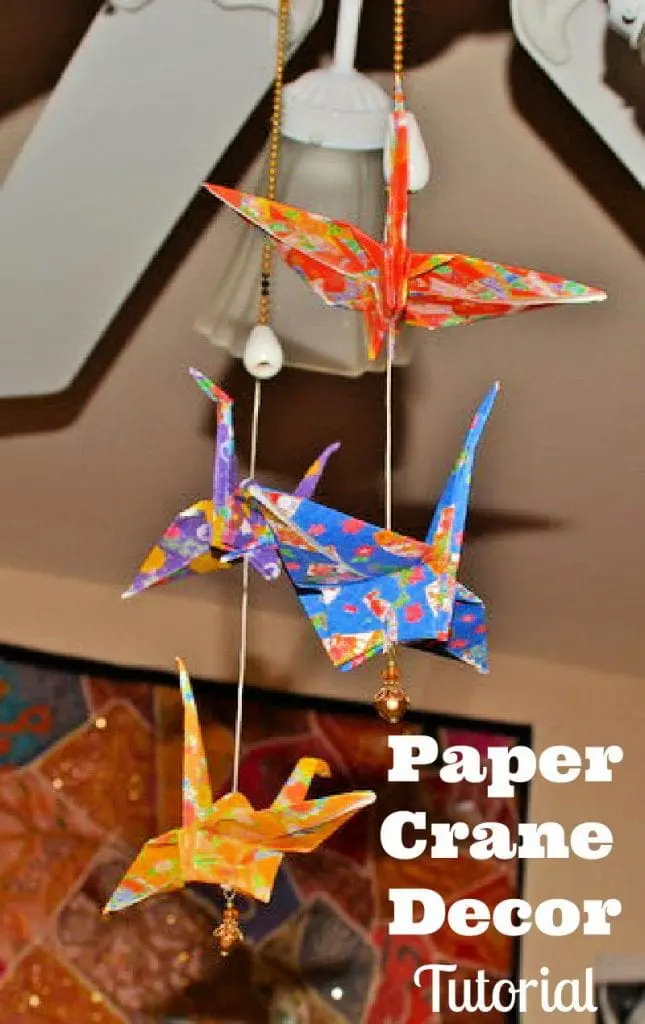
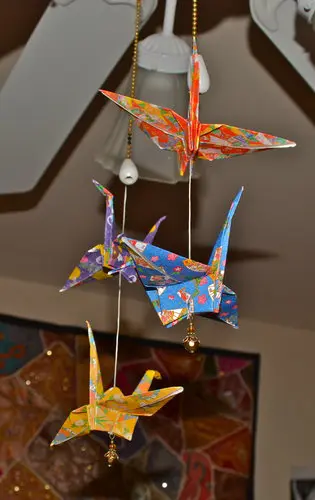
Crane Origami Hanging Decorations
A word on the paper:
Technically, you can make your own origami paper using gift wrap, scrapbook papers, or plain paper and cutting pieces of paper into the dimensions I specified above. However, I don’t recommend it as origami paper is the perfect weight and the precision of the edges will help you get your folds just right. Plus origami creations are often complimented by the beautiful patterns they have on the square sheet of paper.
Hanging Paper Cranes Decoration Instructions:
- Grab 4 to 5 sheets of origami paper and make the cranes. See the link above if you need a tutorial for making the cranes.
- Next, we will begin hanging origami. Use string and string it through the center of the crane. I suggest using embroidery thread and a large needle to make this easier. You can pass the same thread through multiple cranes for a stacked look.
- Secure them on the string by tying a knot at the bottom of it.
- Optional, add a small bead or jewel at the very bottom of the last crane.
- Now, hang! I personally like my paper crane hanging decoration off of my fan, but you could easily turn this into a mobile for a crib. These origami hanging decorations also work great to decorate a window frame.
8 Reasons To Enjoy Origami Decorations
- Aesthetics: Origami offers a unique and beautiful visual appeal. The intricate folds and designs can add elegance and charm to any space.
- Customization: Origami allows for endless customization. You can create decorations that match any color scheme, theme, or style.
- Cost-Effective: Making origami decorations is inexpensive. All you need is paper and some basic tools, making it a budget-friendly option.
- Creative Expression: Origami provides a creative outlet. It allows you to express your artistic side and experiment with different shapes and patterns.
- Versatility: Origami decorations can be used for a variety of occasions, such as birthdays, weddings, holidays, and more. They can be adapted to fit any event or celebration.
- Eco-Friendly: Using paper, especially recycled paper, for decorations is an environmentally friendly choice. It reduces waste and promotes sustainability.
- Interactive and Fun: Creating origami decor can be a fun and engaging activity for people of all ages. It can be a great way to involve family and friends in the decoration process.
- Educational: Origami can help improve motor skills, concentration, and patience. It’s a great way to learn about geometry, symmetry, and spatial reasoning.
Conclusion
These great decorations are a wonderful activity to do alone or with your child. They a creative way to enjoy quality time together practicing an art form. Do you enjoy making your own origami decorations? Which of these you origami crane decoration ideas do you like most? Which DIY origami crane decor idea will try first?
Related Posts:
Take the School Breakfast Challenge & Easy Origami Fruit Kids Will Love