My kids love face painting. We have stood in some of the longest lines at festivals and fairs because they wanted to get their faces painted. So this year, I am doing face painting for my daughter’s birthday party. I am excited because it is always a popular choice and lots of fun for me and the kids. It makes for memorable party photos too! In this post I will share with you my face painting tips, my Go Green face paint review, and my tutorial for tiger face paint. It is one of the most popular face paint ideas.
Face painting is fun because it allows people to express their creativity in a playful and imaginative way. Whether you’re transforming into an animal, a superhero, or something entirely unique, face paint opens up a world of possibilities. It’s an activity that brings out joy, especially at parties or events, where people can share their creations with friends and family. The temporary nature of face paint adds to the excitement, as each design is a fresh, new canvas, allowing for experimentation without the pressure of permanence. Plus, it’s a fun way to connect, especially for kids, bringing stories and characters to life!
How To Face Paint Tips
First, here are tips for using face paints.
*Don’t buy a cheap Halloween face paint. Professional face paint is a little more expensive, but it is so worth it because they are certified safe. That way you can rest assured that there are no hidden nasties or toxic pigments in the face paint.
*Professional face paints go on a lot easier and is easier to do more intricate designs with. It also comes out of carpet and clothes more easily.
*To keep costs down, just buy a couple of colors, like red, blue and yellow, and mix them together to make more colors.
*Use disposable cotton buds and make-up pads. Using different pads for different colors means you don’t have to wash out the pads during a painting session.
*Make sure you have plenty of photos of finished faces that kids can look at while they were waiting. This gives them time to make their minds up and also gives you a template to work from.
*Remember to take a mirror so the person who’s face you’ve just painted can see the result.
*Baby wipes work fast and easy for ‘mistakes’; you can also be assured they are safe to use on faces.
*Avoid letting paint dry on your brushes and utensils. Brushes, utensils, and hands can then be washed with soap and water.
*It is nice to have multiples brushes. A small round brush is very all purpose.
*Baby wipes come in handy for removing the initial layer of face paint. Then use face wash to get off any remainder.
Where To Buy Face Paint And Go Green Face Paint Review:
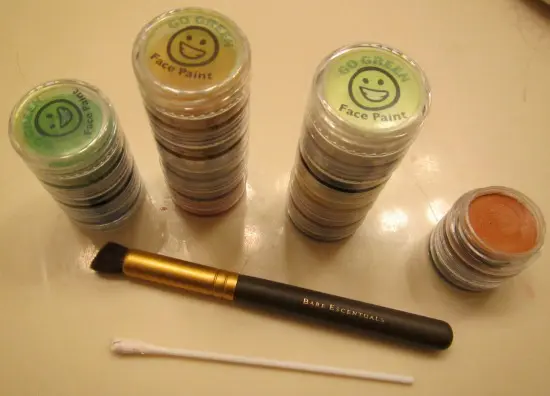
There are lots of places you can get face paints but I recently found one I am very pleased with. Actually, Go Green Face Paint found me and sent me a package of their certified organic face paint. I couldn’t be happier with this child safe, lead free, dye free, paraben free organic face paint that is safe for everyone. If you are looking to buy facepaint and you want to try their professional quality organic face paint, you can get it on Amazon. Here is my affiliate link.
Ready to unleash your inner tiger? In this step-by-step tutorial, you’ll learn how to create a striking tiger face paint look that’s perfect for parties, festivals, or just for fun! Whether you’re a beginner or have some experience with face painting, this guide will walk you through the process, from applying the bold orange and white base to adding the fierce black stripes and finishing touches. With a little practice, you’ll be able to transform anyone into a roaring tiger in no time! Let’s get started on bringing this wild creation to life!
Easy Tiger Face Painting Tutorial
Now, here are tiger face paint step by step instructions. Kids and parents will love this easy face paint idea!
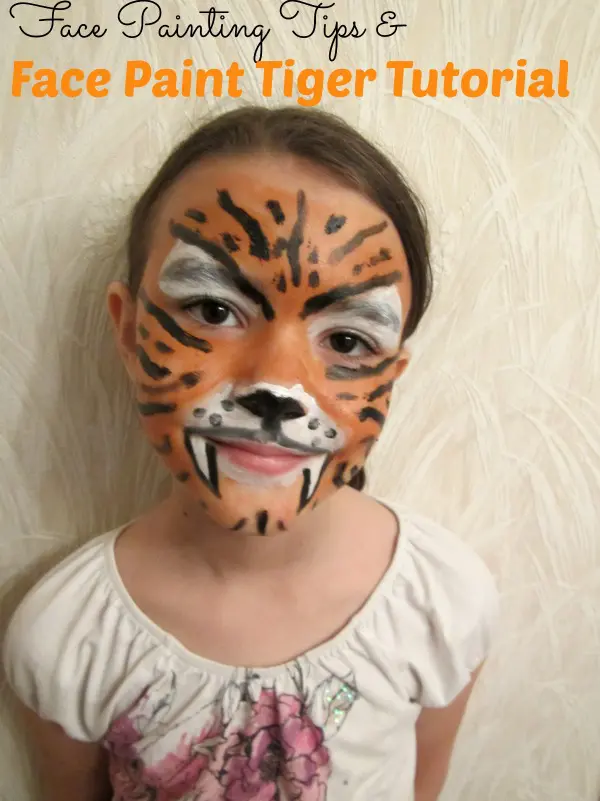
First, for this tiger face paint easy tutorial, you will want to use white paint. Apply it evenly on the eyelids and over the eyebrows making an upward triangle shape over the eyebrows.
Then use the white face paint around the mouth area downward from the nose and over the mouth towards the bottom of the chin.
Next, fill in the rest of the face with orange face paint. The entire face should now be covered.
Finally use black paint to add symmetrical black lines or stripes to the forehead, cheek area, and chin area. Outline the area around nostrils. Use the black face paint to draw a line straight under the nose to connect it to a thin black line over the mouth. Add black dots to the whisker area.
Use the picture as your guide. This simple design helps give you an idea of the general order that works best for the face paints.
Conclusion
To wrap up your tiger face paint tutorial, take a moment to admire your creation! Whether you’re preparing for a costume party, playdate, or special event, this bold and fierce tiger look is sure to impress. Remember, practice makes perfect, so don’t hesitate to experiment with different shades and line styles to make the design your own. Now that you’ve mastered the basics, you can add even more detail and depth in future attempts. Have fun showing off your artistic skills and unleashing your inner tiger! I hope you found these tips for how to face paint helpful. What animal or design is your favorite? I’d love to see how these tiger face paint ideas turn out on your kids’ face. Share a pic on social media @familyfocusblog!
Related Post:
If you’d like other face paint ideas, you may want to check out these directions for skull face paint and comic book face paint.


Emily @Random Recycling says
I’m so impressed with your face painting skills! I’m glad to hear Go Green Face Paint is a safe option, especially for next Halloween!
Annie {Stowed Stuff} says
My kids have NEVER had their faces painted, can you believe it? I think it all has something to do with someone else touching their faces!! You are amazing at it, however! I think I’d make a royal mess if I tried!
Pilar Clark says
SO GLAD to hear about this face paint. My kids love having their faces painted for Halloween, but I’ve relied on makeup that’s free from harmful chemicals instead. Excited to check out this new option!