When you become a parent, photography suddenly takes on new meaning. It is the way that you can capture and document the tremendous changes in your life and the addition of new little people that hold your heart. We bought a fancy camera straight away when my daughter was born. Digital photography is amazing because the quality is amazing and you can’t take too many photos! Digital photo storage is also so much easier. Do you know how to make the best use of your digital camera? It took me a while to get the knack of digital photography but practice helps improve your results. Today, I am featuring some really great digital photography tips for parents from PhotographyTalk to help you utilize your digital camera to get the best images.

Digital Photography Tips For Parents
The quality of your digital camera makes all the difference to the clarity of the photos. These digital photography tips should help you learn how to make the most of your digital camera and get fantastic photos of your kids.
Less is better!
Yes, that’s also true for photography. When talking about cameras and photography, the megapixels number is seen often. A large megapixel number can have negative effects such as an increase in digital noise, reduction in the dynamic range, and color degradation. This is especially true for compact devices that use small sensors measuring just a few millimeters per page. The importance of megapixels is in the print sizes they allow. More megapixels means larger prints are possible but fewer megapixels means lower image-noise often resulting in better photos. So high megapixels is really best for professional photographers while a lower megapixel number is better for amateur photographers.
Lenses
Looking for more digital photography tips? You want to make sure you are using the right lens for the photo. Most people view the zoom feature as an essential feature of the lens. However, zoom expressed in the form of 3x or 10x does not actually mean magnification. It tells the range between the minimum and maximum focal length of the lens. The focal length is exactly what you need to pay attention to. For the purpose of comparability of the lens on different sizes of sensors, most focal lengths are expressed in the equivalent of 35mm formats. Zooming too much can loose the clarity of the photo. The 35 mm is one of the most versatile lenses and therefore perfect for most beginners.
Stabilization
Stabilization is one of those things that are not necessary, but in certain shooting conditions makes a huge difference. To make the picture sharp, the camera should be completely immovable during shooting. Unfortunately, when we hold it in our hands, it always shakes as little, which is a particular problem for long exposures or at large focal lengths. When the whole device in your hands moves in one direction, the stabilization moves the lens or the sensor in the opposite direction. The stabilizer compensates for this movement and provides a sharp image. If you often shoot under conditions with less available light (dusk, night, indoors, etc.), then I recommend a stabilizer.
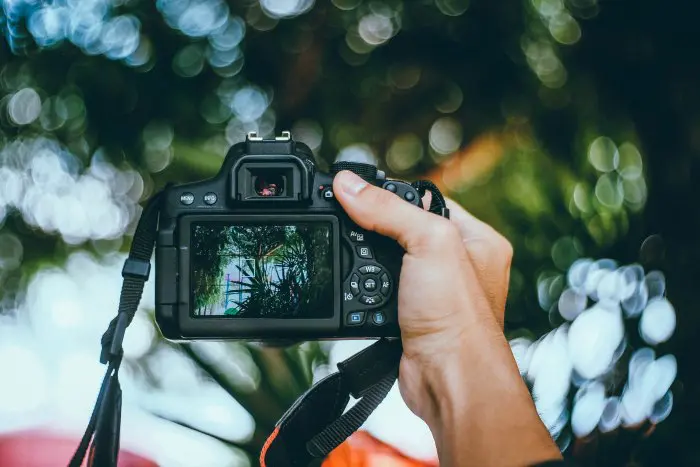
Photo by Kawin Harasai on Unsplash
Prime lenses
Prime lenses are fixed focal length lenses. The quality of the image of such lenses is the best that can be obtained for that focal length. Although they have a fixed focal length, they have the advantage in the aperture. Zoom lenses don’t go below aperture 2.8, and fixed lenses often have an aperture of 2, 1.8, 1.4 (and sometimes even more). Prime lenses have no competition for shooting in low light conditions. Also, they tend to create a bokeh effect that is just magical, a blurred light in the non focal image point. Because of these characteristics, it is also highly appreciated in the world of photography. If you are ready for slight more advanced digital photography tips, then I suggest you try prime lenses to help you capture the bokeh effect (like in the photo above). You will really love it.
Portrait Photography
Portrait photography, besides landscape, is the most common type of photography. A dual lens camera is something that may be the best option for a good portrait, as it gives the image a real sharpness, but preserves naturalness. Don’t worry. This is a feature that even many smart phones have these days (like the Galaxy Note8 and the Apple iPhone 7). A dual lens sensor collects information about the face and background illumination and then uses this information to expose the contour of the face. If your camera has a dual lens or portrait option, be sure to use it. When taking portrait photos, be sure to consider the story you want the photo to tell. You may want explore some family portrait ideas before the photo shoot so you will be ready.
AF lamp
The AF assist lamp is a very useful feature and I advise that you always use it. This is a small LED light that emits light to illuminate the subject and help it to automatically focus. It drastically accelerates focusing in the dark and keeps your images sharp. Many digital cameras come with an AF lamp built in to allow you take great photos in low light conditions for up to 10 feet. You may need an external AF assist lamp if you are trying to take photos in low light at greater distances.
3 Useful Tips for Taking Photos of Kids
You intend to remember your family just as they are. When your little one gets older, he will still be your baby, but he won’t be walking around in baby diapers anymore. Then, all you are left with will be the memories. Even while we grow older we have a tendency to forget all those wonderful events we’ve had with our children. Here are tips for taking photos fo kids so that your will beautiful photography that captures those memories.
As a busy mommy, I realize that I oftentimes overlook a few things now. Having digital cameras, it is now really easy to maintain your memories, in megapixels that is. Naturally, you will want every single photograph to appear beautiful. Allow me to share a few child photography tips and tricks I always use to shoot fantastic photographs of my family.
1. Get A Digital Camera
There are numerous types of cameras on the market, but you should know that the most effective kinds available are usually the digital style. They make taking photographs really easy and they’re fairly straightforward. There are a few things to make note of when thinking of purchasing a digital camera. Most of us are unable to actually hold a pen still, let alone a digicam. So look to see if the digital camera contains a feature allowing you to add it on a tripod.
Any tripod allows steady photographs at slower shutter speeds. Shutter speed is the amount of time your electronic chip comes in contact with light. The slower the shutter speed, the more light your chip utilizes to produce a brighter picture. A second setting in digital cameras will be the aperture. The aperture will be the diameter of the opening that
enables light to enter the digicam. The larger the setting, the more light goes into the digital camera, and the photograph is going to be brighter.
As a side note, you’ll want to have appropriate light also. Indirect lights are the best option. Stay away from aiming light at your kids. It’s going to make deep and ugly shadows.

2. Choose The Right Concept
When considering a theme type photo, make use of your natural environment and avoid working with props. Props really draw attention away from the center of your image. In case you are dressing up your children, be sure that they’re wearing outfits that are best suited not only for his or her age, but also for the concept. A different point to think about is the setting and its appropriateness for the theme.
3. Change Your Photographs Carefully
While uploading your photographs to the computer, it really is crucial that you examine them all and decide which ones you intend to work on. A program named Photoshop is a pretty well put together computer program that enables you to change your photographs.
You can eliminate spots and red-eyes with a click of a button. You can lighten up photographs or darken them. You can also get rid of portions of the photographs that are unnecessary, like the chair that magically showed up in your Christmas photograph. Check the help section of Photoshop to provide you with a greater understanding of the many cool options that come with the program.

An important factor to look at is the intent behind your photographs. Be mindful of this and then try to look at your photographs objectively. If you do this and also follow these suggestions, you will end up taking photographs of your kids like a professional portrait photographer.
I hope you found these tips for taking photos of kids to helpful in improving the quality of your photography.
Conclusion
I hope you find these digital photography tips useful to helping you get started and advance some of your equipment and techniques to get the photos you want. The great news is that if any of these was too far over your head, most digital cameras are so good that the auto focus feature will work great 90% of the time. However, these digital photography tips can really help you step up your game when you are ready. Also, don’t forget to print photos on to canvas for wall decor or into photobooks or even just prints. It is great to be able to hold your favorite photos!
Related Reading:
Food Photography Tips From Cookie And Kate
Tips For Taking Great Holiday Portraits
Hoang says
I have some problems with my digital camera. thank you for sharing the details on how I can use it best.
Varun Intec says
I have dslr camera i have some problem with my DSLR. But your blog has solved my problem your blog is very nice thanks for share this blog with us