This is a step-by-step tutorial for stage and screen FX wound and burn makeup. Halloween is coming up soon and if you are like me you take pride in creating costumes and dramatic makeup! Whether you want to be a zombie for Halloween or you just want to scare your friends give this tutorial a try. You will be surprised how little time this FX makeup takes to make and how inexpensive it is!
How To Apply FX Wound and Burn Makeup:
Creating realistic FX wound and burn makeup can be an exciting and artistic endeavor, often used in film, theater, and Halloween costumes. Here’s a basic guide to get you started.
FX Wound and Burn Makeup Supplies:
- Liquid Latex
- Tissue or thin toilet paper
- Grease makeup
- Foundation
- Liquid Blood
- Makeup sponges
FX Wound and Burn Makeup Instructions:
- Begin by choosing a place to make your wound. Avoid sensitive areas and areas with a lot of hair. Then cleanse the area.
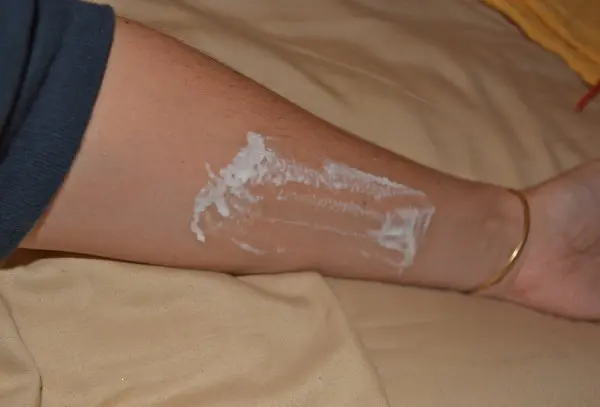
- Using a makeup sponge add a layer or two of liquid latex. Let the layers dry in between applications.
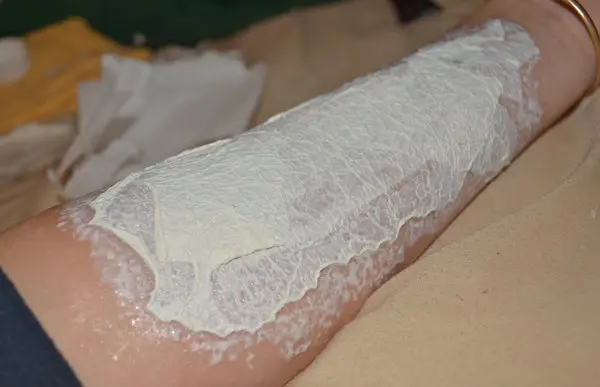
- Next we will build the wound. Put down a layer of liquid latex and add thin layers of tissue or toilet paper on top of the wet liquid latex. Add just 2 or three layers of the tissue or toilet paper and let these layers dry in between application.
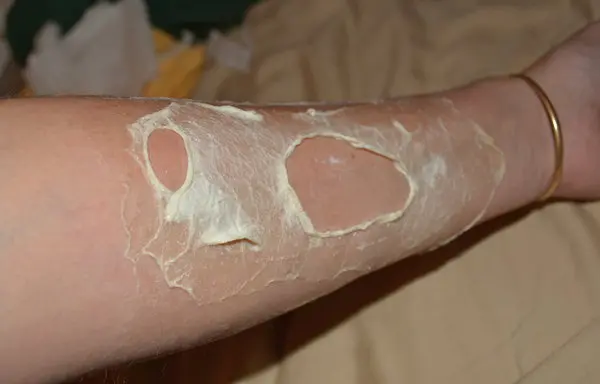
- Once you have done this you can add holes and tears to give the wound depth. I also like to push the edges of the liquid latex toward the center of the wound in some areas.
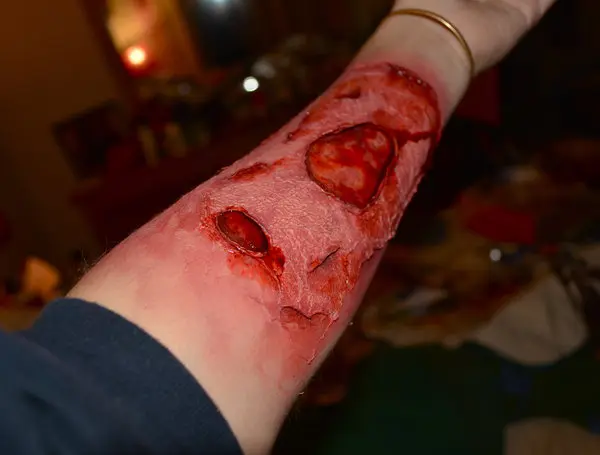
- Once you have the overall look of your wound complete it is time to add some color!
- Begin by using a foundation that matches your skin tone and cover the entire wound. This will make the grease paints look more natural on you.
- Start with your lightest red and a makeup sponge. Then cover the majority of the wound and even outside of the wound with this light red.
- Then move to your second darkest and add definition and depth in certain areas. Start to concentrate the darker colors in and on the areas that you cut earlier. I used a light red, a dark red, a purple and a black. Tip: If you do not have grease paint you can most certainly use eyeshadows and lipsticks!
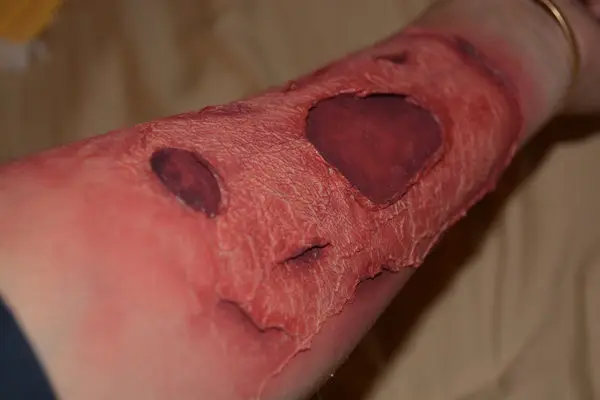
- And for the final touch add some fake liquid blood to the wound!
Costume Makeup Tips and Tricks
- Test for Allergies: Always test liquid latex or any makeup product on a small patch of skin before applying it extensively to ensure there are no allergic reactions.
- Layering: Build up layers slowly to achieve a more realistic effect.
- Blending: Blend the edges of your makeup well to make it look like it’s part of your skin.
- Reference Images: Use images of real wounds and burns as references to make your makeup more realistic.
- Practice: The more you practice, the better you’ll get at creating realistic effects.
With patience and practice, you can create stunning and convincing FX wound and burn makeup for theater or Halloween costumes. Have you ever done FX makeup before? Would you try out this FX wound and burn makeup tutorial for Halloween? If you do be sure to show us your creation @familyfocusblog!
Related Posts:
Easy Comic Book Makeup Tutorial