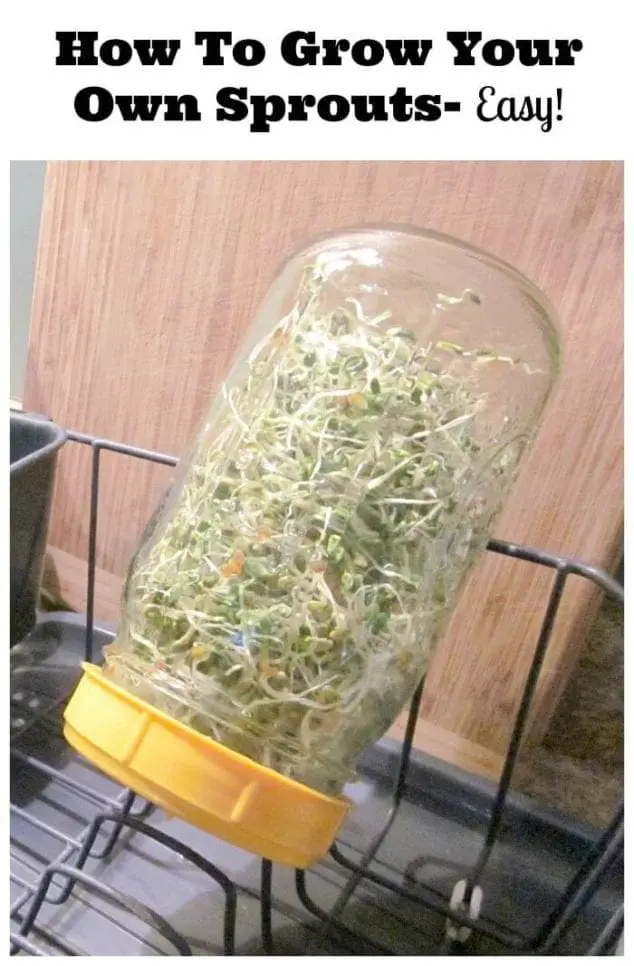
Growing your own sprouts is a great way to add fresh greens to your diet. You can’t get any fresher than sprouts that you grow yourself which means the sprouts are going to be packed full of fresh enzymes and nutrients such as vitamins, minerals, amino acids, and phytochemicals. A great thing about sprouts is that everyone can grow sprouts any time of the year so if you don’t have room for a garden or if you have limited container gardening space, you can always grow sprouts right in your own kitchen. Here is how to grow sprouts using the jar method in 6 easy steps.

What You Need To Grow Your Own Sprouts
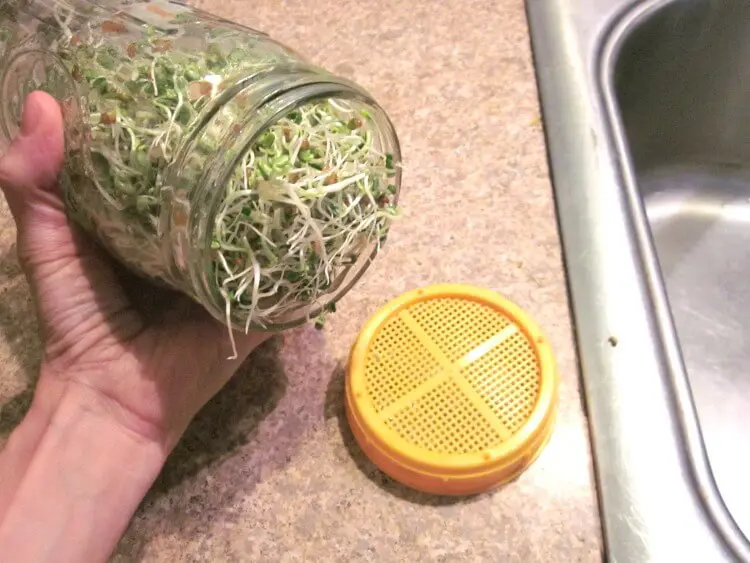
All you need is a mason jar, water, and a mesh lid or cheesecloth to start sprouting! A great starting sprouting seed is alfalfa. It’s easy to sprout, grows quickly, and has a mild flavor, making it perfect for beginners. You can use it in sandwiches, salads, or wraps. Other beginner-friendly sprouting seeds include broccoli sprouts. They are packed with nutrients and easy to grow.
Sprouts are easy to grow, inexpensive and just take a few days. You can often buy sprouting seeds at your local health food store or you can search for them online with the keyword “sprouting seeds”. Make sure you get seeds labeled as “sprouting seeds” to ensure they’re safe and free from harmful chemicals. There are lots of varieties to try and each one tastes different so it will be fun for you to try them out and you can even create your own mixes when you discover what you like best. Some of my favorite sprouts to grow are alfalfa, broccoli, clover, radish, fenugreek, and watercress.
You will also need to have a quart size canning jar on hand. The only special equipment I suggest is a screen cover for the lid which can usually be purchased where sprouting seeds are sold. Or you can use my affiliate amazon link. You could use cheesecloth and a rubber band instead but mesh covers are generally better than cheesecloth for growing sprouts due to their convenience and effectiveness. The fine holes in mesh covers allow for excellent water drainage, reducing the risk of mold or sliminess.
How To Grow Your Own Sprouts In 6 Steps
- Pour 2 tablespoons of your selected sprouting seeds into the bottom of your quart sized canning jar.
- Rinse– Add 3 cups of filtered, cool water (60-70 degrees works well) and screw the screened lid onto the glass jar and then swirl the seeds around for a minute or two.
- Drain– Allow all of the water to drain out through the screen.
- Soak– Add 3 cups of filtered, cool water and let sit for on the countertop for the recommended time (usually 4–12 hours, depending on the seed type.)
- Now your sprout seeds are ready to be drained, rinsed, and drained again using the methods mentioned above. You should do this 2-3 times a day for 3-5 days until you are happy with the size and greenness of your sprouts.
- After each drain, rinse, drain procedure, which should only take about 3 minutes, you will need to store your bottle upside down at an angle. I use the dish rack for this but you could also use a bowl.
Once harvested, store sprouts in an airtight container in the fridge for up to a week.
Notes:
- It is important to rinse thoroughly and to drain thoroughly. Ensure the jar is tilted upside down to allow excess water to drain completely. Too much water can lead to mold; ensure proper drainage and airflow.
- Use a breathable cover (like a sprouting lid) to keep airflow while keeping pests out.
- Don’t put sprouts in prolonged direct sunlight as you may cause them to dry up. Indirect sunlight will still allow them to green.
- Sanitize jars and lids between batches to prevent contamination.

When And How To Harvest Sprouts
Sprouts grow in just a few days, require minimal space, and don’t need soil or sunlight. You can grow them indoors year-round, ensuring access to fresh greens anytime. You’ve got to love that all-season freshness and convenience.
When you sprouts have reached the desired the size and greenness, you can rinse them, eat them and store any extras in the refrigerator. Drain well first and place a paper towel below the sprouts to help keep them from sitting in water. Sprouts should last for about 5 days in the refrigerator. Sprouting is an inexpensive and nutrient-packed way to add fresh greens to your meals!
Conclusion
Growing sprouts is easy and rewarding! A small amount of seeds produces a large yield, making it a budget-friendly source of fresh greens. As a cool bonus, it is sustainable because it requires little water and no packaging or transportation, reducing your carbon footprint.
Sprouts are rich in vitamins, minerals, and enzymes, often more concentrated than in the mature plant. An added benefit besides the health benefits of growing your own sprouts is that children get to witness first hand the beauty of a tiny seed beginning to grow into a plant and it grows out of soil so they can really watch it happen! In a few days when the sprouts are ready, your children can also help harvest their own meal as you add the sprouts to sandwiches or salads.
Fresh sprouts add crunch, flavor, and nutrients to salads, sandwiches, smoothies, wraps, and stir-fries. There are lots of sprout recipes you may want to try. What is one of your favorite ways to eat sprouts? Have you ever tried growing them before or do you think you will now? My favorite sprouts to grow are alfalfa sprouts and broccoli sprouts because they are done in about 3 days and they taste good with so many dishes. What are your favorite sprouts to grow?
Related Posts:
Thrifty Herb Window Gardening
Teaching Kids Gardening
Vegetable Gardening For Beginners

Ike Mceach says
Growing sprouts at home is not only a sustainable practice but also a delightful journey into the microcosm of life. This guide beautifully captures the essence of nurturing nature’s bounty within our own kitchens, emphasizing the nutritional richness and environmental consciousness that comes with it. The simplicity of the jar method is both accessible and inspiring, encouraging us to embrace a more self-sufficient lifestyle while enriching our diets with fresh, enzyme-packed greens. Bravo to the author for reminding us of the joy and health benefits that can sprout from such a small endeavor.
Kris says
Great post! Growing sprouts at home is such a rewarding and budget-friendly way to add fresh, nutritious ingredients to your meals. I love how versatile sprouts are—they’re perfect for salads, sandwiches, and even smoothies. One tip I’ve found helpful is rinsing them gently but thoroughly twice a day to keep them fresh and prevent mold. Also, experimenting with different seeds like alfalfa, mung beans, or broccoli sprouts keeps it fun and flavorful. Thanks for sharing your insights—it’s always inspiring to see others enjoying the sprouting journey!
Hannah says
Thanks for sharing the sprouting process. It as as easy as you said it would be. I am a huge fan of homegrown sprouts especially mung beans and spicy radish sprouts.
Harry says
I absolutely love this guide on growing your own sprouts! It’s so simple and easy to follow, making it perfect for beginners like me. I had no idea sprouting at home could be this quick and cost-effective. Thanks for sharing such helpful tips—can’t wait to try this out and add fresh sprouts to my meals!