Cold-process soap making can be a fun activity and homemade soap helps ensure that you know exactly what is in your soap! With Cold-Process Soap Making you mix up everything, and the chemical reaction of the lye heats up the mixture and “magically” makes soap. I hope these soap making tips and this cold process soap recipe helps you make your own homemade natural soaps. Have fun and fall in love with the process of making your own soap!
What is cold process soap? Cold process soap making is a method of creating soap from scratch using natural ingredients and without the need for external heat. The process involves saponification, where oils and lye react to form soap and glycerin.
This guest post is from Deborah Niemann, author of thriftyhomesteader.com and “Homegrown & Handmade: A Practical Guide to More Self-Reliant Living.” The Homegrown and Handmade book (affiliate link) shows how making things from scratch and growing at least some of your own food can help you eliminate artificial ingredients from your diet, reduce your carbon footprint, and create a more authentic life. Whether your goal is increasing your self-reliance or becoming a full-fledged homesteader, it’s packed with answers and solutions.
How to Make Homemade Bar Soap Using the Cold-Process Soap Making Method

Before starting to make your own handmade soap, make sure you have all of the ingredients on the counter and ready to be used.
Cold Process Soap Making Preparation:
Do you have a bottle of vinegar available for safety in case a little lye splatters on your skin?
Are your molds ready to receive?
If you have purchased professional molds, such as little animals or flowers, they may need to be sprayed with oil to make it easier to unmold the soap.
If you are using a wooden boxor loaf mold, you should line it with freezer paper or the soap will stick to it and be a challenge to remove.
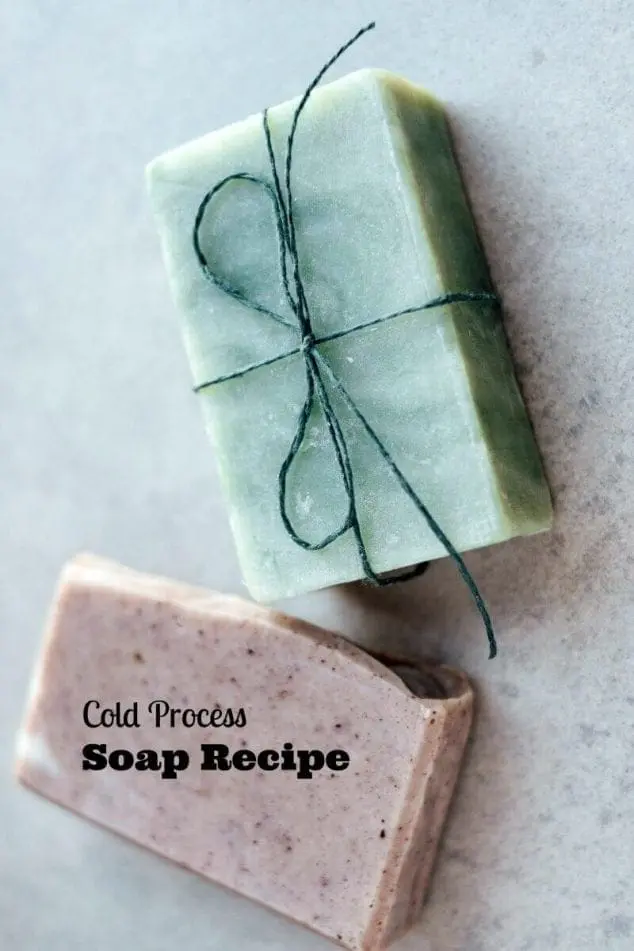
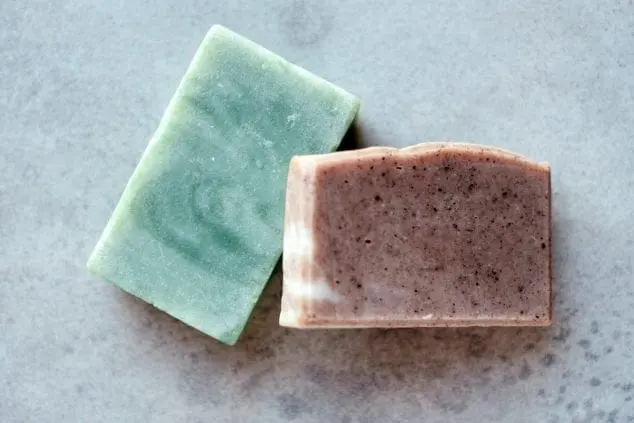
Castile Cold Process Soap Recipe:
Castile bar soap is one that is made mostly or entirely of olive oil. This cold process soap recipe contains 54 percent olive oil. I think it is the best soap recipe. It is the first soap recipe I created, and to this day, it is still one of my favorites for showering, washing hands, and washing my face. Makes twelve 5-ounce bars of Castile Soap.
The recipe can be doubled if you want a larger batch. However, I recommend you only make this amount for your first attempt at soap making. This quantity is easier to work with, and if the batch doesn’t turn out well, you haven’t wasted much oil or milk. Soap making recipes are NOT like cooking recipes, where you can substitute one type of oil for another. Saponification values are different for different oils. You should always use the oil indicated in the recipe!
Cold Process Soap Ingredients:
- 24 ounces olive oil
- 8 ounces palm oil
- 8 ounces coconut oil
- 4 ounces sweet almond oil
- 13 ounces partially frozen goat’s milk
- 6 ounces lye (available at stores like Walmart or through my affiliate Amazon link)
- 2 ounces essential oil (if desired—lavender, orange, or grapefruit work well)
This is a goat milk soap recipe cold process. While goat’s milk is a popular ingredient due to its moisturizing properties and gentle nature, you can use a wide variety of liquids and ingredients to create soap. For example, you may substitute oat milk as it is soothing and gentle, especially beneficial for sensitive or irritated skin. It also adds a mild exfoliating effect.
Step-By-Step Instructions For How To Make Cold-Process Soap Bars
1. Melt Oils
If the recipe (such as this Castile soap recipe) includes any oils that are solid at room temperature (like palm oil or cocoa butter), weigh them and put them in a stainless steel pot on the stove. Heat just until melted and turn off burner. Weigh liquid oils and add them to the melted oils and stir. The temperature should be between 100F° and 120°F, unless you heated the solid oils more than necessary. If it is above 120°F, wait until the temperature is down to 120°F before moving on to the next step.
2. Add Lye To Goats Milk (CAREFULLY- follow instructions)
I suggest wearing rubber gloves and long sleeves for this step. Put frozen goat milk chunks into the 8-cup mixing bowl or pitcher. Weigh lye (sodium hydroxide) and slowly add it to the frozen goat milk chunks, and stir gently until lye is completely dissolved. The lye will melt the frozen milk within two or three minutes. You must ALWAYS add lye to the liquid. Never pour any liquid into lye because it could cause a violent eruption resulting in injury. The temperature should be between 100°F and 120°F when the milk is melted and all of the lye is dissolved. The more frozen the milk is when you add the lye, the closer you will be to this temperature range. If the temperature goes above 120° F, wait until the temperature is down to 120°F before moving on to the next step.
3. Pour lye mixture into the oil mixture.
Gently pour the lye mixture into the oil mixture. Using the stick blender, mix the lye solution and oil. If you are adding anything else—oatmeal, herbs, essential oils—do it now. The warmer the temperature of your oils, the faster the mixture will reach trace, which is when you will pour it into the mold. If you are new to soap making, you may want to work with oil temperatures closer to 100°F. Some fragrance oils will accelerate trace, which is a good reason to start with either unscented or a single essential oil for your beginner batches. The mixture has reached trace when it is the consistency of a thin pudding. When you lift the stick blender from the mixture, drops and dribbles will sit on the surface rather than disappear into liquid.
4. Pour Soap Into Mold
Now is the time to pour into the soap mold. If the mixture gets to the consistency of mashed potatoes, it has seized and will be too thick to pour. You will need to spoon it up and mash it into a mold. It won’t be pretty, but it will turn into soap, and you can still use it.

5. Cover with wax paper.
After pouring the soap into the mold, you can cover it with a piece of wax paper or freezer paper to keep ash from forming. This is exactly what it sounds like—a white powder that forms on the top of the soap as it dries. Ash is harmless, but some people don’t like the way it looks, and it can easily be avoided if the surface is not exposed to air during the first 24 hours as it saponifies.
Most soap making directions use water to dissolve the lye and will tell you to insulate your molds with a blanket or multiple layers of towels at this point. Do NOT do this when making soap with milk. Milk causes the soap to heat up more than a lye-water mixture. If the soap overheats in the mold, it will rise like bread, and there will be a tunnel through the center of the loaf. It’s not pretty, but it is not harmful either.
6. After 24 hours, you can slice soap.
Let the soap sit for 24 hours in a safe place where children and pets can’t grab it or knock it over. After 24 hours, it can be unmolded and sliced. Depending upon the recipe, you might be able to slice the soap a month later, but many recipes require the soap to be sliced as soon as possible. I once made the Gardener’s Scrub Bar at a conference, then brought it home and forgot about it for six weeks. At that point, it was like trying to slice a six-pound hunk of chocolate. Each time we tried to slice it, it would crumble and break off in chunks. A wire cutter works great for slicing.
7. Air Dry
Place bars on a wire rack or shelf to air dry for three or four weeks before using. The following recipe will fill two regular size cardboard potato chip cans. If you use them as molds, they do not have to be lined or sprayed. After twenty-four hours, peel away the sides of the can from the soap, starting at the top edge.
Follow the soap making instructions above to make this Cold Process Soap Recipe. Enjoy!
Benefits Of Cold Process Soap
- Natural Ingredients: Cold process soap can be made with a variety of natural ingredients, allowing for customization and control over what goes into your soap.
- Gentleness: Properly cured cold process soap is gentle on the skin, often free from synthetic additives and harsh detergents found in commercial soaps.
- Customization: You can create unique recipes tailored to specific skin needs, adding ingredients like oatmeal for exfoliation, aloe vera for soothing, or essential oils for aromatherapy.
- Artistic Expression: The method allows for creative designs and patterns, making each bar unique.
- Sustainability: Making soap at home can be more environmentally friendly, reducing packaging waste and allowing for the use of sustainable ingredients.
- Economic: While there is an initial investment in materials and equipment, homemade soap can be more cost-effective in the long run.
Cold process soap making combines the benefits of natural, gentle skincare with the satisfaction of a creative and sustainable hobby.
Related Posts:
Sterling says
Hello there, You’ve done an excellent job. My first batch of soap turned out great. I love the variety of oils and fats used in this Cold Process Soap. It feels so creamy and gentle on my skin. Plus this soap recipe was so fun to make. I think I have found my new hobby! I will certainly digg it and personally suggest to my friends. I am sure they’ll be benefited from this informative website.