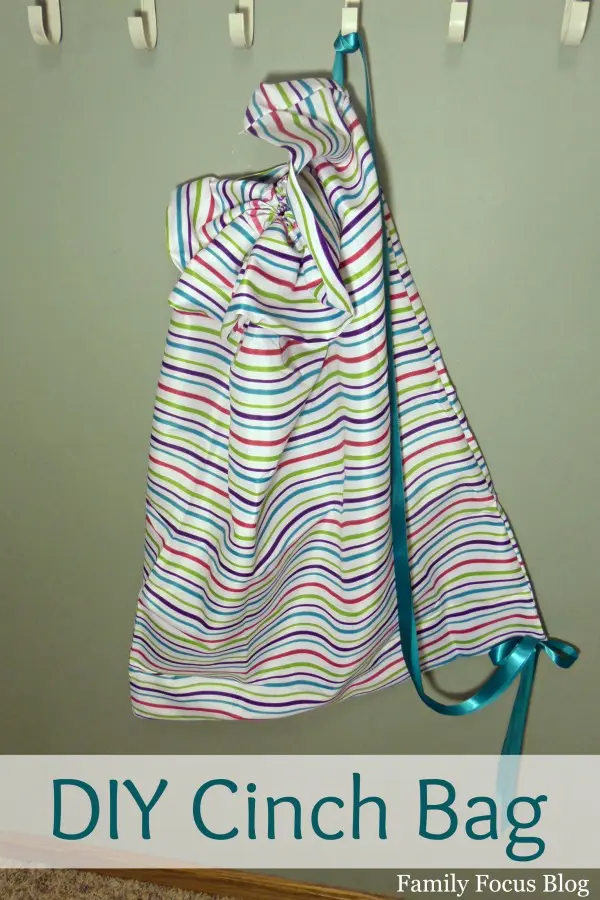
My daughter loves cinch bags and thinks there is no such thing as having too many. We were recently looking for a fun, affordable gift to make for a classmate and decided on a DIY Cinch Bag. These cinch sacks are easy to make from a pillowcase and ribbon. If you have a sewing machine, this will only take a few minutes! If you don’t sew, I provide a no-sew alternative that takes just a bit longer. Pillowcases come in so many sizes, colors, and patterns that make these DIY bags so much fun to have!
This post was first published on December 27, 2014. I have republished it to make it easier for my new readers to find this clever DIY bag tutorial.
What is a cinch bag?
A cinch bag is basically a DIY drawstring backpack. They are sometimes called a sinch bag, a cinch backpack, or a cinch sack bag. They can be carried as a messenger bag, a backpack, or just over the shoulder. Cinch bags pull shut (cinching up the fabric around the strings) so there is no need for installing zippers. These custom drawstring backpacks use ribbon for the shoulder straps. These cinch packs make a great bag for carrying a water bottle, or a few school supplies, or a change of clothes for the gym.
A cinch bag, also known by several other names, can be called:
- Drawstring bag – Named after the string that cinches the bag closed.
- Gym sack – Popular for carrying workout clothes and gear.
- String backpack – Functions like a backpack, but with drawstring straps.
- Stuff sack – Often used for compressing and packing items, especially in camping or outdoor activities.
- Sling bag – Refers to how it is worn, typically slung over one shoulder.
Homemade Cinch Bag (DIY Drawstring Backpack)
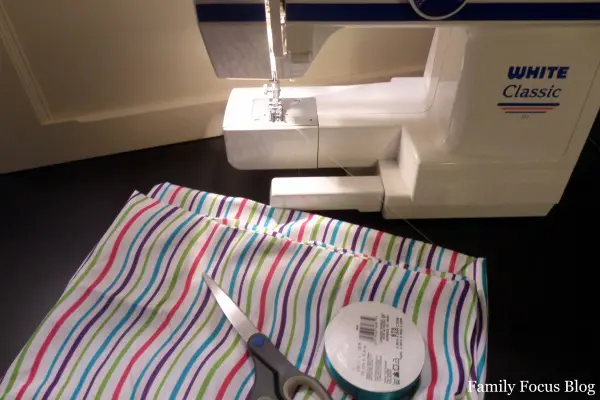
Supplies:
- 1 pillow case
- 1 spool of ribbon
- sewing machine, needle, & thread
- scissors
- safety pin
How To Make A Drawstring Backpack From A Pillowcase
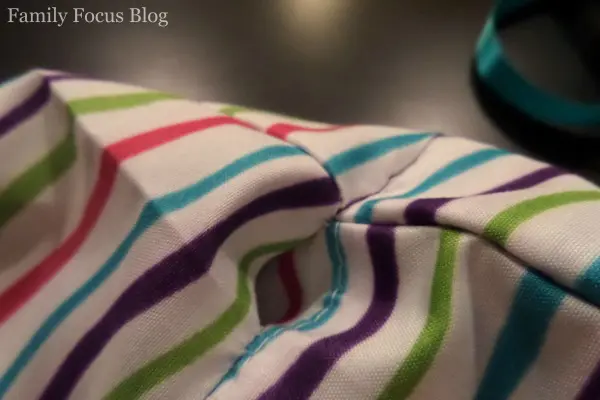
Begin your cinch backpack by folding the opening of the pillowcase down approximately 4″.
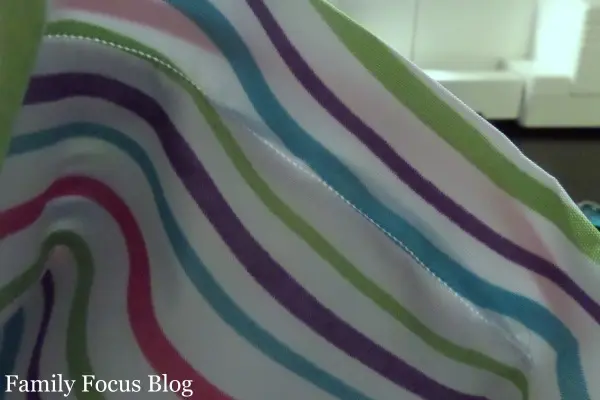
Use the sewing machine to stitch a seam 1″ in from the folded edge. If you need a no sew option, you can use some of that iron on seam tape for the same effect but it won’t be quite as sturdy and long lasting.
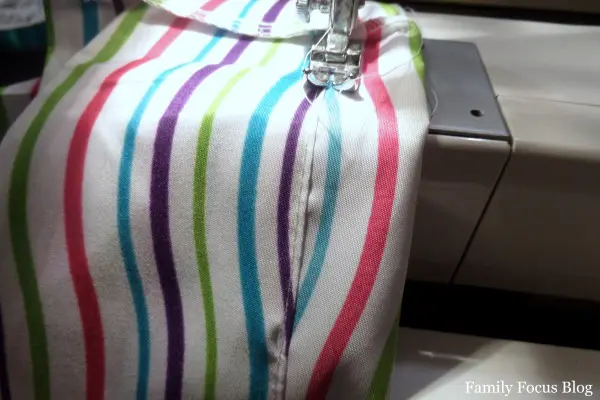
Stitch all the way around the opening leaving a 1″ space that will create an opening for the drawstring ribbon.
Attach a safety pin to one end of the ribbon and carefully feed the ribbon through the pocket you created in the pillowcase.
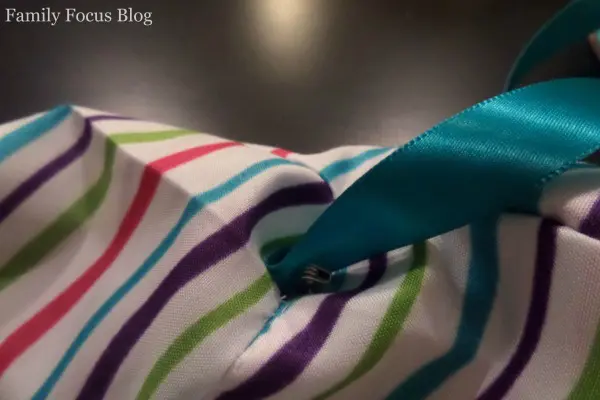
Pull the ribbon out of the opening when you’ve made your way all the way around.

Carefully pull enough ribbon through for the opening of the bag to be completely open with the two ends of the ribbon able to reach 8″-10″ past the bottom of the bag.
Smooth the ribbon out, laying the two pieces over each other, and carefully sew them to the bottom corner of the bag.
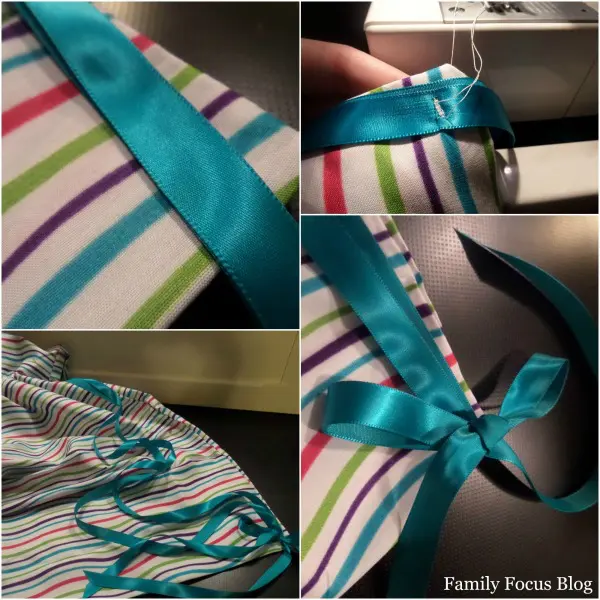
Secured the ribbon at the corner and then tie a tight bow. You can tack the bow into place with a few stitches or simply leave it tied tight. Trim the ends of the ribbon on an angle or knot them to prevent fraying.
Pull the ribbon to cinch the top of the bag closed! And that is how to sew a drawstring bag in just minutes!
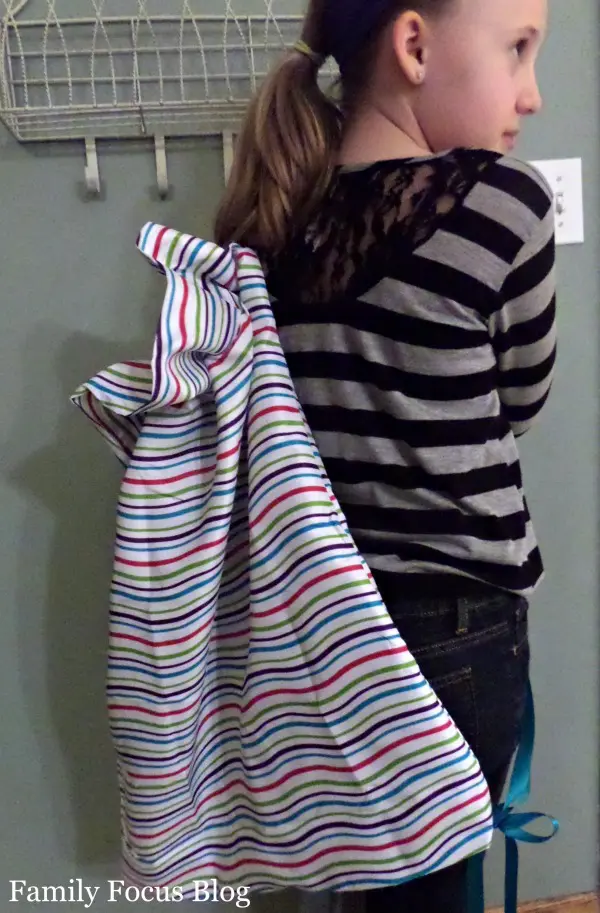
How To Wear The DIY Cinch Bag
You can wear the DIY cinch bag three ways. First, you can separate the two ribbons on this drawstring bag and wear it like a backpack. Second, the two strings can be left together and put over the shoulder. Third, leave the strings together and wear as a messenger bag.
Conclusion
Here are five reasons to make a drawstring bag:
- Customizable – You can personalize the size, design, and fabric.
- Budget-friendly – Cinch bags are relatively easy and inexpensive to make.
- Practical – They’re lightweight, portable, and great for a variety of uses like gym gear, groceries, or day trips.
- Eco-friendly – Making your own reusable bag reduces the need for plastic or other single-use bags.
- Great for Gifts – A homemade cinch bag can be a thoughtful and functional gift.
Full sized pillowcases are great for sleepover bags or for storing dress up clothes. Travel pillowcases usually come with a zipper and are a bit smaller for holding every day small personal items. If you’re daughter is like mine, she’ll want several in different sizes and colors and to make them for her friends too! For less than $5 per bag and only 20 minutes of time, you won’t mind making several of these DIY cinch bags. Would you be interested in making one yourself?
Related Posts:
julie says
Cute cinch bag. My daughter also loves bags. I was looking for ideas for a bag to put her small dolls and little dog toys she got for Christmas.This bag would be ideal for them and then she can take them to church or when out and about by carrying them on her back. thanks for sharing.
Arkashya says
Awesome article. I like your ideas to make custom drawstring bags as gifts.
chandra sinha says
The blog article was concise yet covered all the important points. It saved me time and provided the information I was looking for.
Alan says
This was so nice. Also your red light therapy blog was so nice.
Monroe says
Such a useful article. These drawstring bags would be great for carrying personal items for a sleepover. Or gym class.
Rach says
Awesome blog and I am going make for my friend’s children.
Jack says
Wow thanks for this idea and I creating new stuff.