There’s something magical about a handmade flower crown—whether you’re dressing up for a festival, a wedding, a picnic, or just celebrating the beauty of nature. This DIY project is fun, creative, and surprisingly simple to make. With just a few supplies and your favorite fresh or faux blooms, you can craft a custom crown that adds a touch of whimsy and charm to any occasion. Let’s dive into the easy tutorial where we help with the step-by-step process to create your very own flower crown masterpiece!
This floral crown tutorial was first published August 10,2014. I have made a few updates and shared it here for my new readers to enjoy.
DIY Flower Crown Tutorial
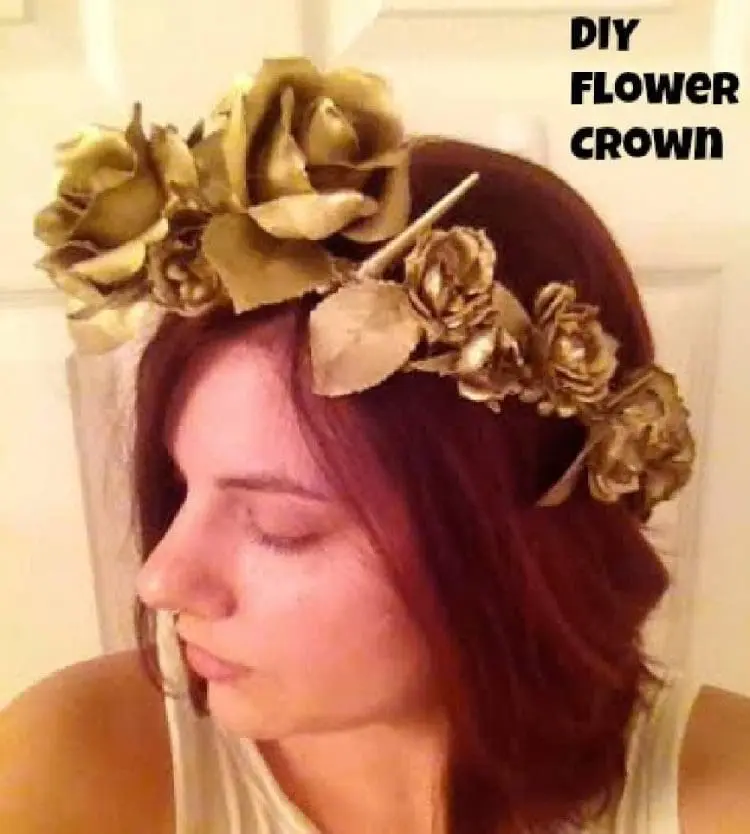
This is a step-by-step tutorial for how to make a DIY flower crown, an easy and affordable craft to complete. You can use this flower crown tutorial with real fresh flowers or fake flowers. Of course, artificial flowers will make the homemade flower crown so that you can use it over and over again. You may also chose different colored spray paints for your own flower crown to match any theme or outfit. This floral crown is perfect for special occasions.
Floral Crown Craft Supplies:
- Faux roses
- Floral Wire
- Plastic spikes optional
- Pearl beads optional
- Gold spray paint
- Wire cutters
- Hot glue gun (my affiliate Amazon link)
You can customize your craft supply list to meet your needs. For example, different types of flowers may be used from tiny baby’s breath to large flowers. Real flowers or faux flowers. This DIY flower crown tutorial is customizable to suit your type of flower and type of crown. These flower crowns are a beautiful addition to wedding hairstyles.
How To Make A Flower Crown:
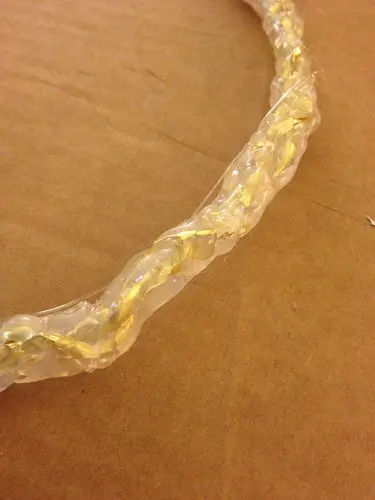
- Measure your head using the wire. Using a wire cutter, cut 3 pieces a bit longer than the length of the circumference of your head. Braid the floral wire together and bend into a circular shape. This will provide the base of your crown structure.
- Next, using a glue gun cover the entire crown in glue and let dry. The hardened glue is a great way to give more structure to the crown base as well as making it softer on your head. The glue covering will prevent the wire from poking you or getting stuck in your hair. It works better than floral tape for those same reasons.
3. Now it is time for the fun part! Clip the roses from the flower stems and decorate around the crown. I suggest getting two or three different sizes of flowers and using the large blooms for the front of the crown and the smaller flowers towards the back.
4. Add the spikes using the glue gun. This will make the roses and crown look like it has thorns.
5. There should be some empty spaces left; fill those spaces with leaves from the left over bouquets.
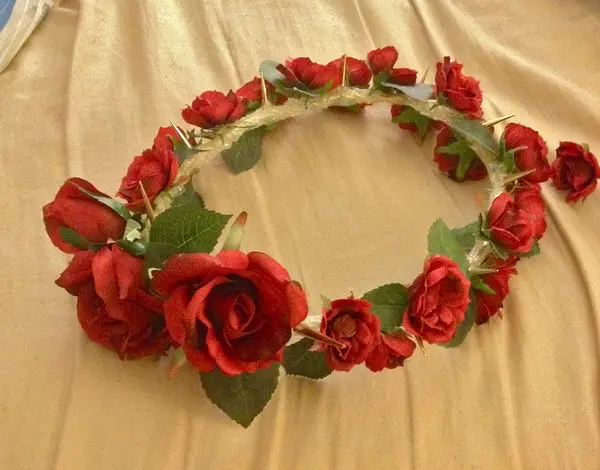
6. Add in pearl beads to fill in extra space if needed. This will add extra dimension and a touch of delicacy. Alternatively, you could use small filler flowers.
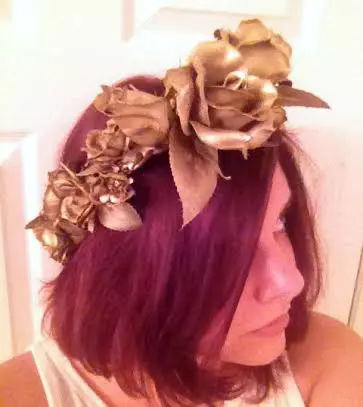
You have now completed the flower crown tutorial unless you would like to cover the whole thing with an optional coat of spray paint. I chose to coat my homemade floral crown with a gold spray paint. This works perfectly for getting a gilded look which is well suited to classical Greek costumes with togas.
7. In a well ventilated area, spray paint the entire crown. All to dry. You may want to do a few coats.
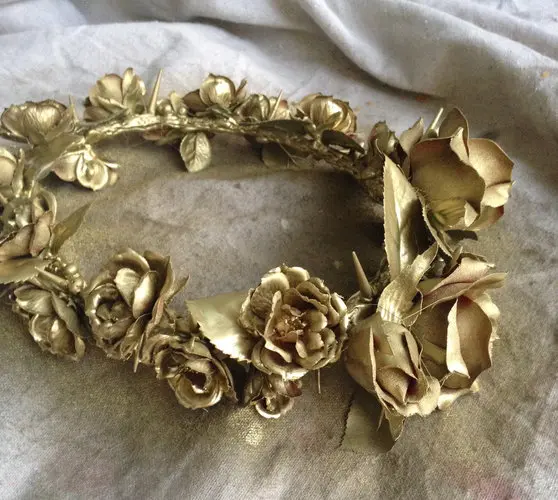
8. Let the painted flower crown dry. Then put it on and enjoy!
Tops Tips:
Here are some top tips for making a gorgeous, long-lasting flower crown:
Choose the Right Flowers: If you are using fresh blossoms, use a mix of sturdy blooms (like roses, daisies, carnations, or chrysanthemums) and filler greenery (like eucalyptus or baby’s breath) to balance structure and softness. If you’re using real flowers, lightly mist the crown with water and store it in the fridge until you’re ready to wear it.
Layer from One Side to the Other: Start from one end of the crown and work your way around. This creates a clean, even flow and prevents awkward gaps.
Keep It Balanced: Alternate big and small flowers and space out your greenery so the crown looks full but not too heavy on one side.
Go Faux for Longevity: Silk or dried flowers can be just as beautiful and will last much longer—great for keepsakes or multiple uses.
Conclusion
Making your own flower crown isn’t just a fun and creative activity—it’s a chance to express your style, connect with nature, and end up with something seriously cute. Whether you’re crafting solo or with friends, it’s the kind of hands-on project that brings joy in the making and in the wearing. Plus, who doesn’t feel a little extra magical with flowers in their hair? So gather your blooms, let your imagination bloom too, and enjoy the beauty you create!
This simple crown makes a gorgeous floral focal point. I hope you found this floral crown how to helpful. They are really fun for special events! Will you make some DIY flower crowns? If you do, be sure to share your creation with us! You can tweet me a picture @familyfocusblog or tag me on instagram @familyfocusblog. Have fun creating!
Related Posts:
Jeanie says
I love this DIY nature crown tutorial! There’s really no better way to spend a sunny afternoon than gathering wild flowers and turning them into something beautiful. Using sturdy wire is definitely the best option—it keeps everything in place without losing that whimsical, natural vibe. Can’t wait to try this out with my kids!
Jana says
Thanks for this awesome tutorial on how to make a homemade flower crown. This looks so professional and I loved getting to the the photos of you making the flower crown in steps.
Diligence says
Flower crowns are such a beautiful way to add a natural, whimsical touch to any look. Thanks for sharing the easy steps so I could create a stunning faux flower crown. It will be a perfect accessory for festivals, weddings, or a casual boho vibe. It was such a fun DIY project to make!
Furrmate says
I really loved the wonderful and easy tutorial on how to make a flower crown! It really stepped everything and allowed one to prepare it with fresh or faux flowers, making it very versatile and adaptable to any crafter’s handiwork. I am especially keen about the additional pearl beads and splashes of gold spray to give things a personalized touch. This will definitely be great during the coming festivals and special occasions. Keep up the awesome work!
Stacy says
Thanks for this awesome tutorial on how to make a homemade flower crown. I appreciate the clear instructions and how you can use the base to add fake flowers or fresh flowers with tape for the short term.