Melt and pour soaps are a great DIY project that parents can do with their children. The soap supplies are readily available at your local craft store. This DIY soap recipe is perfect for beginning soap makers because it is really easy and requires no lye (which can be caustic). DIY Tattoo Soaps make great gifts that kids can give out as gifts to their family, friends and teachers. Children enjoy making and creating things and you may find that you do too!
This homemade tatoo soap recipe was provided by La Shonda Tyree, the Handmade Soap Coach. She is a handcrafted soap artisan who offers DIY educational opportunities for those interested in soapmaking as new hobby or starting a natural skin care business.
DIY Tattoo Soap Recipe

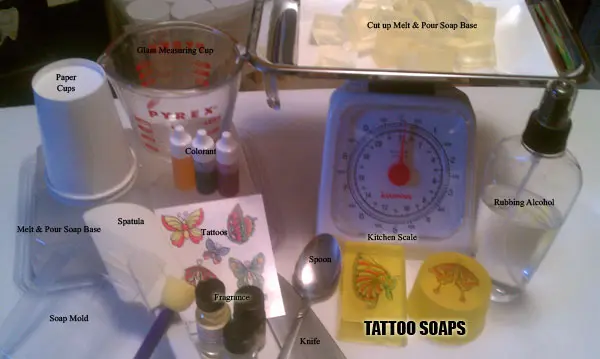
Tattoo Soap Ingredients and Supplies Needed:
Melt and Pour Soap Base
Skin Safe Colorant
Essential Oils (to scent the soap base)
Rubbing alcohol (in a spray bottle)

Microwave or Double Boiler (to melt soap base)
Heat resistant/microwave safe glass measuring cup such as Pyrex
Flexible Molds (silicone , Dixie cups or soap molds from craft stores)
Food Scale (to weigh soap base)
Teaspoon (measure scent)
Knife (to cut melt & pour into chunks)
Sponge (to moisten tattoo)
Temporary tattoos
How To Make Homemade Tattoo Soap Step-By-Step:
Here is how to make tattoo soap.
Cut Soap Base
There are many different types of melt and pour soap bases, but I suggest Glycerin since it is 100% vegetable-based, biodegradable, and clear so you will be able to see the tattoo designs. Begin cutting up the melt and pour base into small chunks. This allows the soap to melt quicker. Weigh out 8 ounces of melt and pour soap base.
Melt Soap Base
Place chunks into the heat resistant measuring cup. If you are using a microwave melt the soap base in 20 second increments. The soap base has the potential to heat up quickly an become a burn hazard. In order not to over heat the soap base slowing melt it down using the 20 second increments. If after a couple of cycles there are some tiny chunks left just allow the heat from the melted base to continue to melt them down.
Scent Soap Base
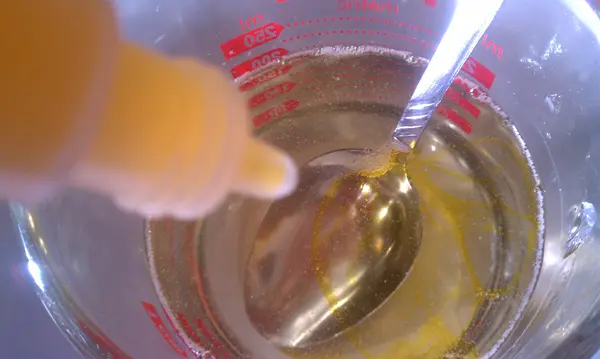
Next, for this diy soap recipe, you will add your scent to the melted soap. Add 20 drops of essential oil (lavender or peppermint or whatever you like) and stir well into the melted soap base. Smell to see if the desired strength has been reached. If not, add another 10 drops of essential oil. Continue until you reach the desired scent strength.
Color Soap Base

Next add the color. Colorants are very concentrated so add one drop at a time until you get the desired color strength. Stir in color well to desired strength.
Mold Soap
Pour scented and colored soap base into mold or Dixie cups will work too. There may be bubbles that form from the stirring and pouring. Spritz the soap with rubbing alcohol and the bubbles will disappear. Allow soap base to cool down and harden. This can take several hours. To expedite you can carefully place the Dixie cups in the refrigerator for about 30-40 minutes.
Unmold Soap
Once harden it is time to unmold. Since Dixie cups are disposable your can tear away the Dixie mold off of the soap. If you use a mold purchased in a craft store just gently bend and twist the mold until the soap pops out.
Adding the Tattoo to the Soap
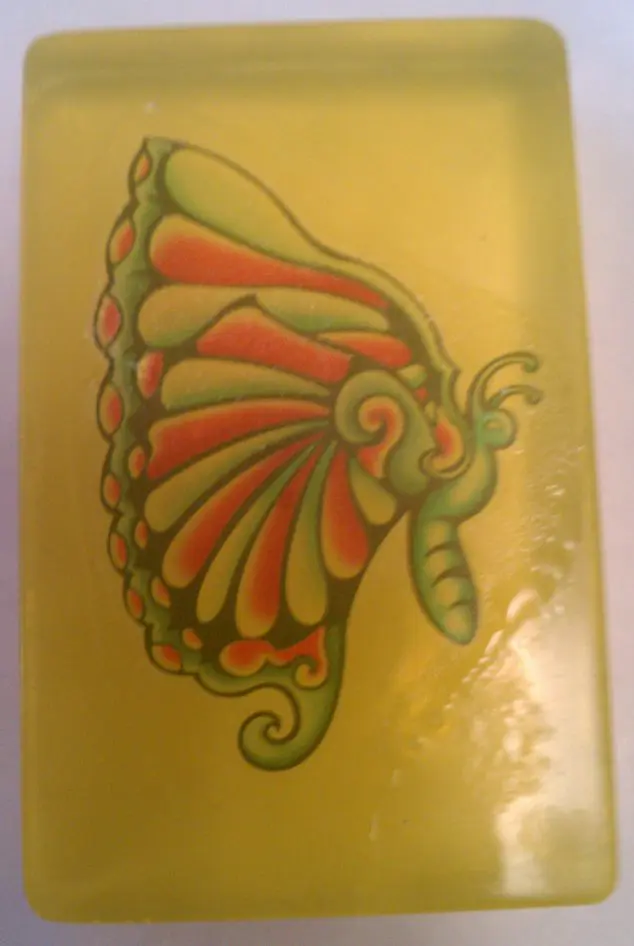
Add the tattoo just like you would on your body. Select your desired tattoo and cut around it. Peel away the plastic covering and place the tattoo facing down on the soap. With a wet sponge gently dab the back of the tattoo until it is wet. Allow the tattoo several seconds to adhere to the soap and release from the paper backing. Starting from one corner gently peel away the tattoo backing and you have a beautiful customized bar of soap!
Soap Making Tips
As the soap base cools it will thicken. You don’t want the soap base to thicken too much that it becomes lumpy and hard to pour. The good news is, if it does become too thick to pour you can pop it into the microwave for about 10-15 seconds to melt the soap base back down. You don’t want it to get too hot or else it could warp your mold.
Here is my affiliate link to a fun collection of temporary tattoos.
I hope you have fun using this diy soap recipe for handcrafted customized bars of soap. Kids love tattoos and this adds an extra fun element to soap making for kids. The cool thing about tattoos is that they come in all kinds of different cool styles- even the boys will like making soap when they can stick dinosaurs and cars on the soap. Tattoo soap making project can be a great activity for a birthday party (they make great favors) or as gifts from grandparents and teachers.
Related Posts:

Ploude says
Hi there to every body, it’s my first visit of this weblog. What a great tutorial for how to make soap. Plus the tattoo is such an easy way to give the homemade soap some flare.
Val says
Excellent way of explaining. I am really excited to try this soap recipe and soap making for the first time!