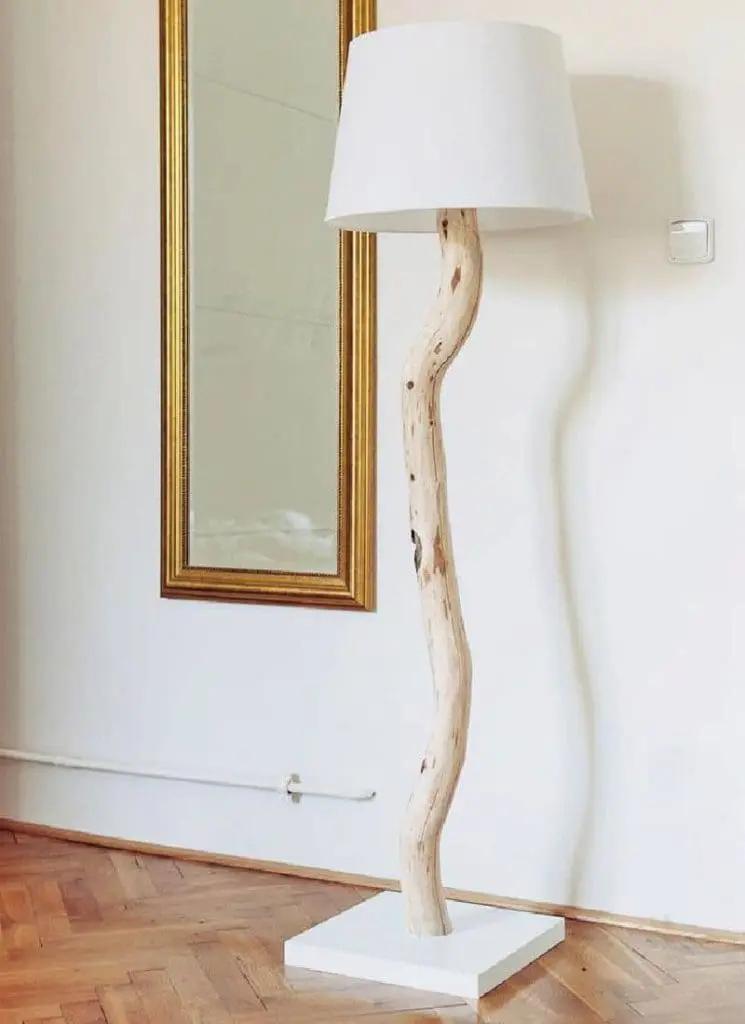
Nature-inspired interiors are in vogue, and this trend is very unlikely to disappear anytime soon. In fact, having a natural element in your space is always a good interior home decor idea. After seeing a sea of nature-inspired home décor and accessories, I found the perfect idea for a weekend DIY project— a tree branch lamp. You don’t need any fancy power tools or electrician skills for this simple tree branch floor lamp! It is surprising easy to make this DIY floor lamp. A do it yourself branch lamp can be a unique and natural addition to your home decor. Here’s a guide to help you create one.
DIY Tree Branch Floor Lamp Tutorial
There are several options for making your own DIY tree lamp. Chandeliers, wall lamps, and pendant lights are extremely popular, and so are small table lamps for your living room. However, I decided to show you my DIY tree branch floor lamp today. It’s a combination of statement-carrying chandelier and easy-to-make table lamp. The biggest challenge is finding the right type of branch or other piece of wood that will work well with your design. The wood should be chosen with great care because it is the focal point of the lamp.
Supplies Need For DIY Floor Lamp:
- a sturdy piece of wood or drift wood
- lamp kit — socket, nipple, and neck (I got mine from IKEA)
- lamps shade (also IKEA)
- sand paper (I used medium first and then fine)
- mildew remover
- wood paint, wax, or other polish (I’m using opaque white for the lamp base and clear matte wax for the leg)
- brush or sponge for application
- handful of screws and a screwdriver
- handful of point staples and a hammer
- pliers
- saw
All of these simple supplies can be gotten at local hardware stores or big box home improvement stores, except for the wood branch itself. If you are making a tree branch table lamp, you will need about a 30 inch section of wood. If you are making a tree brach floor lamp, you will need about at 58 inch section of wood. These are just estimates because your final lamp height will depend on your shade size height.
How To Make A DIY Tree Lamp:
Here is how to make your own floor lamp with a branch as the vertical support.
Select and Prepare the Branch
If you’re using a fallen tree branches, as I did to make my tree branch lamp base, examine it first. It’s important to make sure that there’s no mildew or decay. Clean your piece with warm running water and a sponge, and let it dry by an open oven for a couple hours. Remember that the wood needs to be completely dry before you move to the next step.
When your branch is dry and ready, you can adjust its width with a saw and use medium-grain sand paper to remove any remaining knots or twigs. As you’re sanding, look for any internal decay or deeper mildew. If you find any, use a mildew remover to get rid of it. When you’re done, you’re ready to apply fine-grain sandpaper for smooth and even texture.
Apply a wood finish, if desired. This step is optional but can enhance the appearance of your lamp. Or you may prefer a natural unfinished look. I think it depends on the type of wood you use and the look of your other decor. More polished or more rustic? Wipe your branch with a damp cloth to remove any remaining dust and wood particles, and then apply a first layer of paint, wax, or polish. Follow the instructions on the package and apply as many layers as needed, then let it dry completely.
Add A Lamp Base
Now it’s time to think about the tree branch lamp base. I used a square piece of wood that I bought at Home Depot. They will do your cuts for you! I used a 12″ by 12″ square that was 1 inch thick. Screw the lamp leg to the lamp base. Use screws or brackets to secure the branch to the base.
Install the Light Socket
Now, you’re ready to do the electrical part. I’m not an electrician, so I played it safe by purchasing a ready-to-plug lamp kit. You can get an instant lamp kit at your local home improvement store or through my affiliate Amazon link.
I used a two-hole strap with screw holes to mount the socket to the top of the branch. Once I had the socket mounted, I used staples and a hammer to secure the cord along the branch and installed the lamp shade onto the shell. I didn’t worry about the cable being visible because I already knew where I would place it, and the cable couldn’t be seen from any angle. All I had to do was insert a light bulb, plug the cable in, and admire the finished result.
You could use the exact same technique to make a rustic table lamp as well but just cut the tree branch much shorter. Typically 24-34 inches works well for a table lamp.

Conclusion
A tree branch lamp can add a rustic and natural element to your home decor, creating a unique and cozy atmosphere. This touch of nature looks great with leather furniture. A tree branch set of lamps would also go great with rustic home design. What do you think? Have you done any DIY lamps before? Do you think you try this tree branch lamp DIY project?
Related Posts:
5 Ideas for DIY Curtain Rod Finials You Will Love
Upcycle Old Books Into Cool Decor
DIY Entryway Bench
Cute DIY Sweater Vase
DIY Decorative Glass Bottles


Zenda says
Thanks for describing about it. I will give this DIY floor lamp wood tutorial a try.