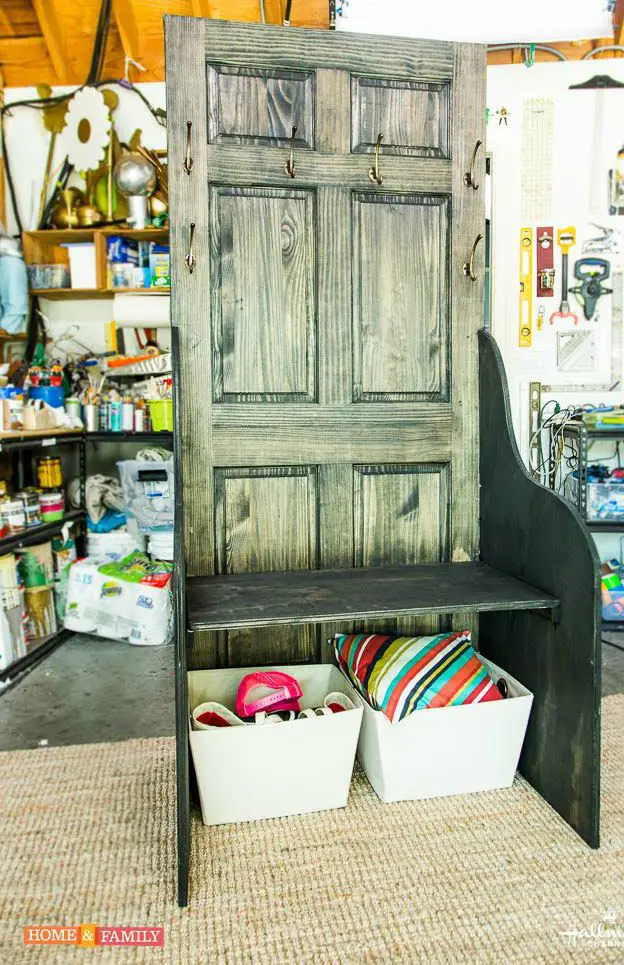
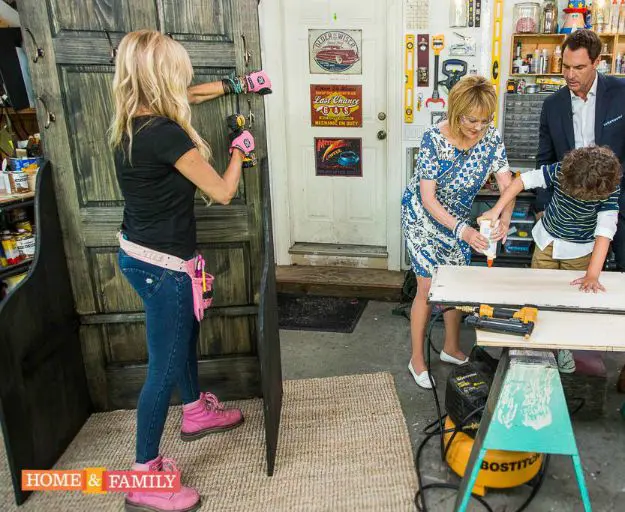
I love reuse projects. It is so fun to see how people can take something old that no longer has an apparent purpose and give it fresh new life. I saw this clever project where Paige Hemmis showed how to reuse an old door to make an entry way bench on Home & Family, which airs weekdays at 10 am ET/PT on Hallmark Channel. I was given permission to share this DIY Entryway Bench project with you here. It is a great way to reuse an old door that you have replaced or you might like the project so much you that could go find an old door at a Habitat For Humanity Restore or other used goods store/ online site. I have been looking for some entryway bench ideas and I thought this one was very clever.
Check Out This Cool Old Door Bench
H&F Photo Credit: Copyright 2015 Crown Media Family Networks/Photographer: Jeremy Lee
DIY Entryway Bench Supplies:
- Door (of any size)
- Plywood
- Jigsaw Power Tool
- Wood screws and screw gun (or nails and nail gun)
- Sand paper
- No VOC Paint or Stain
- Coat Rack Hooks
- Accessories (such as wicker baskets for under the bench seat or pillows for the seat)
Looking to spruce up your entryway? You will love this simple bench made from old door tutorial. I bet it is easier than you thought to make a DIY bench to place next to your front door.
How To Make An Entryway Bench Made From Old Door:
These step by step instructions make this little bench an easy build.
1. Decide what height you would like your sides of the entryway bench to be. Get creative here….with a jigsaw, you can create any design you would like. Make the first vertical 18” of your sides as wide and symmetrical as possible. Make them 18” wide as well. Then get creative for the additional area. Use the first side you make a template so your second side matches perfectly.
2. Cut your plywood to fit in between the two sides of your bench. It will be your seat bench 18” deep and as long as the width of your door.
3. Lay down your door and set the side supports on either side of the door.
4. Either screw the sides to the door or nail them on.
5. Measure 18” up and mark both of your sides.
6. Take your cut piece for your bench and set into place. Either screw in or nail into place. Now you have your diy entryway bench!
7. For the next step, you will stain or paint your entry bench for a matching smooth finish.
8. Add any accessories you would like. Here, she added coat hooks for the sides and top part of the old door entryway bench. Baskets underneath the bench seat increase storage space in a small space. These baskets are perfect for using it as a DIY shoe storage bench. You can also add a mirror, picture, or else anything else you would like to your simple entryway bench.
That is it! Your DIY entryway bench is ready to go.
Old Door Coat Rack And Bench Tutorial Conclusion
In conclusion, a DIY entryway bench combines both charm and functionality, serving as a welcoming focal point in your home while providing practical storage and seating solutions. The creative process allows you to customize the design to match your aesthetic and space, whether you prefer a rustic, minimalist, or modern look.
Beyond its visual appeal, it’s a project that offers personal satisfaction and adds character to your entryway. The versatility of a homemade bench makes it a perfect addition to any household, blending style and utility in a way that store-bought furniture often cannot. What a great way to reuse an old door! Do you think you will give this diy project a go? Do you have other ideas for reusing old doors?
Related Posts:


Marina Silva-Opps says
Excellent idea! We have just renovated one of the bedrooms in our house and now have an extra door. This diy entryway shoe storage bench is perhaps something new to do with the door! Thanks for the perfect solution. Making my own own entryway bench is a good suggestion. Now all I need is an extra piece of wood to make this cool piece of furniture.