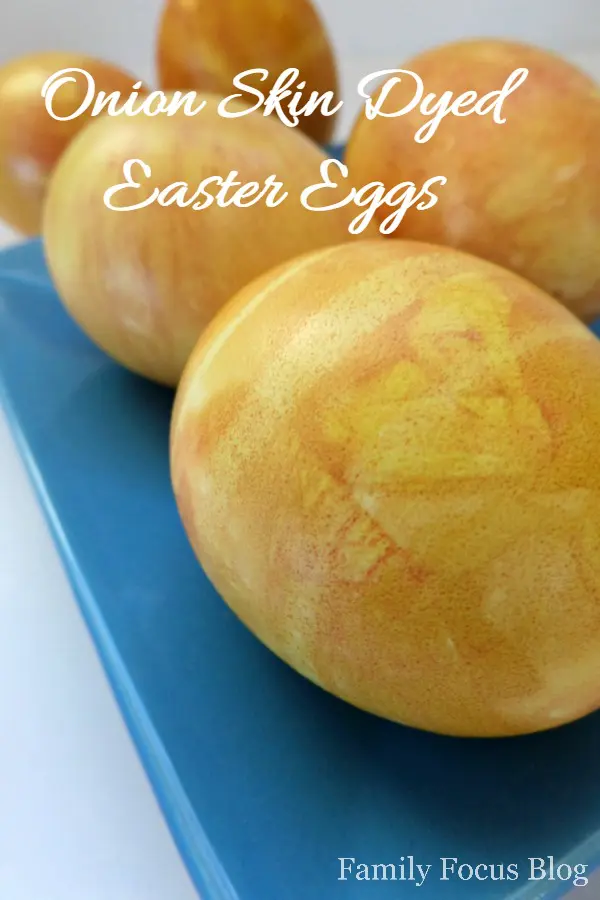
There are many traditions and memories from my childhood that the holidays bring to mind. As a grown up with children of my own, I am carrying on traditions and creating special memories. I hope my children will hold these memories dear for a lifetime. One very special memory from when I was a little girl is my grandmother creating the most beautiful eggs for us each Easter. I remember being fascinated with the rich golden color and how unique each egg’s pattern was. As a young child I had no idea those special eggs were Onion Skin Dyed Easter Eggs! As an adult, I love that she was using a natural dye for Easter Eggs. Plus onion skins are eco-friendly and cheap!
Onion Skin Easter Eggs Tutorial
People of various cultures have been using onion skins to dye eggs for centuries! Were you familiar with this bit of Easter Trivia? This tutorial for how to dye Easter eggs with onion skins is for yellow onions. It will yield yellow-orangish eggs when you start with white eggs. However, red onions will also work in the same way. They are perfect for how to dye eggs red naturally.
I use white eggs here because it is easiest to see the results of the natural onion skin dye. You can use brown eggs but, of course the yellow will be more of a dark orange. The red will be more of a reddish-brown. To make onion skin dye, you’ll need a large quantity of onion skins, water, and a pot. Here are the basic supplies and directions below.
Craft Supplies For Dying Easter Eggs With Onion Skins:
- 12 uncooked eggs
- 10 onion skins (the amount of onion skins will determine how golden they become)
- cheese cloth (nylon stocking may be substituted for wrapped eggs)
- small rubber bands
That’s it. Just a few basic natural ingredients and you can make your own beautiful onion skin eggs.
When dyeing eggs with onion skins, it’s best—but not absolutely required—for the eggs to be room temperature. Cold eggs dropped into hot water are more likely to crack. Letting them warm up a bit reduces the shock and you get less cracking. Plus, room temperature eggs tend to take on dye more uniformly.
How To Dye Easter Eggs In Onion Skin:
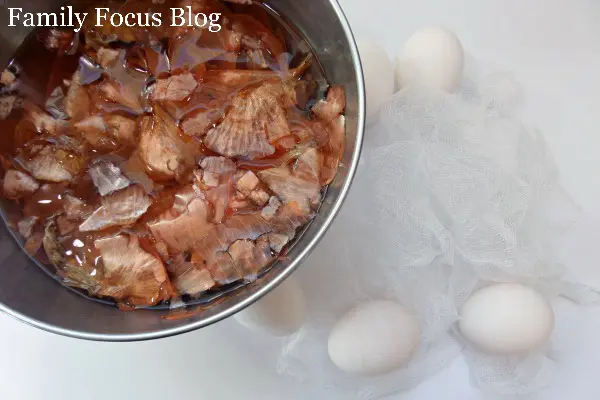
Begin by soaking your onion skins in water until the paper skins become softened. I know ahead of time that I am going to do onion skin dyed eggs. So, I begin saving the onion peels a few weeks in advance. Depending on how many eggs you will be making you can often find loose skins in the bottom of your onion bag. You can even pick them up at the super market.
Next cut the cheese cloth into small squares, approximately 4″ x 4″.
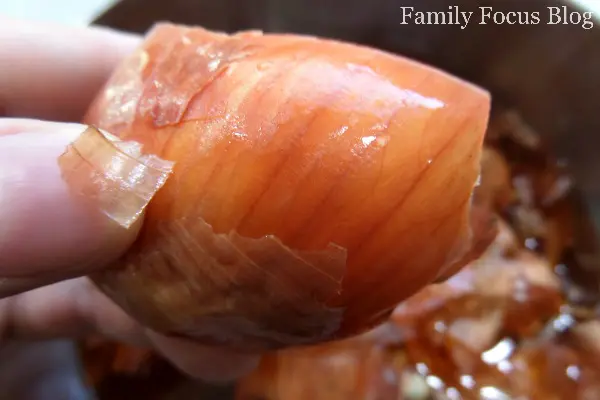
Once your skins are soft begin wrapping them around your uncooked eggs. The way that the skin lays against the egg will create your pattern. Some onion skin has a more striped appearance. Pieces from near the tops and bottoms of the onion will offer a different pattern. Layer the skins on carefully remembering that the eggs are raw and fragile.
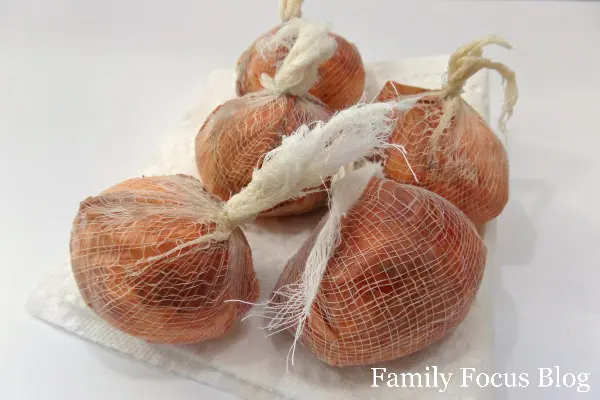
Tightly, but carefully, wrap the skin covered egg in cheese cloth. Use small rubber bands to secure the cheese cloth. Repeat until all of your eggs are covered.
Cooking And Dying Easter Eggs With Onion Skins At The Same Time
When all of your eggs are wrapped, carefully place them in a large pot. Cover with water and bring to a boil over high heat. Once the water has reached a rolling boil, turn the heat off completely. Cover the pan and leave eggs in the water for 12 minutes. This will produce hard-boiled eggs. Then transfer the eggs to a strainer and run cold water over them for several minutes.
Once the eggs are cool enough to handle, carefully remove the cheese cloth and onion skin. Set the eggs aside and allow them to finish cooling.
*If the color is not deep enough transfer the water they were boiled in to a bowl. Add 2 tablespoons of white vinegar to water. (Vinegar acts as a mordant, helping the natural dye bind to the eggshell for a darker color.) Return the eggs to the water and store in the refrigerator until the color deepens.

After the eggs have cooled store them in the refrigerator until ready to use or display. You can rub the shells with a little bit of olive oil to give them a bit of shine if you plan to display them at Easter dinner!
Conclusion
Onion skin dye is a natural dye made from the outer skins of onions. It can be used to dye fabrics, yarn, and even Easter eggs. What I knew as a little girl was how amazing my grandmother was and how creative and talented she was. What I didn’t know then was that this method of coloring eggs was an old Easter tradition from her childhood. It was a very frugal way to create something special! Keep in mind that natural dyes like onion skin dye tend to produce more subtle colors than synthetic dyes. However, the longer you allow them to sit, the deeper the color.
Onion skins make such a great natural dye for easter eggs! Onion skins might otherwise go to waste. Now you know that they can be used as a natural dye. What other creative ways have you used to decorate Easter eggs? Have you ever tried dying eggs with natural dyes before? Do you think you will try this recipe for onion skin dyed Easter Eggs? The dyeing process is sure to make a fun new family tradition!
Related Posts:
Rice Krispies Easter Eggs With Hidden Surprise
June says
I love this! It’s amazing how the easiest way to dye eggs—using onion skins—connects us to such an old tradition. It feels so meaningful to step away from chemical dyes and artificial colors, especially during Easter celebrations. This reminds me a bit of the Ukrainian tradition of intricate egg decorating, just a bit more half way between rustic and artistic. Planning to try this on Good Friday for our Easter Day table. Thanks for sharing—good luck to everyone giving it a go!
Sarah says
What a beautiful and nostalgic way to celebrate Easter! Using onion skins as natural dye is both eco-friendly and creatively heartwarming. Such a creative way to naturally dye eggs! The colors come out so rich and dreamy! These make such a beautiful addition to the Easter table— who needs store-bought dye when you can get vibrant eggs like this?
Sally says
I really enjoyed this tutorial—it was clear, simple, and brought such a lovely, natural approach to egg dyeing. I especially appreciated how it honored tradition while offering modern tips for the best results. One little tip that worked well for me: after simmering the onion skins, I let the eggs sit in the dye overnight in a small bowl in the fridge. They came out such rich colors. We will be doing this again next year!
v vidya says
What a beautiful way to blend tradition and creativity! I love the idea of using natural dyes like onion skins for a meaningful, eco-friendly Easter celebration.