So here is a fun diy furniture project! Are you looking for old dresser ideas? You are going to love this old dresser repurposed into two new furnitures! I bet you didn’t know you could take an old dresser and turn it a fabulous matching dresser chair and ottoman. Yup, it is such a great way to upcycle a chest of drawers. Paige Hemmis shared this clever trick on Home & Family, which airs weekdays at 10 am ET/PT on Hallmark Channel. I got permission to share this how to upcycle a dresser project with you here.
Upcycle Chest of Drawers Into A Dresser Chair And Ottoman

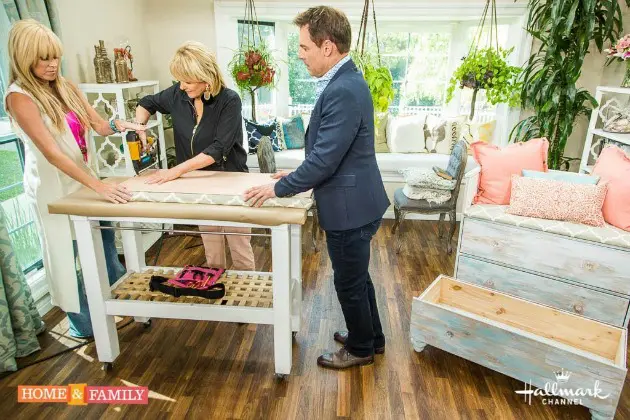
Photo Credits: Copyright 2016 Crown Media Family Networks/Photographer: Jeremy Lee
Paige Hemmis is takes a old dresser and gives it new life by turning it into a stylish chair and ottoman. Paige’s big tip is to make sure you use the correct size of brad nails to safely secure your chair.
This entire DIY will cost you only $50 compared to over $300 if you bought it in a store. It is a great way to upcycle an old dresser that you currently own or you can go thrift store shopping for this diy upycle furniture project. This is the perfect way to upcycle a chest or drawers or turn a nightstand into a chair. If you spot some damaged furniture at a garage sale, this is a fun way to give it repurposed life. What a great project to refresh your family room.
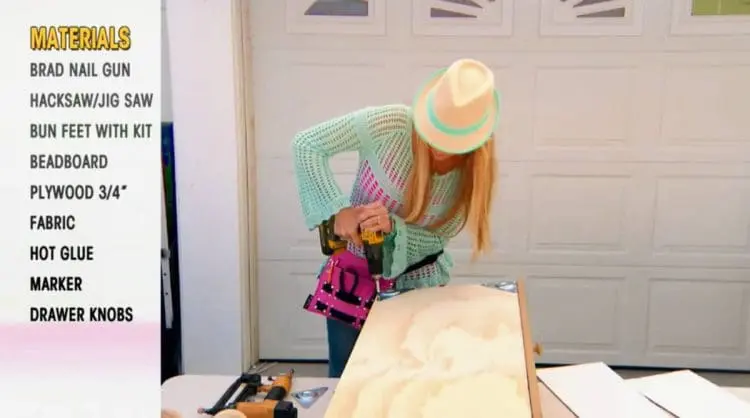
Materials Needed for Upcycled Dresser to Ottoman and Reading Chair DIY:
- Brad nail gun
- Brad nails (or finishing nails)
- Hack saw or jig saw
- Hammer
- 1”x2” piece of wood
- Plywood (3/4” or thicker will work)
- One sheet of beadboard
- 3 yards of fabric (your choice on the color/style)
- Hot glue Gun
- Hot Glue sticks
- Marker (Sharpie)
- Pillows/cushion
- Paint (optional)
- New drawer pulls (optional)
Here is how to build chair and ottoman out of a chest of drawers.
How To Repurpose An Old Dresser Into a Dresser Chair
1) Take your old chest of drawers and remove all drawers. Do not discard them…you will return the bottom drawers after you complete the update. You will use the top drawer to make the ottoman later.
2) You will need to remove the top of the dresser next. You can do this by either using a hammer to hammer it off from the bottom up, or you can take the jig saw and cut it out.
3) Depending on how many drawers you have, you will need to remove the center pieces that hold the top drawer up and separate the drawers from one another.
4) If your dresser has side rails, you are good to go. If it doesn’t, you will need to cut two pieces of 1”x2” at the length of the depth of your chair. These will act as reinforcement pieces to be used to hold up the seat.
5) Cut your plywood to fit inside the dresser, resting on the reinforcement side pieces.
6) Make it slightly smaller than your space since you will be adding fabric to it, which will make it slightly bigger.
7) Take your beadboard and cut a piece to fit the backing and the sides. Set aside.
8) For the bottom cushion, set the plywood on top of the batting and draw an outline with a marker.
9) Cut out the batting. If your batting isn’t thick enough, add layers and layers until you reach your desired size.
10) Lay the plywood on the fabric and use your marker to draw around the plywood. You will need this to be larger than the plywood, so mark about 5” LARGER than plywood all the way around.
11) Lay the fabric on a flat surface, lay the batting on top of the fabric and add the piece of plywood.
12) Use the hot glue gun to secure the fabric around the plywood by folding it over. You can use the brad nail gun to secure into place.
13) If you want to give your repurposed furniture a fresh coat of paint, now is the time to do that and let it dry. She used a light coat of white and added some bright color with a little bit of aqua overlayed.
14) Add your bead board to the back and sides of the chair with wood glue (or liquid nails) and hold in place with brad nails. Make sure to get the correct size of nails so that they do not go through the back of the dresser.
15) Place the bottom cushion on the dresser.
16) As the finishing touch, decorate with cushions or pillows and enjoy your new dresser seat!
How To Upcycle A Dresser Drawer Into an Ottoman
Ever wanted to repurpose dresser drawers? Well, they can make storage ottomans, especially cool when they match your dresser seat!
You will need most of the materials listed above and you will use the dresser drawer that you removed to create a storage ottoman. The video will show you how to use plywood to reinforce the strength of the drawer on both the top and the bottom. Then attach 4 bun feet hardware to give the DIY ottoman some legs and height. Add bead board to sides of drawer to make it pretty. Then make the DIY ottoman lid using the same techniques you used to create the cushioned dresser seat top. Now this piece of furniture can provide extra storage in your living room.
Now you know what to do with an old dresser. You can’t go wrong when you repurpose old dresser to get two new updated DIY furniture pieces. Turning old dresser drawers into DIY ottomans is just a great way to reuse and give new life to old furniture.
What a great diy furniture project, right? I loved learning how to upcycle an old dresser into a dresser chair and matching ottoman. I hope you enjoyed it too. It is so fun to try flea market diy projects. What are your favorite repurposed dresser ideas?

What a great way to upcycle old dresser! Kind of makes me feel like visiting some yard sales right now to find a vintage dresser with potential. Do you think you will give this upcycled furniture a try?
Related Posts:
How Furniture Defines Bedroom Home Decor
What To Do With Old Clothes That Cannot Be Donated
Bunk Bed With Desk- A Space Saver For My Daughter’s Tiny Room
Jim says
So nice! Thanks for your tips on this dresser makeover. I think I could use this to give my large, old, clunky night stand new purpose.
Could you tell me how much we can expect it to cost? (Materials Needed for Dresser)
What a great way to repurpose chest of drawers into a dresser seat!
Scarlet says
You can get all the material for under $50 if you already own an old dresser and have a nail gun you can borrow.