Halloween’s just around the corner! What are you doing to get ready for it? Are you getting excited about Jack’ O Lanterns? If you’re like me, you’re already looking forward to pumpkin carving, that once-a-year event where you scrape out the squishy, stringy insides of a squash and with orange-stained fingers, cut out chunks so that pretty designs flicker and glow in the evenings and spice up your front porch! There’s a new fad out there for pumpkin-carving lovers that takes design to a different level- pumpkin carving with a drill! The household drill gun can be used to make some really cool pumpkin artwork!
New Halloween Pumpkin Carving Technique- Use A Drill!
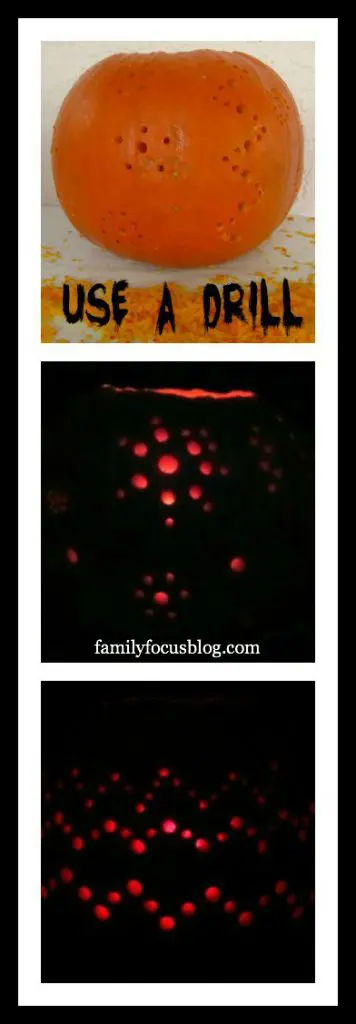
If you’ve been on Pinterest recently, you may have seen this new pumpkin drill technique:

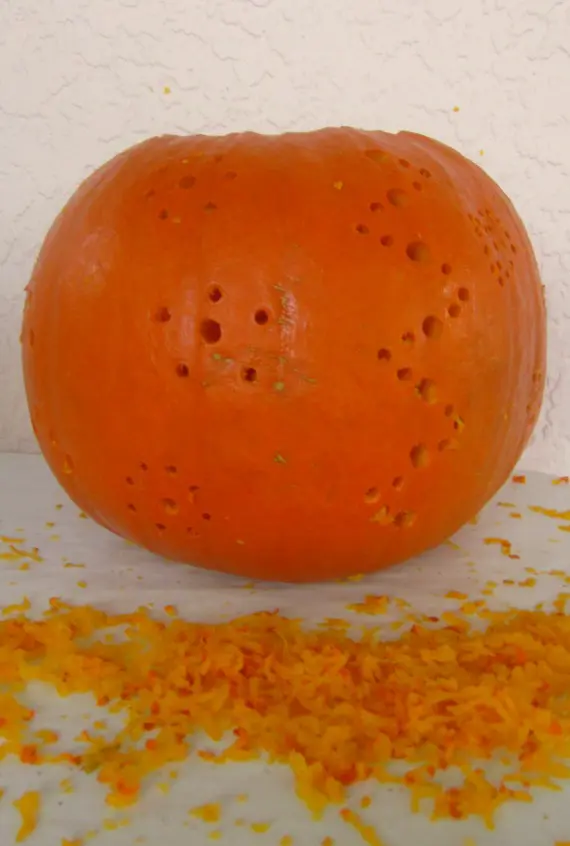
These pumpkins look so neat, I had to try pumpkin carving with a power drill as well. A jack o lantern with drill holes turns out to be quite pretty! A drill is the perfect pumpkin carving tool for intricate designs. Why not get out your power tools and get in on the fun?
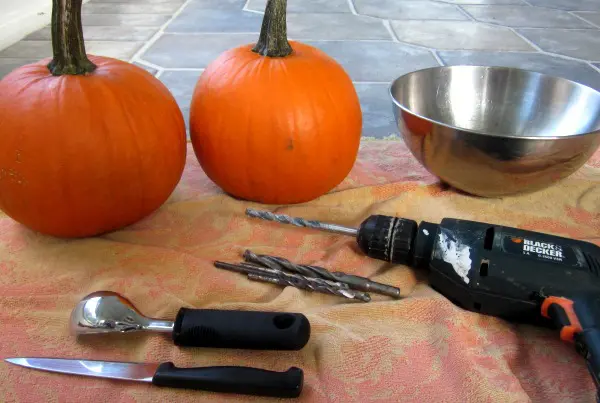
Craft Supplies Needed For Drill Pumpkin Carving:
- pumpkin(s)
- drill gun
- drill bits (at least 3 sizes is best is you can make small holes, medium holes, and large holes)
- pen
- knife
- ice cream scoop or large strong spoon
- bowl
Now, quick- go grab your kids, siblings, and spouse, because pumpkin carving is always a really fun Halloween activity!
Instructions For Pumpkin Carving With A Drill
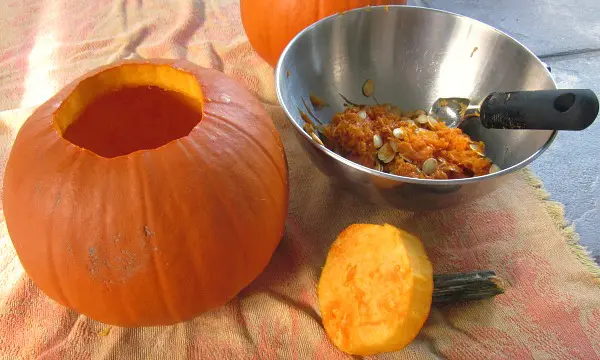
I set out my tools and got to work. Begin with the obvious – opening a hole on top of the pumpkin and scraping out all slimy, pumpkin guts and seeds. Don’t throw that stuff away though! Keep the seeds and check out our Halloween recipes for more details on yummy recipes using pumpkin seeds, ie. Heirloom Luxury Pie Pumpkin Soup, Caramel Apples With Toasted Pumpkin Seeds, and other delicious Halloween treats.
Then, using three different size drill bits, small, medium, and large, and a pen, I plotted out my placement with ink dots before setting the bit to the spot. It helps to set the pumpkin against something, like a wall, so that when you push against it with the drill it doesn’t slide away from you and cause crooked holes.
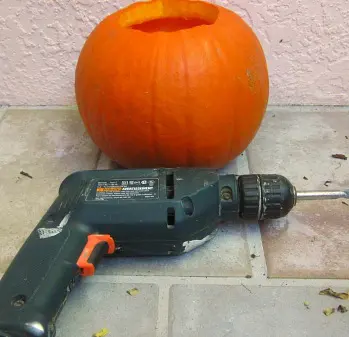
Then, drill to your heart’s content! Little holes, big holes, patterns, faces, you name it. You can plan out your pumpkin drill patterns beforehand or just have at it! Using a drill to carve pumpkins lends a very artsy look.
With a patterned drilled pumpkin you can turn it into a vase, and put assorted fall harvest plants inside, like a pot of chrysanthemums, cornstalks, or Indian corn.
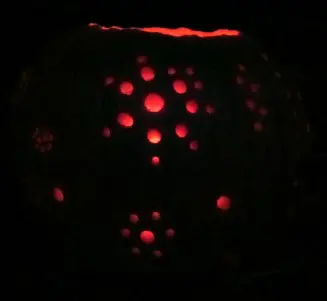
I chose to go the traditional route with my drilled pumpkins and stuck two little tea candles inside to light them up.
While my pumpkins didn’t turn out exactly like those trending on Pinterest, I had a lot of fun making it. And now I can say I’m a bit more practiced with a pistol-grip drill driver!
Ideas For Pumpkin Drill Patterns
Here are some fun and creative pumpkin drill patterns you can try for your jack-o’-lantern:
1. Polka Dot Design
- Use a drill with a variety of bit sizes to create a random assortment of small, medium, and large holes all over the pumpkin for a polka dot effect.
2. Starry Night
- Drill different sized holes in a constellation or star pattern to give your pumpkin a starry look. You can arrange the dots in shapes that mimic the night sky.
3. Spiral Design
- Start at the top of the pumpkin and drill holes in a spiral shape that wraps around it, working your way to the bottom.
4. Checkerboard
- Create a grid by drilling holes in a structured pattern. You can alternate sizes of the holes or keep them uniform for a more geometric look.
5. Geometric Shapes
- Use a drill to carve out triangles, squares, or hexagons in various patterns. You can connect the dots by carving lines with a knife for a more intricate design.
6. Flower Power
- Drill holes in a floral pattern by creating a large center circle and smaller dots radiating outward like petals. Try adding multiple “flowers” around the pumpkin.
7. Face with a Twist
- Instead of carving, you can use a drill to outline a simple face, such as eyes and a mouth, giving it a modern and minimalist look.
8. Zig-Zag Design
- Drill holes in a zig-zag or wave-like pattern that wraps around the pumpkin horizontally for a striking and dynamic look.

For the best results, use a variety of drill bits to get different hole sizes, and light up the pumpkin from the inside for a dazzling effect.
Carving Pumpkins With a Drill Conclusion
Don’t forget glow sticks to drop into this popular diy project to light it up on Halloween night! You can use this pumpkin carving idea on white pumpkins too! Your electric drill should work equally well with a big pumpkin or small pumpkin. Take a picture with the whole family in front of the pumpkin. If you try this drill pumpkin carving technique, tag us @familyfocusblog so we can see what pumpkin drill patterns you chose!
Have you ever used this drill gun technique to carve pumpkins? Do you or your family use any unique designing tools or pumpkin carving techniques?What’s the best pumpkin carving you’ve done?
Related Posts:
paula schuck says
Very cool!! Off to buy more pumpkins now. I think I will try this before husband objects to use of his drill and different width drill bits!
Jennifer Sikora says
I showed my daughter this drill trick and she is definitely going to try this out when she carves her pumpkin this year.