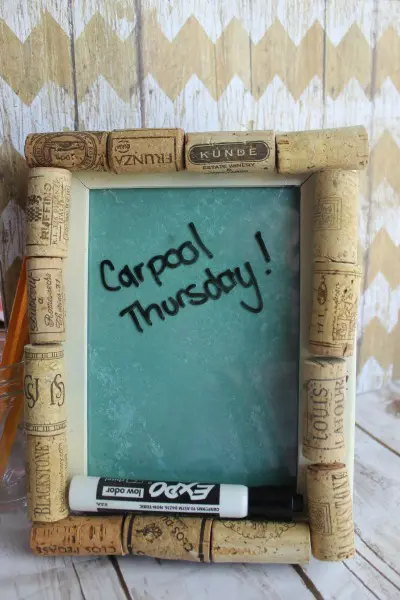
This fun little DIY dry erase board tutorial is a simple and inexpensive project to make to keep or gift to someone else. I had all supplies on hand, and you are likely to have them in your craft stash as well. I had a 5×7 frame on hand that I used because I wanted a desktop size memo board, however, you could use and 8×10 or even an 11×17 frame to create a large homemade wall memo board. This homemade dry erase board is finished off with a cork frame for looks and to hold any extra memos. It is the perfect little DIY to do board to keep you organized.
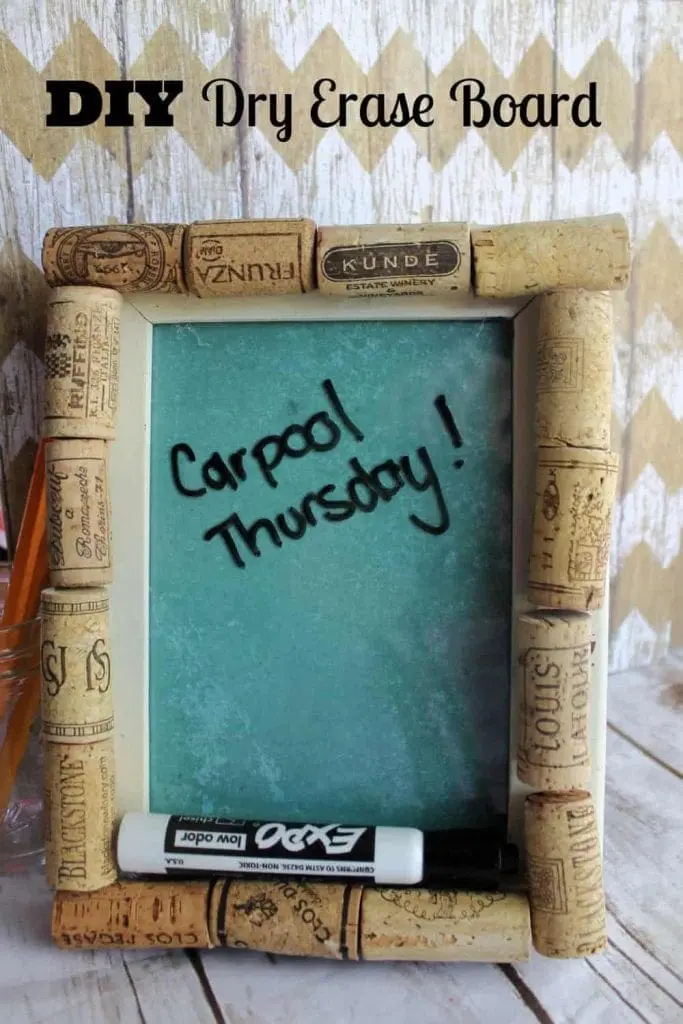
Cork Framed DIY Glass Dry Erase Board For Memos
Making your own DIY dry erase board for memos can be a fun and practical project for several reasons:
- Cost-Effective: Store-bought dry erase boards can be expensive, especially larger ones. Creating your own can save money, as you can use affordable materials like a picture frame, glass, or acrylic sheets.
- Customization: You can choose the size, style, and frame that fits your space and personal taste. You can even personalize the background, adding designs or colors to match your home decor.
- Eco-Friendly: This DIY dry erase board reuses several items to give them new life.
- Flexibility: You can make it as simple or complex as you like, adding sections for calendars, to-do lists, or brainstorming spaces. You can also create multiple small boards for different purposes or locations in your home.
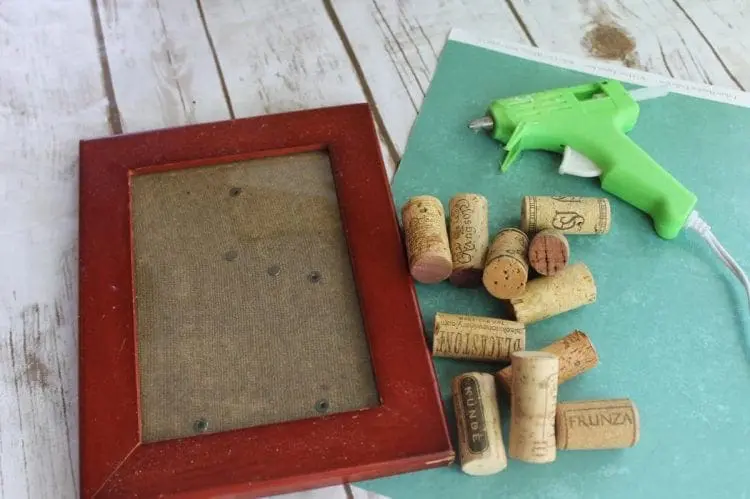
Supplies Needed For DIY Dry Erase Boards:
- Wine corks
- wooden picture frame with a flat glass surface
- spray paint- any color (so easy to coordinate colors to any decor)
- scrapbook paper or wrapping paper
- glue gun/glue sticks
- Sand paper
- dry erase markers also known as whiteboard markers (available at the dollar store)
I didn’t drink all the wine for this DIY dry erase board picture frame by myself. I picked up a jar of old corks at a yard sale awhile back for just $1! If you are not a wine drinker, but want to give this DIY white board project a try you can pick up corks on Amazon for a great deal for all your cork projects.
If you don’t have a hot glue gun already, you may want to get this amazing cordless version I found on Amazon- here is my affiliate link.
Spray paint can also be purchased at Amazon or your local hardware store or Home Depot. You can skip the spray paint step if you already like the color of your frame.
If you don’t have any frames sitting around, you can usually pick one up cheaply at your local thrift stores.
Are you ready to make your own dry erase board in a few easy steps? Let’s get started!
How To Make A Dry Erase Board With An Old Picture Frame
We begin this DIY dry erase board picture frame by lightly sanding frame for best results. This will rough up the finish which will help paint and glue hold better. That means this DIY project that will last longer.
Wipe all dust off thoroughly with a damp cloth.
Flip over to the back of the frame and remove glass and backing from frame, set aside.
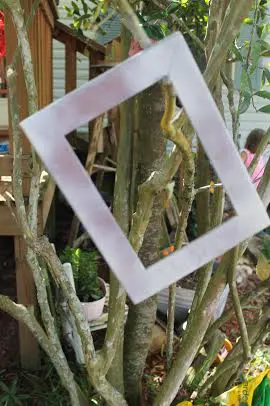
To spray paint your frame you can either lay it on newspaper outdoors or the way I like to do it is to hang from a branch, that way I can access all angles and it dries well hanging also.
Spray a light tack coat, allow to dry for 5 minutes, repeat with 1 to 2 more coats.
Dry for 3-4 hours before continuing.
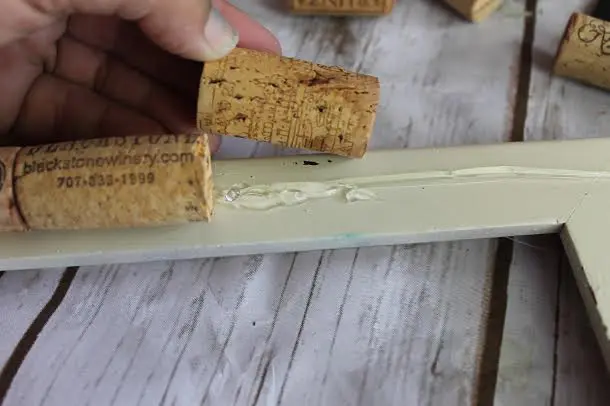
Once frame has completely dried attach corks with a generous amount of hot glue- not so much that it is oozing on your frame but to create a good bond so that they do not fall off with some handling- do this all the way around.
Trace the glass from your frame onto a pretty solid color of scrapbook or wrapping paper and cut out. You could use white paper for making your own own whiteboard. I used a light chalkboard green paper to make my marker board. Use white paper if you want a DIY whiteboard.

Replace plastic insert or glass in frame. Now, insert paper and finally fasten in the backing to frame.
Your cork memo DIY dry erase boards are ready to go!
How To Use Your DIY Dry Erase Memo Board
You can make a to-do list in the blank space. It is great for the home office or to hang at your command center. This simple project can be the perfect solution for keeping track of important events on your daily schedule. You may want one for each kid’s room too.
Using a DIY dry erase board for memos is simple and versatile. Here are some common ways you can use it:
1. Daily To-Do Lists
- Write down tasks, errands, or reminders for the day.
- Check off completed items or erase them as you go.
2. Weekly Planner
- Divide the board into sections for each day of the week.
- Plan out meals, appointments, or activities for the week ahead.
3. Family Communication Board
- Use it to leave messages or reminders for family members about family meetings.
- Keep track of everyone’s schedules in one place.
4. Brainstorming or Creative Ideas
- Jot down ideas for projects, hobbies, or creative endeavors.
- Use different colored markers to organize thoughts or prioritize tasks.
5. Shopping Lists
- Create a section for items you need to buy, and update it as needed.
- Snap a photo of the list with your phone before heading to the store.
6. Chore Chart
- Assign household tasks to family members or roommates.
- Use it to keep everyone accountable and ensure chores are done.
7. Meal Planning
- Plan meals for the week and list ingredients you’ll need.
- Keep it in your kitchen for easy access.
8. Inspiration or Motivation
- Write inspiring quotes or positive affirmations for motivation.
- Use it as a space for daily gratitude.
9. Study or Work Planner
- Keep track of important deadlines, exams, or meetings.
- Use it to break down larger projects into smaller tasks.
10. Event Countdown
- Create a countdown for important events like birthdays, vacations, or holidays.
How To Care For Your DIY Whiteboard
Simply write on the board with dry erase markers and wipe it clean with a dry or damp cloth when needed. You can also attach magnets (if made with a magnetic board) to pin notes or photos.
I find that the dry erase marker erases easily with a bit of paper towel or a clan rag if you do so within a day or two or writing. However, it is harder to wipe clean, the longer you leave it. You may like this recipe for DIY dry erase board cleaner if you tend to let your notes sit.
Homemade Dry-Erase Board Conclusion
This is a pretty easy and pretty functional DIY to do board. It is perfect for writing yourself reminder notes and you can pin on any little notices you may have as well. I hope you enjoy this DIY dry erase boards project. It is such a great way to reuse old corks and old frames and upcycle them to give them new life. Will you make your own diy whiteboard? Let me know how yours turns out and tweet me a picture @familyfocusblog!
Happy crafting!
Related Posts:
Hampton says
This diy dry erase board picture frame is very nice. I really appreciate your work. Thanks for your useful blog.❤️ This homemade dry erase board turned out perfectly.
Karen says
Your blog post was a much-needed dose of inspiration. Thank you for motivating me to make my own memo board. It came out so well, I made a few extra dry erase boards for gifts as well!
Anonymous says
This DIY dry erase board with the cork memo border tutorial was very useful.Thank you for this great craft blog with such clear instructions and photos.