Today, I have some pretty Easter egg decorations to share with you. I don’t know if you’ve noticed but I’ve been on a little bit of a Holiday-themed kick recently. I will share a little secret about myself, you might have already picked up on it, but I love the holidays, in every way imaginable; the activities, decorations, treats…you name it! As we all know, Easter is coming up, and with it brings a plethora of unique and diverse ways to make your own Easter decorations at home. You and your family are sure to enjoy making these embroidery thread DIY String Easter Eggs and they will be fabulous DIY Easter Decor to make the house feel cheerful in a classy way.
I have to say, I’m a huge advocate for making your own Easter decor. Making your own decorations at home lets you add your own personal touch and it is another opportunity to spend time with family! Who doesn’t love a fun activity to do with the whole family? Since these Easter Eggs are meant to serve as decorations, we will not be using hard-boiled eggs as the base. Instead you will need to use a wooden egg, plastic eggs, foam eggs, or some other form of faux eggs.
This post was first published April 11, 2014. I have made a few updates and shared it here for my new readers to enjoy.
DIY String Easter Eggs Tutorial
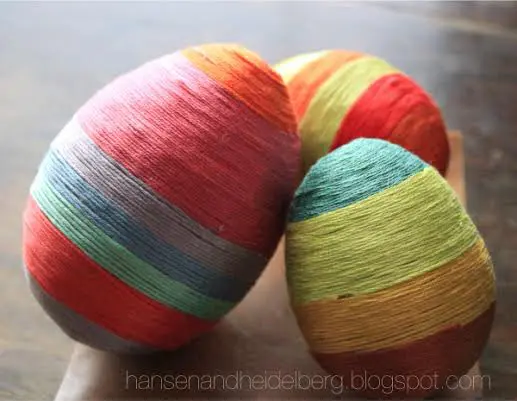
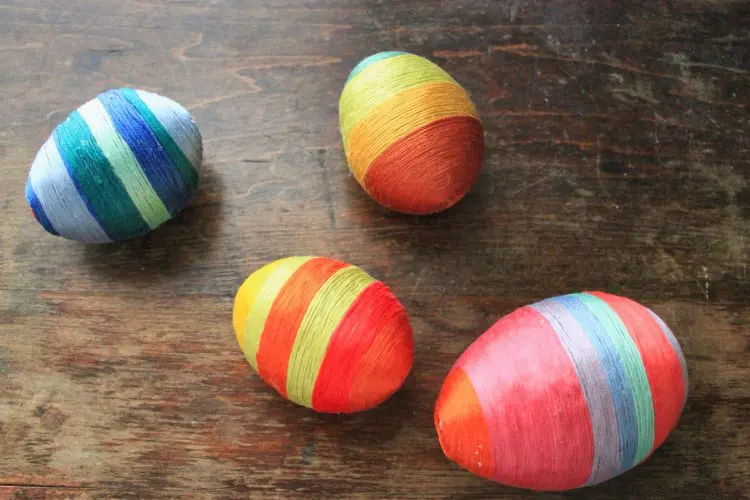
These DIY string Easter Eggs can be made with yarn for Yarn Easter Eggs, embroidery thread for Embroidery Thread Easter Eggs, or whatever kind of string you like for DIY string Easter Eggs. I personally used embroidery thread as my string of choice since you can get so many different colors. These beautiful eggs are not meant for the Easter egg hunt but rather to decorate the Easter table or your mantle. Let your inner artist shine as you create intricate designs through your color choices, patterns, and gradients.
This type of craft can be called by many names: “embroidery thread-wrapped eggs” or “thread-wrapped decorative eggs” or “string eggs” or “yarn-wrapped eggs”. Depending on the craft material used, they might even be described as:
- “Embroidered Easter eggs” (especially around the holiday)
- “Decorative thread eggs”
- “Textile-wrapped eggs” (a more artsy or gallery-style term)
Craft Supplies For This DIY Easter Egg Decor Project:
- String or Embroidery Thread in a variety of colors
- StyroGlue
- Several styrofoam Easter eggs of various sizes
- Scissors
- Toothpicks
How To Make String Easter Eggs- Embroidery Thread Easter Egg Craft Tutorial
Add a touch of colorful charm to your seasonal decor with these beautiful thread-wrapped decorative eggs. This simple craft uses embroidery thread to transform plain faux eggs into eye-catching pieces perfect for spring or Easter displays. Here’s how to make these faux Easter eggs.
Step 1
Put a generous amount of styroglue on the center of the top of your egg and spread it around thoroughly using a toothpick.
Step 2
Start with the end of your string and lay it on the adhesive in the center. Slowly manipulate it into a small circle. Once you’ve gone around the circle a few times, start pulling tightly while pushing the string down into the egg to stick (you will only need to push down for the tops and bottoms of the egg).
Step 3
Slowly but tightly wrap the embroidery thread around the Easter egg.
Step 4
Once you have enough of a color, use a pair of scissors to snip the embroidery thread and gently but firmly place the thread down on a small dab of styroglue so that it adheres to the egg.
Step 5
Repeat Step 3 and 4 with additional colors. Once you’ve made it half way, you need switch to the other end and start from there until the entire egg is covered.
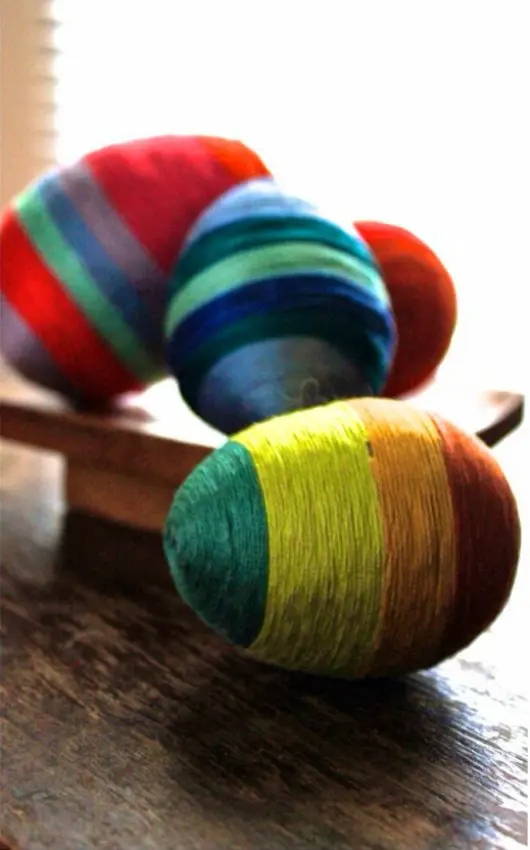
Ta-da! You’ve made your very own DIY Easter decor. Plus, these embroidery thread DIY string Easter eggs will be a great conversation piece to have on the coffee table this spring and you can reuse them year after year. You can see more photos of the embroidery thread Easter eggs I made on my own blog, HansenandHeidelberg.
Why Use Easter Egg Decorations
Easter egg decorations are a fun and traditional way to celebrate the Easter holiday. Here are a few reasons why people enjoy using them:
- Symbolism: Eggs symbolize new life and rebirth, which aligns with the religious significance of Easter. Decorating eggs can be a way to reflect on this symbolism.
- Creativity: Decorating eggs allows for creativity and artistic expression. People can use a variety of techniques and materials to create unique designs.
- Tradition: Decorating eggs is a longstanding tradition in many cultures, dating back centuries. It’s a way to connect with history and heritage.
- Celebration: Easter egg decorations are a festive way to celebrate the holiday and add a cheerful touch to the home or Easter festivities.
- Crafting: For some, decorating eggs is a fun crafting activity that can be enjoyed alone or with family and friends. It’s a chance to unwind and create something beautiful.
Overall, Easter egg decorations can add joy, beauty, and meaning to the Easter season. So go ahead and make this Easter Craft to decorate for your Easter celebration and the best part? You can use them year after year for the perfect Easter Eggs to beautify your Easter holidays!
Conclusion
Take your Easter egg decorations to the next level with these vibrant, thread-wrapped craft eggs. Whether you’re creating a playful surprise for the Easter Bunny or adding a handmade touch to your Easter basket, these unique designs are sure to stand out. Get creative, have fun, and enjoy the joy of making something special this season! They will make a beautiful addition to your Easter Brunch table decor.
I hope you enjoyed this easy tutorial. What’s your favorite decoration to pull out each Easter? Have you ever made your own Easter decorations before? Do you think you will try this DIY string Easter Eggs tutorial and make string Easter Eggs?
Related Posts:
Nancy says
This is one of the best ideas I’ve seen—so simple yet stunning! I love how you added a layer of Mod Podge for extra hold, especially on the larger sizes. Thanks for sharing such a great tutorial—definitely adding this to my list of fun Easter egg ideas!
Franny says
In India, Easter celebrations often include decorated Easter eggs, which are sometimes presented in bowls put out on the terrace.
Furrmate says
A big thank you for this very enjoyable and imaginative tutorial! The step-by-step instructions for making Easter eggs wrapped with embroidery threads are clear and motivating. I appreciate how this project not only decorates for the holidays with a personal touch but is also a fun thing to do with family. It is brilliant to cover simple faux eggs into elegant decorations with vibrant threads. I can’t wait to try this out and add tons of color to my home this Easter season!
Painters Agency says
These Easter egg decorations are absolutely adorable!
I love how simple and fun this embroidery floss craft is, perfect for adding a colourful, handmade touch to the Easter season.
Can’t wait to try this with my family!
Quordle Hint says
Love the idea of DIY Easter eggs! I’m all about adding a personal touch. Using embroidery thread sounds great. I will try making these with different colors to create a rainbow effect. So festive!