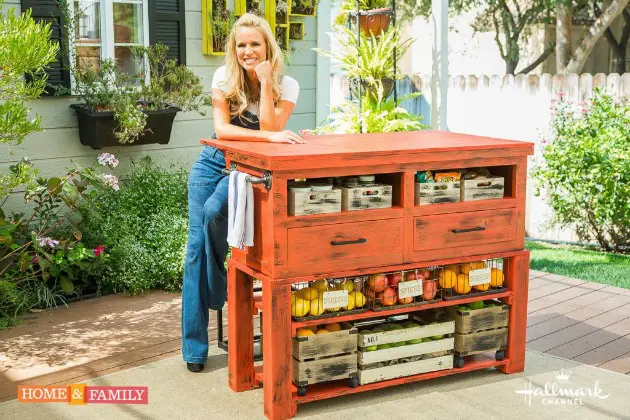
This is a great upcycle project that will help you make your own kitchen island out of an old coffee table or entertainment center. Paige Hemmis first shared this project on Home & Family which airs weekdays at 10 am ET/PT on Hallmark Channel. I received permission to share this useful diy kitchen island project with you here. You can get an inexpensive coffee table for kitchen at a garage sale and then convert table to island with just a bit of elbow grease!
Coffee Table Kitchen Island Tutorial
Photo Credit: Copyright 2016 Crown Media Family Networks/Photographer: Jeremy Lee
Need more storage space in your kitchen? Longing for a butcher block countertop with base cabinets? While a new island from Home Depot may be more money than you’d like to spend, a DIY custom kitchen island could be affordable. Upcycling an old TV console from a thrift store, Paige shows you how to make a useful kitchen island. It will be a great new focal point for your kitchen. Paige’s DIY kitchen island will cost you $200 or less compared to $1,200 at a retail store. It is the perfect solution for a small kitchen that needs extra counter space and cabinet space.
DIY Kitchen Island Materials To Convert Table To Island
- Console or coffee table
- Jigsaw
- 4 X 4 wood and 8 feet piece of 1 X 2
- 3/4″ Plywood
- Galvanized pipe
- 3″ Screws
- Wood Glue
- Nails
Tips:
If you don’t want to cut the measurements of the plywood or wood, take it to your hardware store and they will do it for you. Remember the piece of plywood doesn’t have to be expensive because you will be painting over it.
You can turn your custom island into a kitchen cart if you add furniture wheels.
Another cool use for this, would be in your living room or dining room as a bar cart that could be utilized when guests come over. Instead of holding small kitchen appliances, it could hold glassware and booze. It would be fun to customize with wine holders and bar accessories.
How To Make Kitchen Island Out Of Table
1. Saw legs off table for a nice solid base
2. Cut 4 x 4 wood to the right height for new legs and use 3.5″ pieces of 1 x 2 to create shelf holders
3. Measure and cut plywood for shelves
4. Attach shelves with screws and wood glue
5. Screw legs onto the plywood
6. Attach plywood with legs to the console using nails
7. Cut plywood for countertop with overhang for a bar area
8. Attach counter top to console
9. Sand and paint
10. Attach galvanized pipe towel rail
Photo Credit: Copyright 2016 Crown Media Family Networks/Photographer: Jeremy Lee
In addition to the step-by-step instructions above, you can see the video of how to make your own kitchen island here. Sometime it is nice to see how things are done in addition to just reading about how to do things. Besides it is always fun watching Paige Hemmis work with basic tools to create something really nifty for the home!
Upcycle DIY Kitchen Island Conclusion
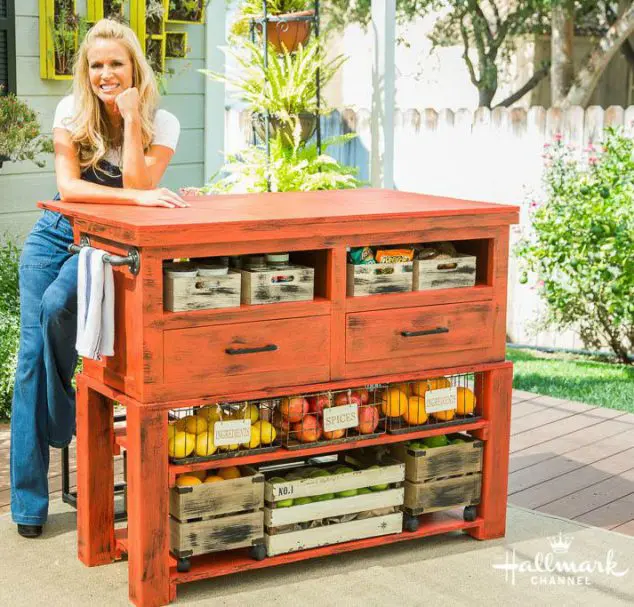
The magic of making your own DIY kitchen island is in the kitchen island ideas. It is details like the paint color and the towel bar that really make this look simple kitchen island snazzy. Vintage boxes and basket are optional elements for providing this functional kitchen island with extra storage. You can get this pulled together kitchen island look for a great deal while upcycling furniture. Even better, this inexpensive kitchen island is it is pretty easy to make!
This easy diy project is a good idea if you need to increase the available space for storage in your kitchen. It is a good way to give your kitchen a new look and add different functions to your space. I hope you enjoy this stylish DIY kitchen island project. Do you think you will make your own kitchen island? I’d love to see it! Tag us @familyfocusblog
Related Posts:
DIY Kids Art Desk With Storage
How To Reuse An Old Door- DIY Entryway Bench
Repurposed Dresser Tutorial: Turned Into A Chair And Ottoman


Nicole says
Awesome DIY project and kitchen island design. I would love an island in my kitchen and think it is so cool when you upcycle old furniture into something useful.